We usually need to trim a video to shorten a video or get the best part from the video. Maybe you have recorded a video with a screen recorder and want to trim off the part of the opening or closing the recorder. Or maybe you want to share a video to Instagram, Twitter, where the video should be trimmed to 2 minutes/15 seconds or less in length.
There are a lot of video trimmers that can help you trim video files in Windows 10, 8, 7. Here we will introduce the 4 most easier tools to trim video on a Windows computer. These tools can also be used to crop, clip or combine videos and more.
# Icecream Video Editor
Icecream Video Editor (opens new window) is a simple video editing software with everything you need to create and edit videos. In addition to removing unneeded parts or shortening videos, Icecream Video Editor can also add a variety of filters, music to improve videos or crop, flip, rotate, merge videos, and so on.
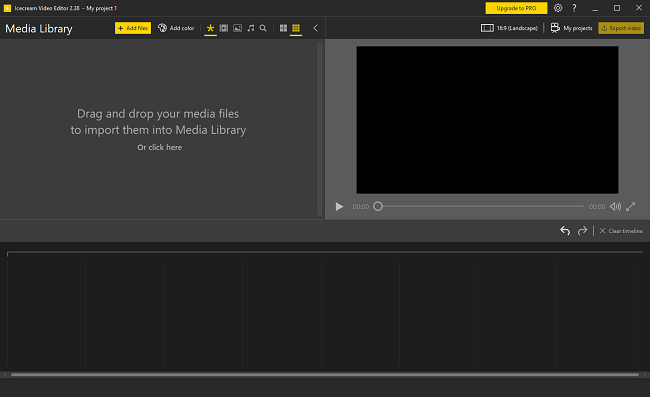
Step 1: Import Video to Trim in Icecream Video Editor
Install Icecream Video Editor. Drag and drop your media files into the Media Library. Or click the "+ Add files" to add new videos.
Step 2: Trim video
Drag the video you want to trim to a timeline track. Select the Trim and you can begin to trim the video.
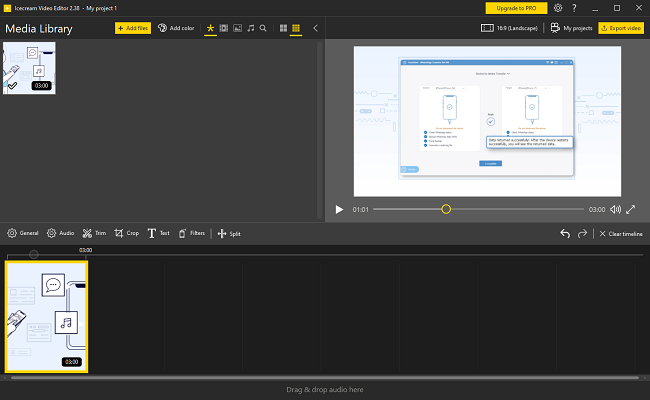
Trim the beginning/end of the video
If you want to trim the beginning or end of a video, simply drag your mouse cursor over the beginning or ending point of the video. Move the slider to the part you want to keep. Release the mouse and you'll be able to see in the preview window that the beginning or end of the video is trimmed off.
Click the Done button and the trimmed video clip will be shown in the track.

Tip: If you like, you can also crop, rotate, or merge video clips in Icecream Video Editor. Moreover, there are filters, transitions, text you can add to your videos.
Step 3: Export the final video
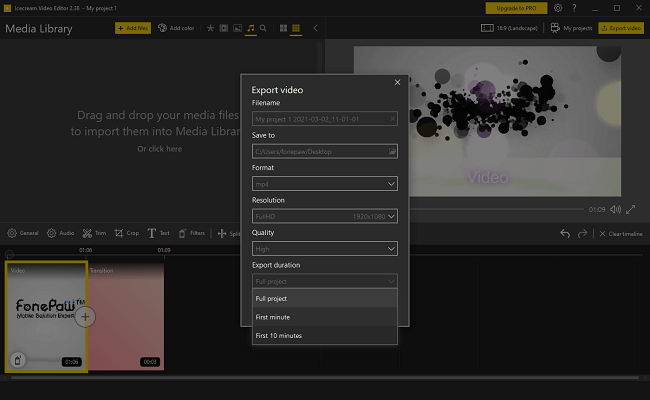
Click the Export Video button to export the video. You can rename the file, change the save location, format, resolution, and quality of the video. Besides, you can choose to export only the first minute or the first 10 minutes of the video.
# Photos
If you are using Windows 10 PC, the built-in Photos app has some basic video editing features that allow you to trim video clips.
Step 1: Open the video in the Photos app
If the video you want to trim is already in the Photos app, just open the app from the Start menu and find the video to start trimming.
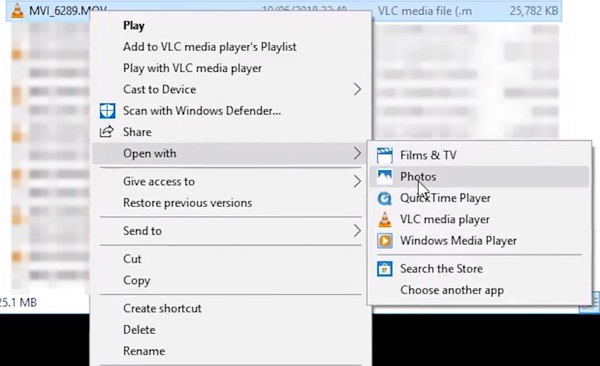
If the video hasn't been added to the Photos app, locate the video and right-click on it, select Open with, and then click Photos app.
Step 2: Trim video in Photos
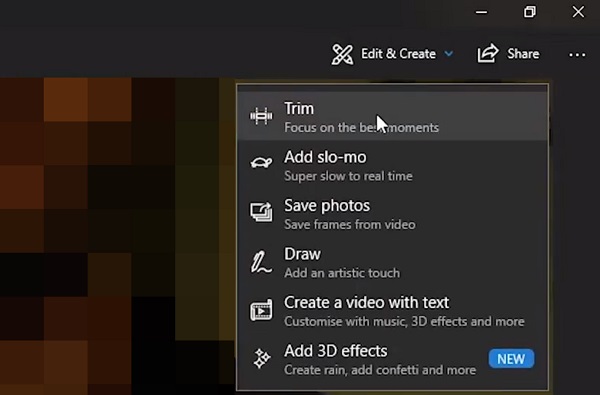
After opening the video in Photos, find and click Edit & Create at the top right corner of the app, then click the Trim button.
Photos app's trimming function is very simple. You can only move the slider to select the beginning and ending point to trim the beginning or the end of the video. Therefore, you are unable to cut the video in the middle.
Step 3: Save the trimmed video
When you have finished trimming, click the Save a Copy button, and the trimmed video will be exported.

# Movies & TV
Windows 10 also offers a video player named Movies & TV. When watching a video on Movies & TV, you can trim the video directly from the app.
First, you need to select the target video clip and open it with Movies & TV.
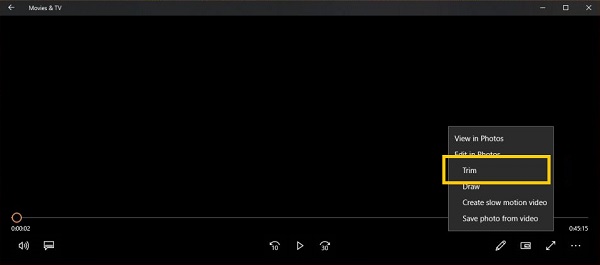
In the lower right corner of the playback window, you can find a small pencil icon, which represents Edit. Click Edit. Then under Edit in Photos, click Trim. This will open the video in the Photos app's Trim window. Then you can trim the video with Microsoft Photos.
# Windows Movies Maker
Windows Movies Maker is a video editing tool you can find in Windows XP, Vista, 7, and 8. You may be unable to find Windows Movies Maker in Windows 10. (Windows Movies Maker alternative for Windows 10).
Windows Movies Maker can trim, crop, or edit videos as you like. There are 2 ways to trim videos in Windows Movies Maker.
Set start/end point
Import a video into Windows Movie Maker. Click Edit to access the Trim/Split tool in the program. In the playback window, drag the slider to the point you want to start or end the video, click Set start point or Set end point.
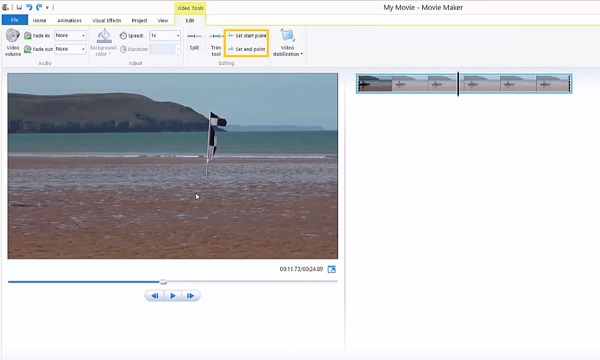
The clip before the start point or after the end point will be cut from the video.
Trim Tool
You may use the Split tool to separate a video, and then use the Trim tool to cut the unneeded part from the middle of a video.
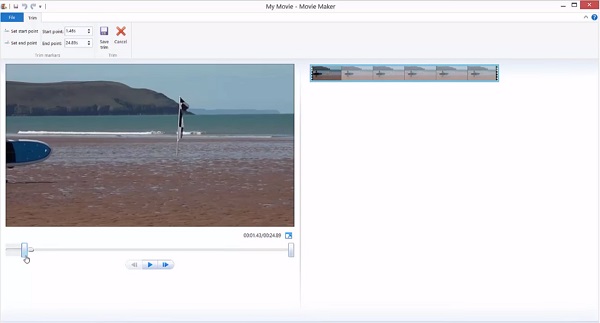
Click where you want to trim on the clip. Then click Edit > Trim. Then drag the slider to select the part you want to clip. The unselected part will be trimmed off the video. Select Save to save the changes.
These are the 4 methods you can use on Windows 10, 8, 7 to trim a video. They are simple and allow you to make further editing on the trimmed videos.


