It is easy to delete files on a Mac. But you may find it challenging to recover deleted files on Mac, especially when you don't figure out how to recover deleted files from emptied Trash on Mac. Still, it is possible to restore trashed files as long as they are not overwritten. For your ease, this article will show 5 workable ways to guide you through how to recover permanently deleted files on MacBook Pro/Air and iMac. And among these solutions, some can help you get back deleted files on Mac for free!
1. Recover Recently Deleted Files on Mac from Trash
 Available before Trash automatically cleans
the deleted files
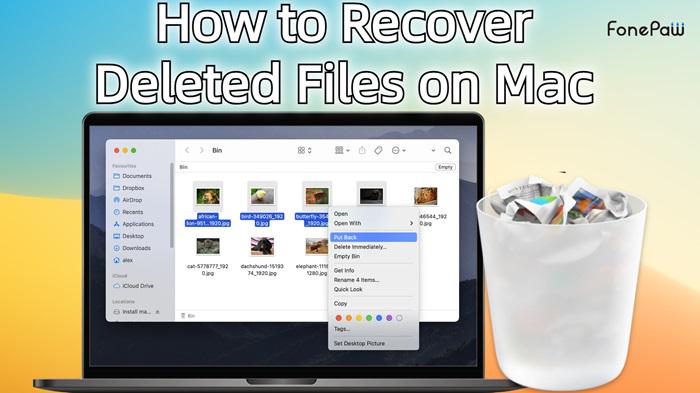
On Mac, the Trash serves as the first destination for deleted files and can keep these files for 30 days. So once you discover that some files on your Mac are missing, the first action you should take is to check the Trash. Here is how Trash works to recover deleted files on Mac for free.
- Open Trash from Dock on your Mac;
- Type keywords in the search bar to locate the deleted file that you need;
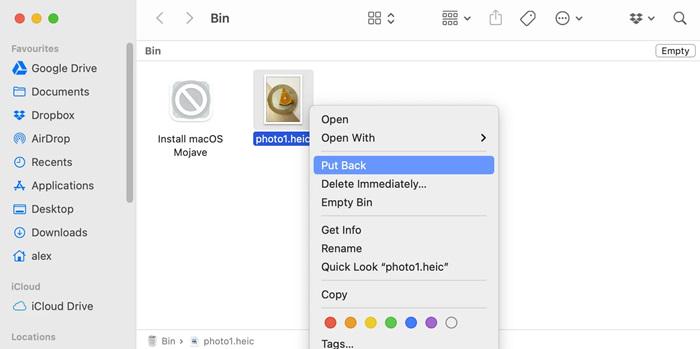
- Right-click the deleted file and choose "Put Back" to restore deleted files on Mac. Alternatively, you can drag and drop the file to the desktop or its save folder.
2. Retrieve Permanently Deleted Files on Mac with Data Recovery Tool
 Works best to recover permanently deleted
files on all Mac models
If you have emptied Trash or bypassed Trash to permanently delete files via keyboard shortcut, you are not able to find the deleted files on Trash. Under this circumstance, the most optimized way is to turn to some third-party recovery tools for help.
FonePaw Mac Data Recovery is highly recommended here because it is an all-in-one solution to recover permanently deleted files on MacBook Pro, MacBook Air, and iMac. Coupled with Quick Scan and Deep Scan, this full-fledged program can recover files from Trash, internal disk, and external flash drives on Mac. Even better, FonePaw Data Recovery supports file previews, including docs, photos, audio, archives, etc. This is conducive to selective file recovery on Mac.
Free Download Buy with 20% off Free Download Buy with 20% off
Main Features of FonePaw Data Recovery
| 💻Extensive Compatibility |
|
| 🔄Superior Recovery |
|
| ✨Easy to Use |
|
| 🛡Safeguard Your Data |
|
Now explore the tutorial below and try FonePaw Data Recovery to recover permanently deleted files on MacBook Pro, MacBook Air, and iMac.
Step 1. Launch FonePaw Data Recovery
Install and launch FonePaw Data Recovery on your Mac computer by tapping the button below.
Free Download Buy with 20% off Free Download Buy with 20% off
Step 2. Select Data Type and Drive
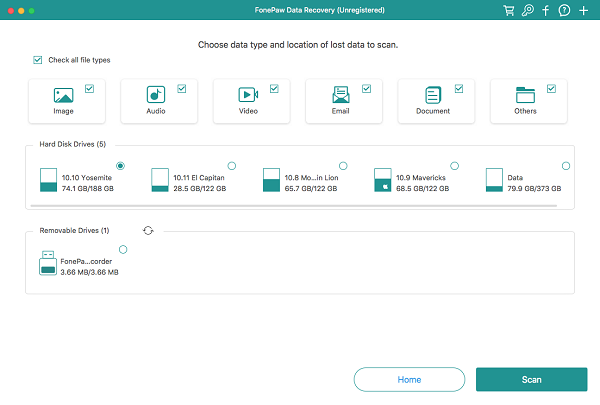
Tick photos, videos, documents, or other kinds of files you want to retrieve from Mac. Then select the drive that used to contain the deleted files.
 Tip:
Tip:
- If you need to recover deleted files from an SD card, USB drive, etc. on Mac, connect the storage device to Mac and select it in the Removable Drive.
Step 3. Scan Deleted Files on Mac
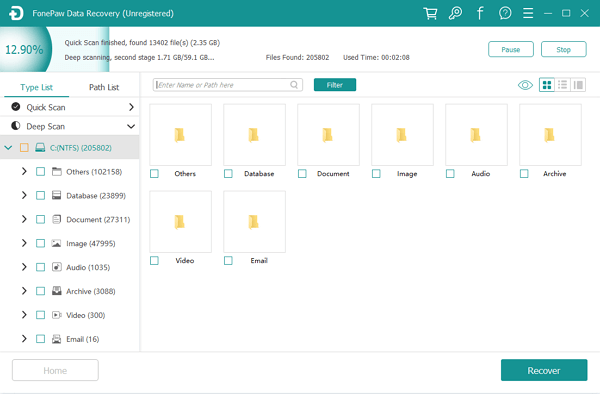
Click "Scan" to find the deleted files from emptied Trash and internal disk. "Quick Scan" can show results fast. If you are not satisfied, turn to "Deep Scan", which can uncover more files on Mac.
Step 4. Recover Deleted Files on Mac
After the scanning, you can view the deleted files marked in orange by type or path. Use "Filter" to locate the files you want to restore. Then tick on them, and hit "Recover" in the bottom right corner to recover permanently deleted files on Mac.
 Note:
Note:
If you recover deleted files on Mac computer and see a message like "Startup disk is protected by 'System Integrity Protection' on your Mac. Please disable it for data recovery completely," you need to disable System Integrity Protection on your Mac before using the FonePaw Mac Data Recovery.
3. Undelete Files on MacBook/iMac with Undo Option
 Applicable to files just deleted without
restarting the computer
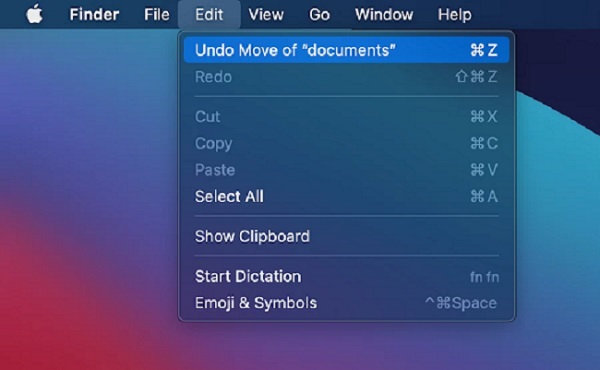
The "Undo" option can reverse the most recent action performed. So it can also be used to recover deleted files without software on Mac. However, it's important to note that 'Undo' must be executed immediately after file deletion. If you restart the computer or empty the Trash, the 'Undo' function becomes ineffective. To quickly restore deleted files on MacBook and iMac, you can initiate "Undo" by pressing the "CTRL + Z" shortcut keys or following the steps below.
- Open "Finder" and choose "Edit";
- Click the "Undo Move of ..." option from the dropdown menu.
4. Recover Deleted Files on Mac via Time Machine
 Effective if you've backed up deleted files
with Time Machine
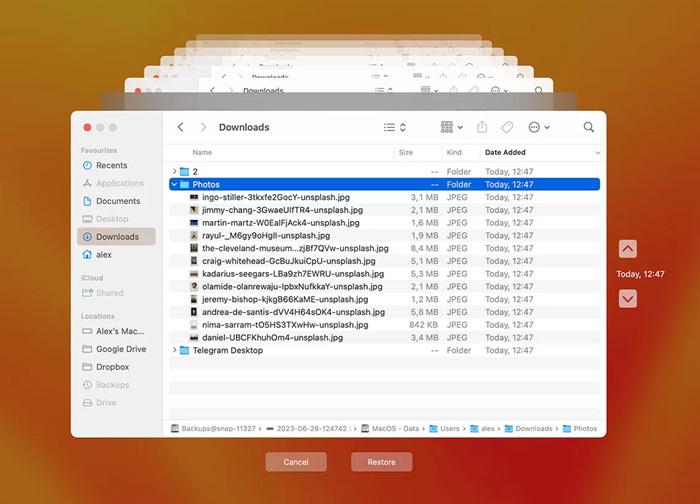
In macOS 10.5 and later versions, Time Machine comes pre-installed on MacBook Pro, MacBook Air, and iMac. It can serve as the built-in best data recovery tool to help you recover deleted files on Mac for free. To leverage this feature, you need to enable Time Machine to back up your data first. Then you can follow the steps below to achieve file recovery on Mac.
- Go to "System Preferences" > "Time Machine" to ensure it is added to the menu bar;
- Launch Time Machine from the menu bar, and hit the "Enter Time Machine" option;
- Tap keywords in the search field to locate the path or folder where you last saved the deleted files;
- Use the timeline on the right edge of the screen to find the most recent version of your deleted files;
- Select the files and click "Restore" to recover them on Mac for free.
5. Restore Deleted Files on Mac Using Terminal
 Useful to recover trashed files on Mac
without Time Machine and software
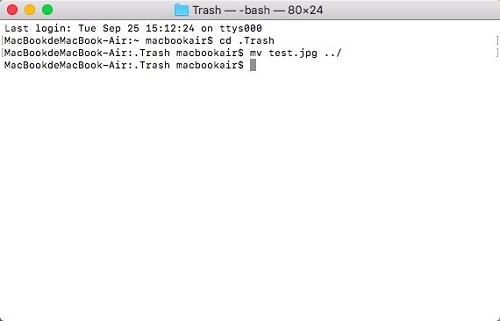
In addition to the above solutions, you can also try Terminal to recover deleted files on Mac. It can do you a great favor with a command line. But this method can only recover deleted files from Trash. Therefore, you need to make sure Trash still holds the data you want before conducting the file recovery on Mac as follows.
- Go to "Finder" > "Applications" > "Utilities" to find Terminal;
- Type cd .Trash and press "Enter" to proceed;
- Fill in mv xxx ../. Replace the xxx part with the name of the deleted file. Hit Enter again;
- Enter 'Quit' to exit from Terminal when file recovery is finished;
- Open Finder and in the search bar, search for the deleted files, and they will appear.
Wrap-up
When you want to recover deleted files on Mac, Trash, Undo, and Time Machine are all workable to help you out. However, these methods either have limitations or require backups. If you don't meet these prerequisites, FonePaw Mac Data Recovery stands out as the optimal choice. This top-tier software can delve deep to help you recover deleted files on MacBook Pro, MacBook Air, and iMac. With it by your side, not only are all files within reach, but it also ensures that deleted files are not overwritten. So you may download and give it a shot as well!

FAQs about Recovering Deleted Files on Mac
Where do deleted files go on Mac?
When files are deleted on a Mac, they are generally moved to the Trash, which serves as a temporary storage area. If you only delete files to the Trash and haven't emptied the Trash, you can find and recover deleted files from Trash within 30 days.
Once the Trash is emptied, the files within are deemed permanently deleted. However, these files don't disappear immediately. The space they occupy will be marked as available on the hard drive until new files are overwritten, at which point they are truly removed from the Mac.
Can I recover permanently deleted files on Mac?
Certainly. As noted, permanently deleted files won't be removed instantly from Mac. Instead, they linger on the hard drive until overwritten by new files. At this point, manual file recovery efforts may prove ineffective, but professional Mac recovery tools like FonePaw Mac Data Recovery can deeply scan the hard drive and uncover these files to make them previewable. Then you can select and recover permanently deleted files on Mac.
How to recover permanently deleted files on Mac without software?
To recover permanently deleted files on Mac without software, you can try Time Machine. This program is pre-installed and allows you to preview deleted files based on the timeline. However, please be aware that Time Machine relies on prior backups to recover deleted files on Mac without software. If you haven't backed up your files, it is suggested to use FonePaw Mac Data Recovery. Because there is always a risk of permanent deletion being overwritten, FonePaw Data Recovery can quickly scan and recover permanently deleted files in no time.
Free Download Buy with 20% off Free Download Buy with 20% off


