There is an awesome hidden settings menu in your Android. Guess what! It is "Android Developer Options". This option contains a lot of advanced and unique features. In this guide, we will show how to unlock Android Developer Options and what you can do after unlocking it.
Section 1: Why Enable Developer Options
Reason 1. Process Stat
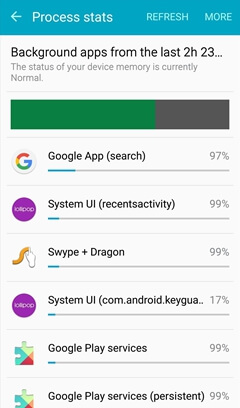
When you tap the "Process Stat" option, there will be an interface that is quite similar to the Android battery interface. The bar graph at the top of the interfaces will give you details about your device's RAM memory usage, telling you what percentage of RAM is in use.
Reason 2. Force RTL Layout
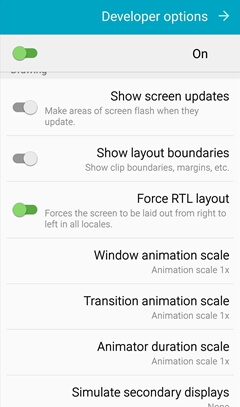
Developer options allows you to experience your phone in a new layout though if you are left-handed. Just turn on the "Force RTL layout" and the orientation of most elements on your Android screen will be forces to be laid out from right to left in all locales.
Reason 3. Show CPU Usage
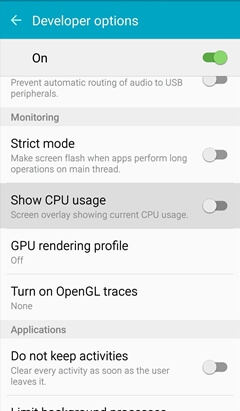
Toggle the switch of "Show CPU usage". There will be an overlay displaying on your Android screen. It shows you all of the currently running process. These entries are order by the current CPU load. A bar graph at the top of the Android will show your overall processor usage.
Reason 4. Limit Background Process
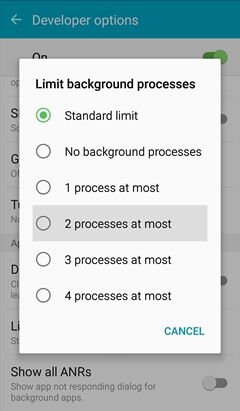
You can choose "Limit background processes" and select the amount of processes that are allowed to run in the background. This will prevent the process from eating up memory on your Android device. For example, you can limit the background processes by selecting "Standard limit", "No background processes", "1 process at most", "2 process at most", "3 process at most", or "4 process at most".
Attractive? Now you can enable Android developer options (opens new window) and see what you can do after enabling Developer Options.
Section 2: What Can You Do After Enabling Developer Options
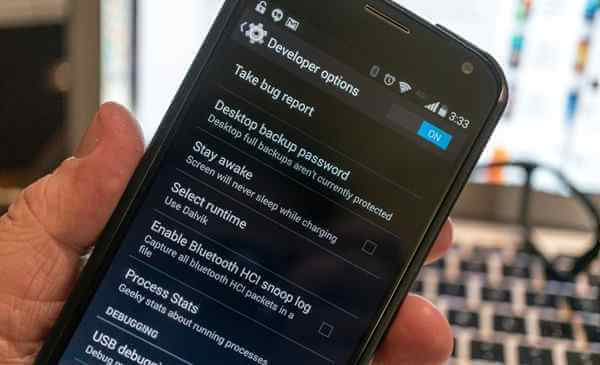
1. Take bug report: Tap the "Take bug report" option . You can grab the current log files on your Android phone, packages them up, and prepares them for sending to people who want to have it. A one or two minutes after tapping it, there will be a pop-up notification. You can touch on it to send it or swipe to cancel it.
2. Desktop backup password: Android allows you to back up and restore things like apps and app data between your computer with the help of ADB. This requires password. With the password, you cannot restore your Android apps.
3. Stay awake: If you turn on the "Stake awake" option, your Android will be set to stay on anytime. And when it is plugged in with a wall charger or a USB cable, it will also stay on. However, this will consume your battery. So do not check this box unless you need this feature.
4. USB debugging: After opening the Developer Options, you can turn on the USB debugging. And with the USB debugging on, your Android phone can communicate over the USB port on your computer via the the Android Debug Bridge. You are required to turn this feature on to use things like DDMS, or to use ADB commands.
5. Select runtime: Here is where (for now) you choose to use Dalvik or ART, which is still experimental and what we have now isn't what will eventually be released in Android L. Some Android phones really don't like the current ART runtime preview, so refer to the forum for your particular device before going there
6. Allow mock locations: You are allowed to manually write location information, which makes your Android phone think it is at a place it really isn't. In addition to cheating at foursquare, this setting is really useful if an Android app uses location information.
7. Verify apps over USB: Lets Google scan applications you installed via ADB for malicious behavior. This is a good thing.
8. Show surface updates: When there are surface updates, the edge of a "window" flashes.
9. Simulate secondary displays: Developer is allowed to simulate different screen sizes.
10. Show all ANRs: Because of this setting, every process shows an "App Not Responding" dialog if it gets hung, including the background processes that the user did not recognize. This feature is really useful if one application is interfering with another.
That's all about Android Developer Options. If you have any question, you can leave it below and let us know!


