Transferring files from iPad to Windows PC could be difficult. Unlike Mac users who can directly AirDrop files from iPad to Mac, PC users can only use iTunes. However, if your iTunes has been associated with an iPad before, it could accidentally merge the data of two iPads, which is very frustrating.
Don't worry, this article will introduce methods to transfer files from iPad to a Windows PC with or without iTunes, helping you effortlessly save iPad data on your Windows computer.
How to Transfer Files from iPad to PC with iTunes
To transfer files from iPad to PC, the first tool you can try is iTunes. There is a “File Sharing” function embodied in iTunes, and it helps you transfer files from iPad to PC through USB cable or Wi-Fi.
Before you start, make sure that your iPad and PC are connected to the same Wi-Fi. Update your iPad and iTunes to the latest. And follow the steps below to conduct file transferring.
STEP 1. Install iTunes on your PC and run it.
STEP 2. Connect iPad to PC through USB cable or Wi-Fi.
STEP 3. Click “File Sharing” and select the files you want to transfer.

STEP 4. Click “Save to” to choose the designated folder.
After finishing these simple steps, the files you have chosen from your iPad will be transferred to your PC.
How to Transfer Files from iPad to PC without iTunes (4 Ways)
You may find that iTunes for Windows is really difficult to use, and it only supports transferring limited types of files. Fortunately, we have picked up 4 efficient ways to transfer files from iPad to PC without iTunes, which will definitely eliminate your worries.
Method 1. Move Files from iPad to PC using Transfer Software
FonePaw iOS Transfer is a user-friendly program that simplifies data management and transfer between iOS devices and computers. It provides a seamless transfer of photos, videos, music, contacts, messages, and other files from iPad to PC without using iTunes. With its intuitive interface and powerful features, FonePaw iOS Transfer makes managing iOS data effortless and efficient.
Free Download Buy with 20% off Free Download Buy with 20% off
Highlight Features of FonePaw iOS Transfer:
- Stable connection across iOS, Windows PC, and macOS, no worrying about failure of transferring.
- Transfer files from iPad to PC in batch at a fast speed.
- No file size limit while transferring files from iPad to PC.
- Easily transfer files like photos, videos, music, and contacts in one click.
- Support from iPad 2 to the latest iPad models and the newly released iPadOS.
Just download FonePaw iOS Transfer on your device, and follow the instructions below to transfer files from iPad to PC!
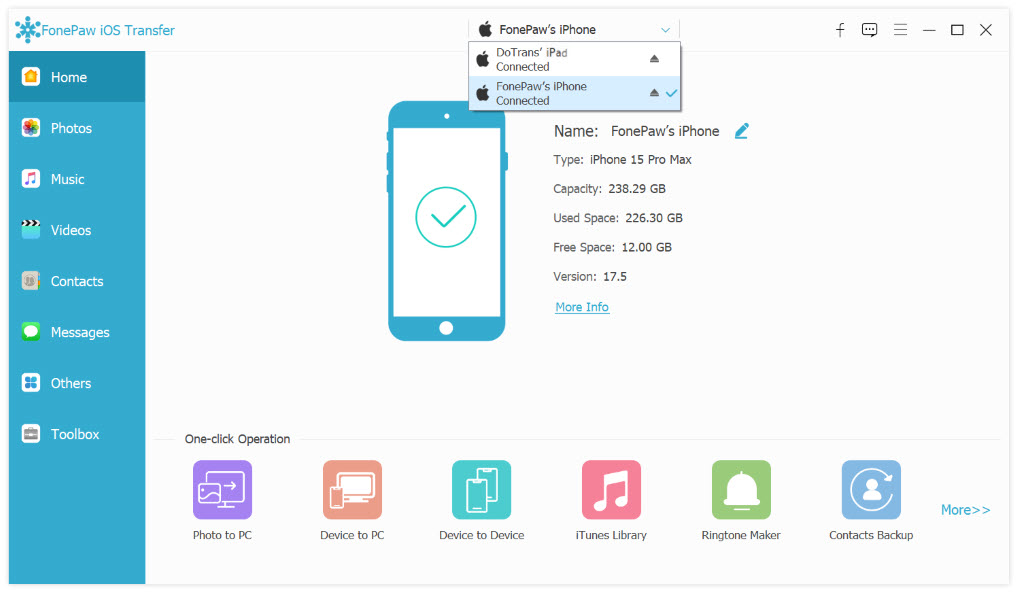
STEP 1. Connect iPad to PC.
Download, install, and launch FonePaw iOS Transfer on your PC. Connect your iPad with PC through a USB cable. And the information of your iPad will be presented on the interface.
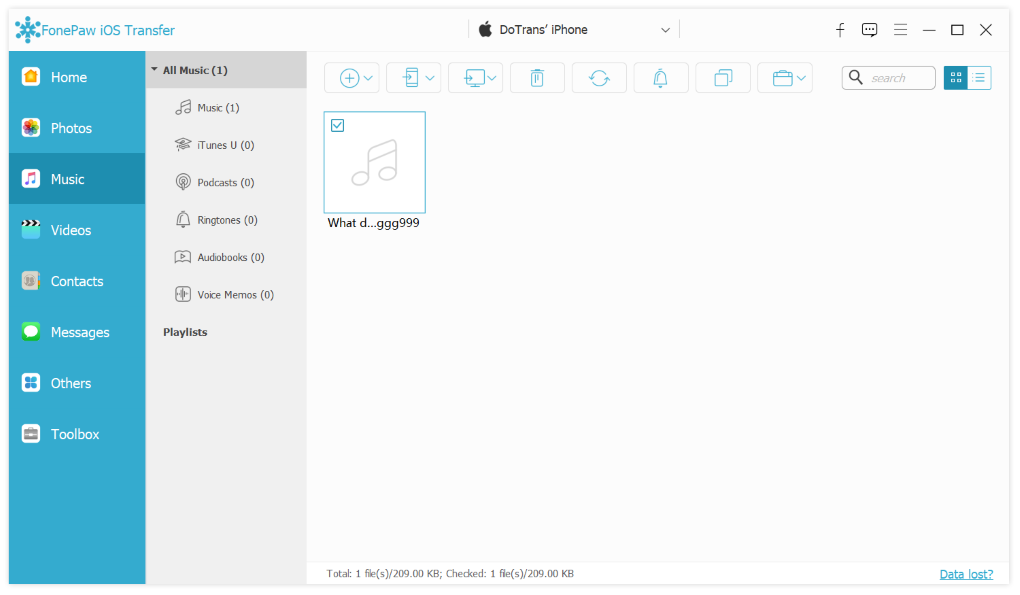
STEP 2. Choose the Files to Transfer from iPad.
On the left, you can select the types of files you want to move to your PC. Take “music” as an example, you can click “Music” and then, the right-side menu will show all the songs included in the music folder. Just click the files you want to transfer.
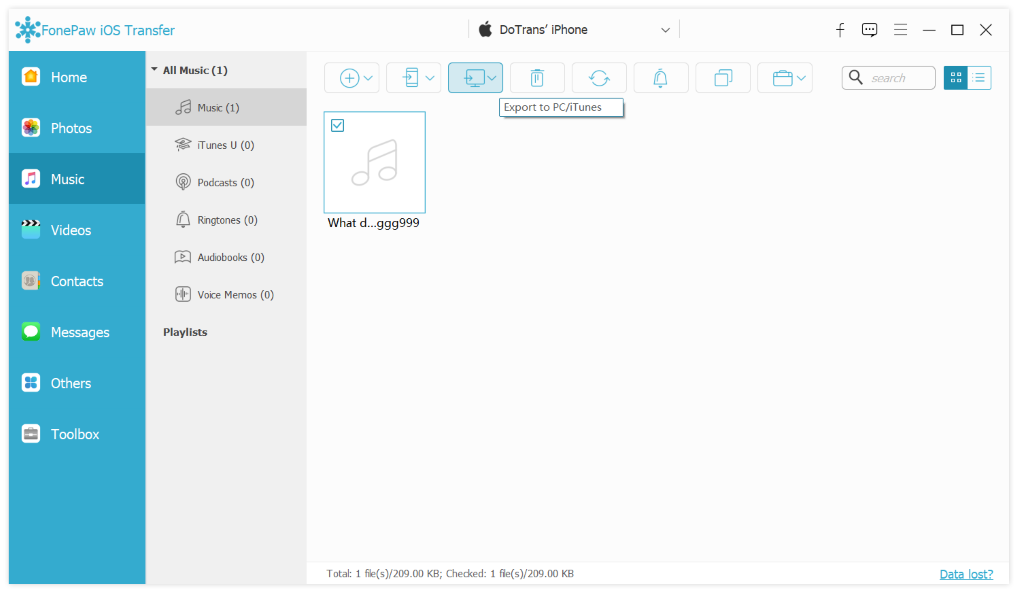
STEP 3. Transfer Files from iPad to PC.
Click the "Export to PC" button to start transferring. A few seconds later, your music on the iPad will be successfully moved to your PC.
Method 2. Sync Files from iPad to Computer with iCloud
You may heard others use iCloud to transfer files from Mac to iPhone. Also, you can transfer files from iPad to PC wirelessly through iCloud. It is important to note that Apple only provides a 5GB free iCloud Drive for you to store files. If you run out of space, you have to subscribe to a paid plan for using larger storage on iCloud Drive.
Before getting started, make sure you have a stable network connection, since the speed of uploading and downloading files relies on the network. If you have a bunch to transfer, it might be a bit time-consuming. If you would like to give it a go, follow the below instructions to sync files from iPad to your computer.
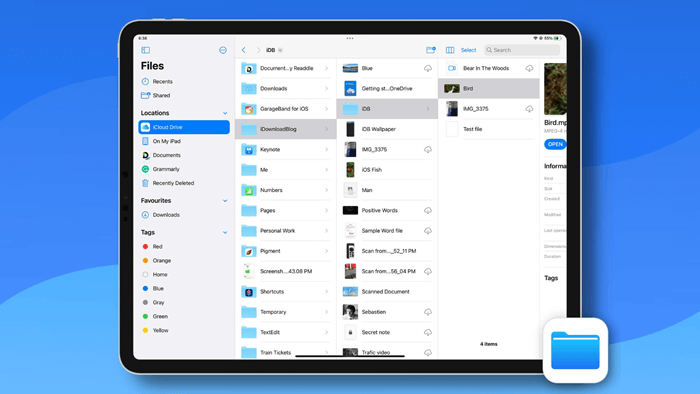
STEP 1. Open the Files app on your iPad.
STEP 2. Long-press the file you want to transfer to launch the menu.
STEP 3. Tab Move and choose iCloud Drive as the destination to copy to.
STEP 4. Visit iCould.com on your PC. Sign in with your Apple ID.
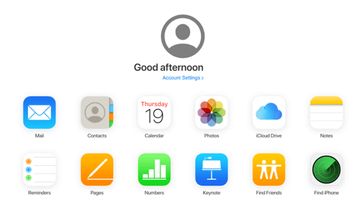
STEP 5. Locate the file you have added and download it.
 Note:
Note:
If there's no spare space on your iCloud Drive, you can try One Drive, Dropbox, or Google Drive, which offers large free storage. They work as same as iCloud Drive.
Method 3. Copy Files from iPad to Windows PC via USB
If you only want to transfer photos from iPad to PC, using a USB cable is another simple yet workable way. All you need is to prepare a USB cable that fits with both your iPad and PC.
STEP 1. Connect your iPad and PC with the USB cable.
STEP 2. Tap Allow on your iPad to allow your PC to access files on your iPad.
STEP 3. There will be a "Choose what to do with this device" notification on your PC. Click it.
STEP 4. Click Import photos and videos.
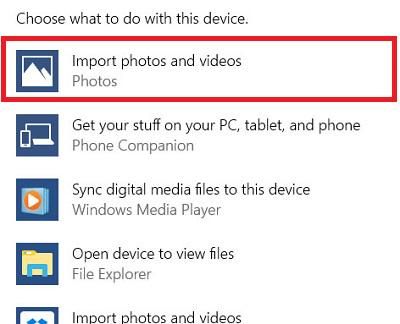
STEP 5. Choose the photos and videos you want to import. Click Continue and wait a few minutes.
Method 4. Transfer Files from iPad to PC/Laptop Wirelessly
If you don’t like installing any third-party apps or using sync helper to transfer files. You can take emails or chat apps as transfer tools to help you transfer files from iPad to PC wirelessly. These methods are suitable for transferring a small amount of files.
Use Email to Transfer Files
This method can be used to transfer a few small files from iPad to PC.
You just create an email on your iPad (iCloud, Gmail, Outlook, etc.), and attach the files you want to transfer to your PC. Send it to your own email address, and receive it on your PC to download the attached files.
Use Chat Apps to Send Files
There are so many chat apps that support online file sending through a dialogue box. Messenger, WhatsApp, Line, WeChat, Telegram, and so on, can be used to transfer small files from iPad to PC. But make sure the chat app offers a desktop program before you try.
You can sign into your chat app account on your iPad, send the files to the dialogue box, and then sign into the same account on PC to receive them.
FAQs about Transferring Files from iPad to PC
Can I AirDrop from iPad to Windows PC?
No. You can only use AirDrop to send files from iPad to Mac and other Apple devices. AirDrop does not work with Windows. To transfer files to PC from iPhone/iPad, try the five methods mentioned above.
Can I Transfer Files from iPad to an External Hard Drive?
It is sure that you can transfer files from iPad to an external hard drive. To achieve this goal, you can:
Use file app and USB Cable. You can use the file app on your iPad to pack your files together, and then connect the external hard drive with your iPad with the USB cable, to transfer the files directly.
Use online transfer. Some hard drives are inbuilt with a Wi-Fi connection. It allows you to transfer the files on your iPad to the hard drive online.
Use your PC as the intermediate. This method works for everyone. Just send your iPad files to your PC first, and then connect the hard drive to your PC to get access to the files.
Conclusion
Now that you've learned 5 ways to transfer files from iPad to PC with/without iTunes, we believe that using FonePaw iOS Transfer must be the best method for its fast transferring speed and easy-to-use experience. Do not hesitate anymore, hit the download button below to get FonePaw iOS Transfer and use it to transfer files from iPad to PC without iTunes right away!
Free Download Buy with 20% off Free Download Buy with 20% off


