The post has been updated on September 17, 2020.
It seems that our parents are becoming more and more like to take notes with age. They say that is because they are suffering from age-related memory loss. I'm sorry to hear that one of my friends' mother loses her iPhone X. And that is not the worst situation. Her mother always keeps many passwords of her bank cards in iPhone notes instead of her mind. Now, they are like cats on hot bricks because they think they cannot find those passwords back anymore.
To get back notes on the iPhone after the device is lost or stolen, there is only one way. That is restoring notes from backup files. FonePaw iPhone Data Recovery (opens new window) works perfectly in notes recovery from iCloud backup or iTunes backup. It not only can restore lost notes, but videos, pictures, text messages, reminders, etc can be recovered. Since iCloud now is a more preferred way for people to do a backup, I am going to show you how to restore notes from iCloud. Let's see the details in the following guide. Download the trial version of iPhone Data Recovery here:
Free Download Buy with 20% off Free Download Buy with 20% off
Solution 1: How to Restore Notes from iCloud
Step 1: Start the program
After the download completed, launch the .exe file to install, and then start the program.
Step 2: Sign in iCloud
Choose "Recover from iCloud" to enter into the iCloud login page. Sign in your iCloud account with Apple ID and password.
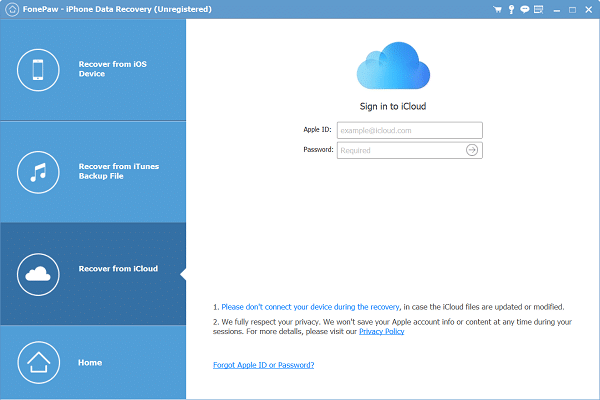
Step 3: Recover from Notes & Attachments
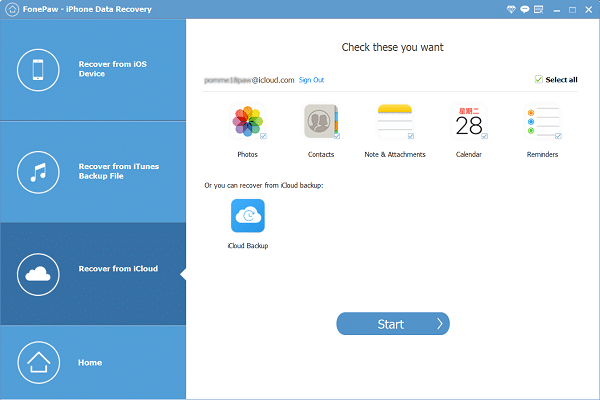
After entering the iCloud account, you can choose to recover the notes that have synced on iCloud. Tick the Note & Attachments and click Start to begin the scanning.
When the scanning finishes, the notes will be shown on the left side of the screen. Click Recover and choose the output folder. Your notes will be saved to the computer.
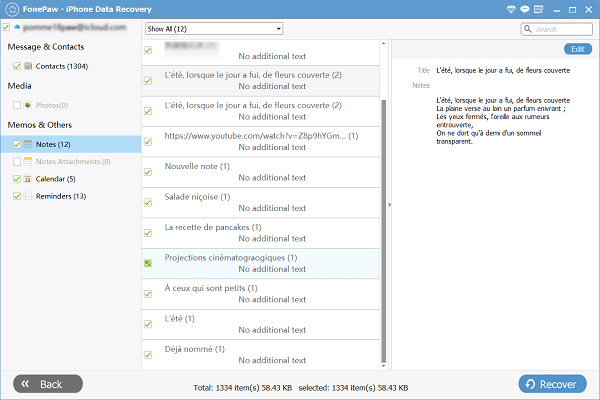
If your notes are backed up but not synced on iCloud, move on to the next step.
Step 4: Recover from iCloud Backup
Choose the iCloud Backup option and all iCloud backup files will be loaded automatically. Choose the one you need and click "Download" in the corresponding column.
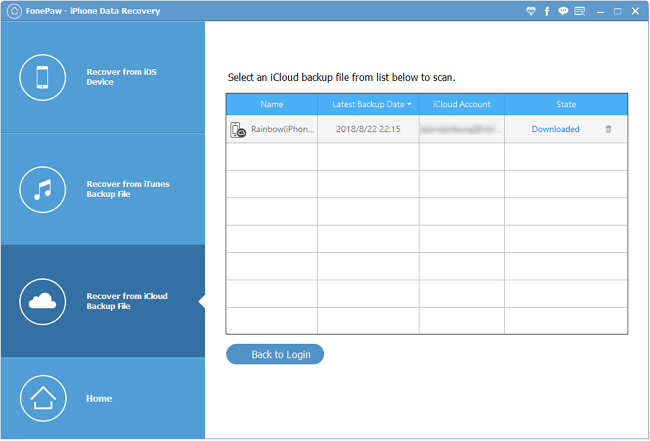
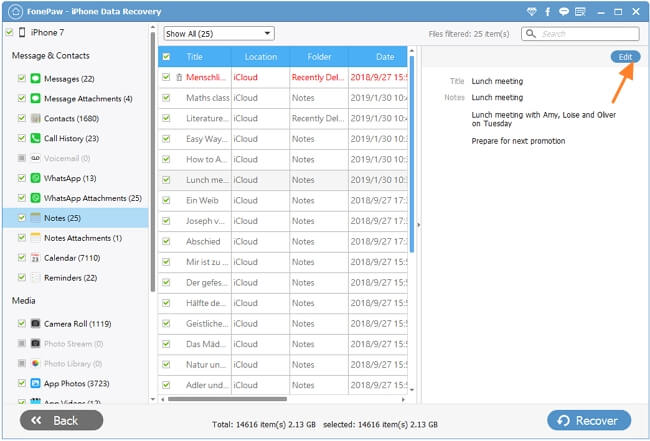
A few seconds later, you can preview the downloaded file. Mark down what you want while previewing, and restore them by clicking the "Recover" button.
Before recovery, you are allowed to modify the content of the note with the Edit button, and the attachments, including images, txt, etc., can be previewed separately in the "Notes Attachments" node.
[Optional] Step 5: Put Recovered Notes Back to Device
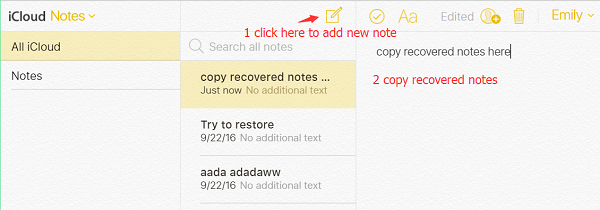
After you have recovered deleted notes successfully, those recovered notes will be saved to the computer, not the iPhone or iPad. However, there is an optional way for you to put the data back to the device: Log in toiCloudand copy the recovered note to the iCloud Notes. Then they will automatically sync with your iDevices. Go back to your iPhone/iPad, and you will view these notes.
Solution 2: Get My Notes Back from iCloud Website
If you are an old Notes users, you will notice that you can create notes on the "iCloud" folder and "My iPhone" folder. Those notes saved on the "iCloud" folder can be recovered from the iCloud website when you lost your iPhone.
- Sign in your Apple ID on the iCloud website.
- Go into the "Notes" app and you will see all notes on iCloud, even if you have deleted them in the past 30 days.
- Click on certain notes and view them. When you tend to recover the deleted notes from "Recently Deleted", just open that note and hit the "Recover" button so it will go back to its original folder.

Now, FonePaw iPhone Data Recovery (opens new window) and iCloud website help you to save notes on the computer painlessly. It takes nothing except for a few simple mouse clicks. You can also restore notes from iTunes backup. Please don't hesitate to try this program to restore deleted files when you stuck in iPhone data loss.
Free Download Buy with 20% off Free Download Buy with 20% off


