Imagine that when you receive a call from your kids, your iPhone ringtone goes as "Mommy, answer your phone!", wouldn't it really be so cute! If you want to have a different and unique ringtone on your iPhone, the best ringtone may be the voice memo you recorded directly on your iPhone. However, the only question is, how to make a voice memo into a ringtone on your iPhone?
In this article, we will explain 2 easiest ways to set a voice memo as Ringtone on iPhone, and also help you get rid of some frequently asked questions about ringtone. Keep reading!
Method 1: Make a Voice Memo into a Ringtone on iPhone with iOS Transfer Tool
The most recommended way to make a voice memo into a ringtone on your iPhone is by using a professional iOS transfer tool. FonePaw iOS Transfer is such a tool to manage and transfer iPhone voice and music data, which can perfectly meet your needs. With FonePaw, you can turn a voice memo or music file into a ringtone format, and then make it ringtone on your iPhone easily.
Free Download Buy with 20% off Free Download Buy with 20% off
- Make a voice memo or a song into a ringtone easily
- Transfer and manage voice and music files on iPhone with one click
- Transfer a wide range of file types among iOS, Windows, and macOS - voice memos, music, photos, videos, chats, messages etc.
- Backup and restore iPhone data without iTunes
- Ensure data safety with no risk of loss or overwrite
FonePaw iOS Transfer also has an intuitive interface, enabling you to make a voice memo into a ringtone on your iPhone within a few clicks. Let's see how it works:
Step 1: Connect your iPhone to your Windows or macOS computer, and launch FonePaw iOS transfer.
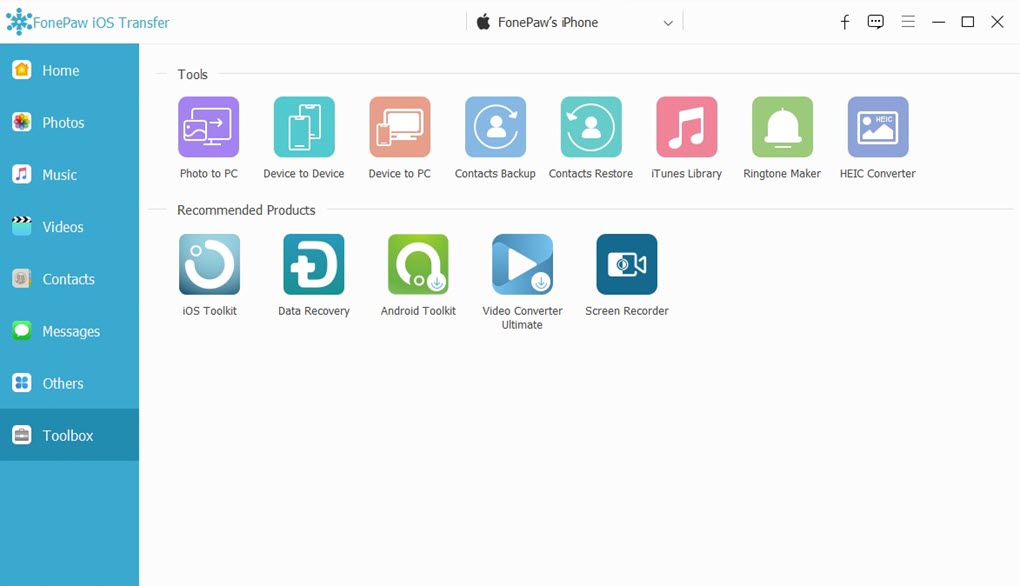
Step 2: Go to the "Toolbox" on the left side of the FonePaw iOS Transfer interface, and then choose "Ringtone Maker" from the Tools.
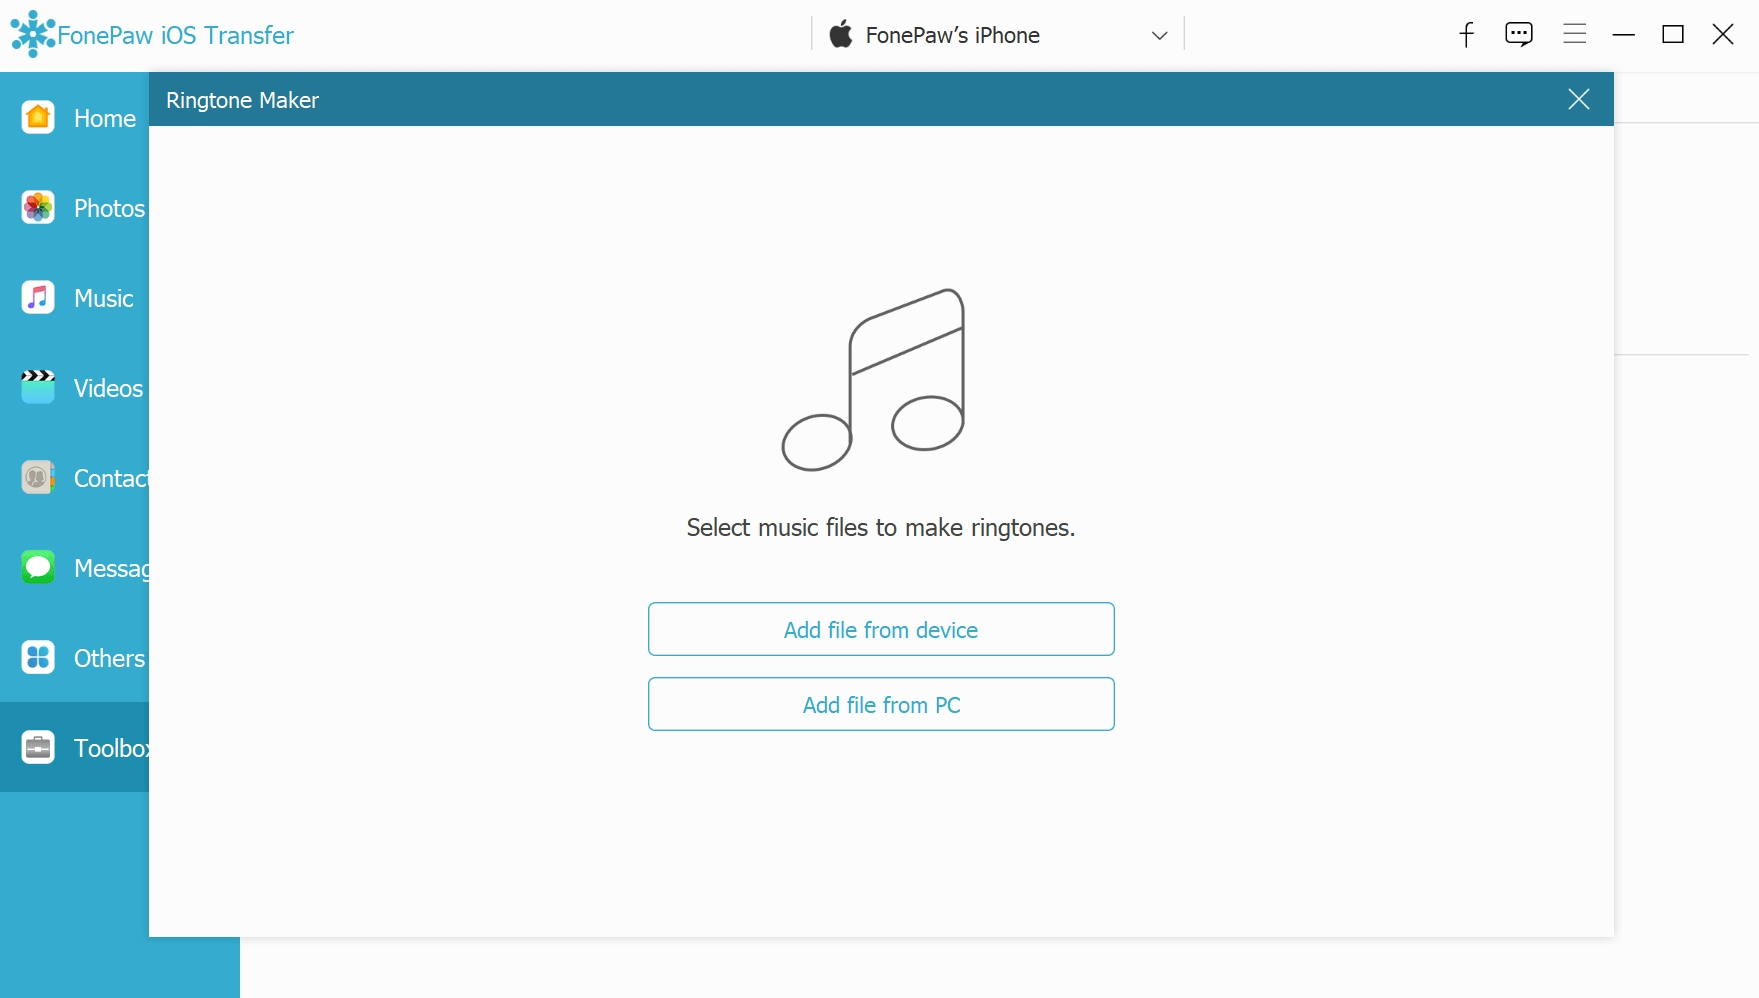
Step 3: Select "Add file from device". FonePaw iOS Transfer will automatically detect your music collections and import your voice memo and music files on your iPhone to the "Ringtone Maker".
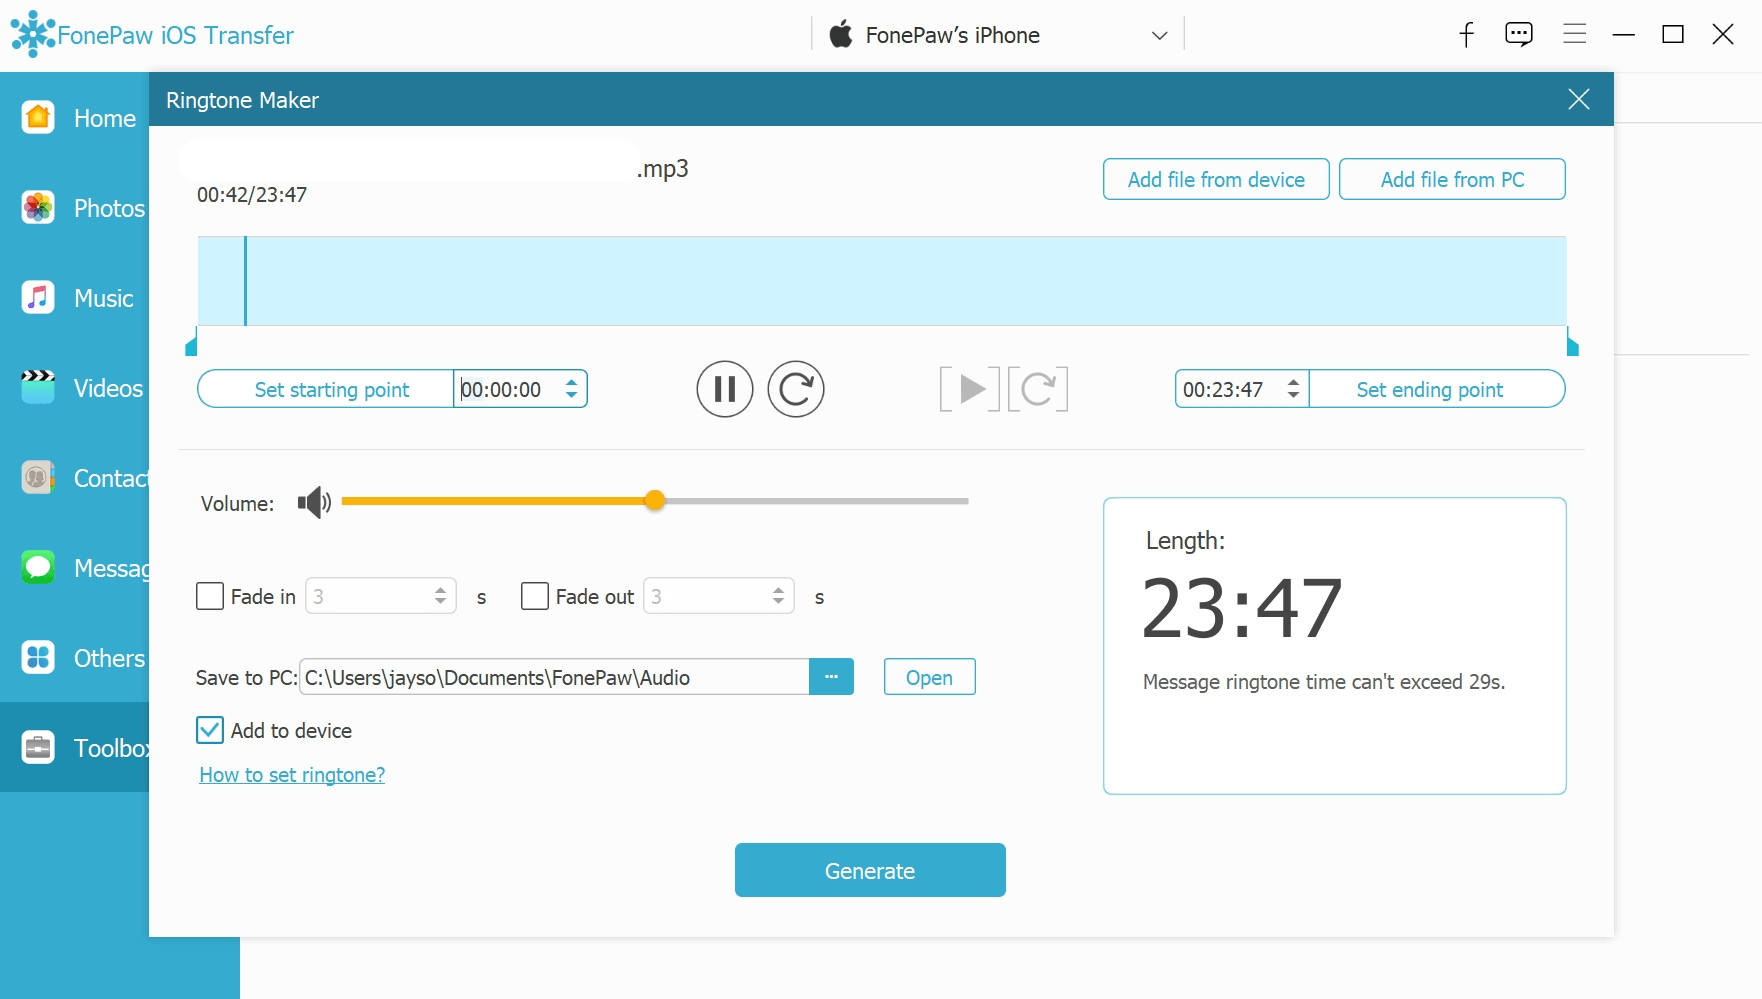
Step 4: You will see all the voice and music files on your iPhone are listed here. Select the voice memo from the list. Customize the voice memo, by dragging the playback progress bar or setting the start and end times. Tick "Add to device," then click "Generate".
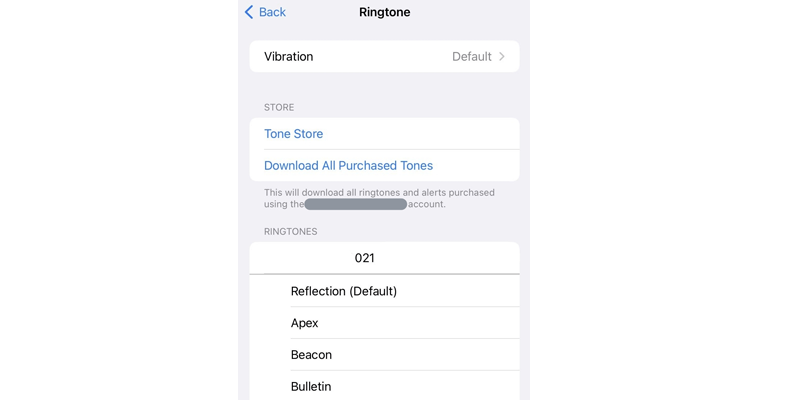
Step 5: After the generation is done, go to "Settings > Sounds & Haptics > Ringtone" on your iPhone. You will see that your newly added ringtone is in the list, and the ringtone is automatically imported into your iPhone. Tap on it to set it as your default ringtone. Finally, you get your ringtone on your iPhone!
Method 2: Turn a Voice Memo into a Ringtone on iPhone with GarageBand
Turning a voice memo into a ringtone on your iPhone using GarageBand is straightforward. GarageBand is a built-in iOS app on your iPhone, and you don't need a computer using this method. But, the process is a bit complicated, which might cause difficulties for beginners.
And it is important to note that, at the time of writing, it only supports iOS 17.4 and later versions for download. If you have the old version on your iPhone, making voice memos into ringtones is still accessible. For those who are new to GarageBand and don't want to update the iOS system temporarily, it's recommended to choose the method above.
How to Turn a Voice Memo into a Ringtone on iPhone with GarageBand:
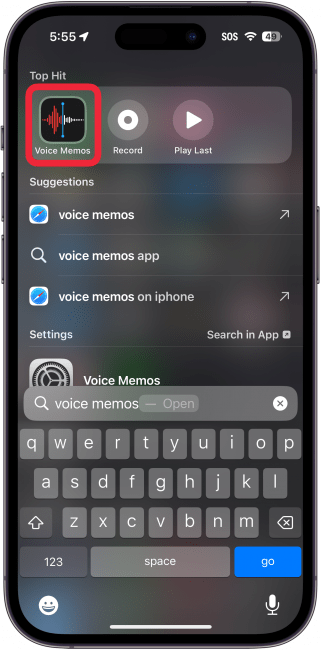
Step 1: Open the "Voice Memos" app on your iPhone.
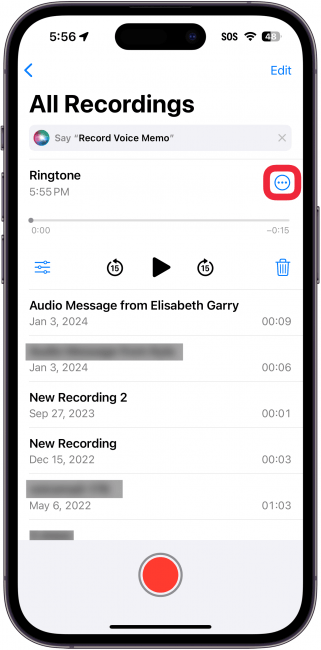
Step 2: Find and select the voice memo you want to use as a ringtone. Tap on the ellipsis (...) next to the voice memo.
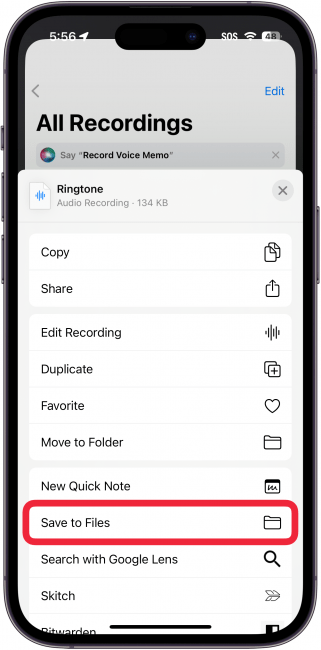
Step 3: Choose "Save to Files" to save the voice memo to your iPhone's Files app.
Step 4: Open GarageBand on your iPhone. If you don’t have it, download it from the App Store.
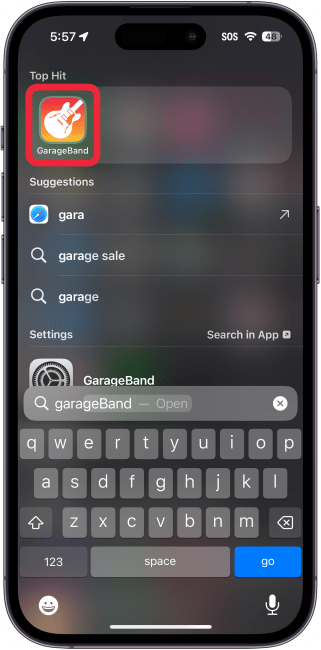
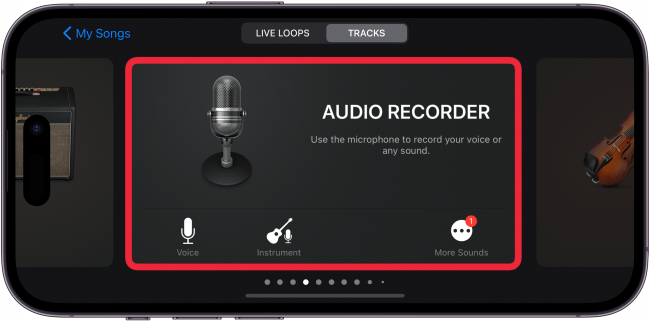
Step 5: In GarageBand, create a new project by tapping on the + button and selecting "Audio Recorder" where you saved your voice memo.
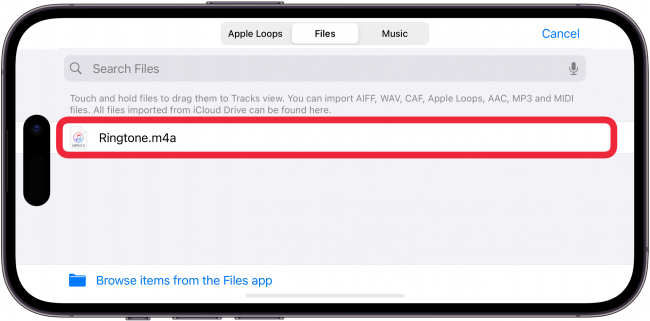
Step 6: Locate and import your voice memo from the Files app into GarageBand.
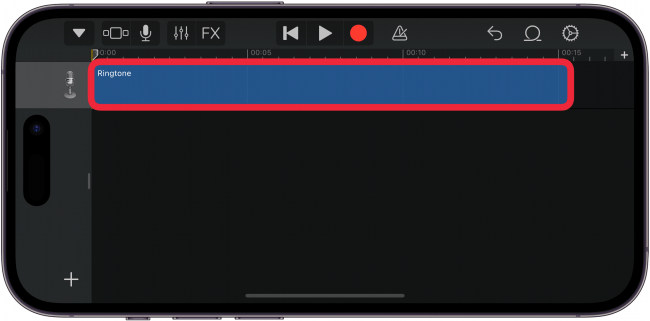
Step 7: Drop the voice memo onto the track, and then trim the voice memo as needed.
Step 8: Tap on the downward arrow icon on the top left corner to go back to the "My Songs" screen.
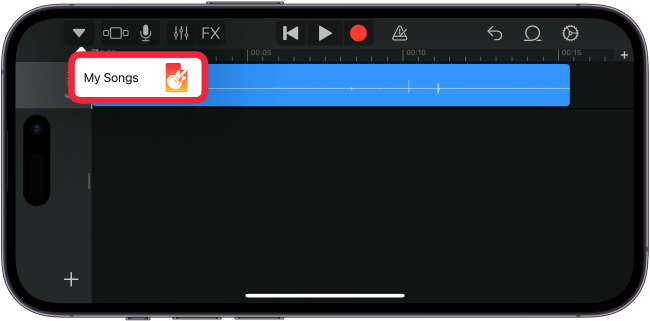
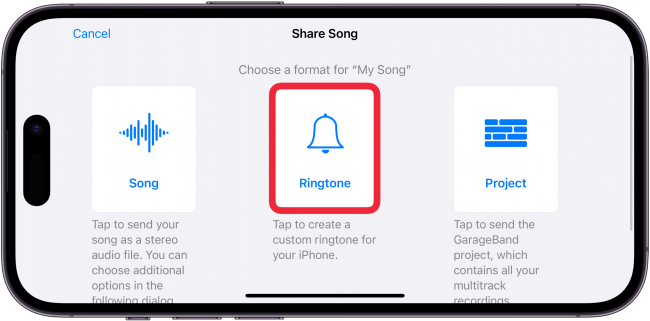
Step 9: Press and hold on the song tile to bring up the options menu. Choose "Share" from the menu, and then select "Ringtone". Give your ringtone a special name, and tap "Export".
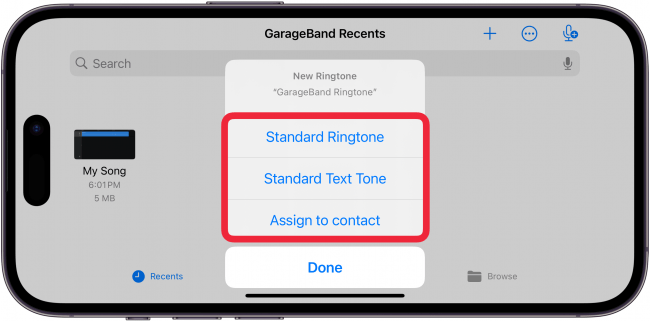
Step 10: After exporting, GarageBand will set the ringtone. Tap on "Use sound as…" and select "Standard Ringtone", "Standard Text Tone" or "Assign to Contact" as you wish.
FAQs About Making Ringtone
After reading the methods, you have learned how to make a voice memo into a ringtone on your iPhone. You can create a unique ringtone for all your voice memos, or assign a special sound to your beloved. Here are some FAQs about ringtones for you:
Can I set a song as a ringtone on my iPhone?
Yes. The easiest way to set a song as a ringtone is by purchasing the track on iTunes. Once you complete the payment, you can navigate to "Settings > Sounds & Vibration > Ringtone" to select your purchased song as ringtone. Alternatively, you can create a custom ringtone using GarageBand or third-party software like FonePaw iOS Transfer.
Can I select a ringtone for a specific person?
Yes, you can assign a specific ringtone to individual contacts on your iPhone. Open the "Contacts" app and select the contact you want to customize. Tap "Edit" in the top right corner. Scroll down and tap "Ringtone" or "Text Tone." Choose a ringtone or text tone from the list, and finally tap "Done" to save the changes.
Conclusion
To sum up, we have introduced a detailed guide to making a voice memo into a ringtone on iPhone using the 2 easiest ways - GarageBand and FonePaw iOS Transfer. For the seamless process, FonePaw iOS Transfer offers a better solution. With FonePaw, you can set a voice memo as a ringtone for your kids, lovers, and other special ones. Moreover, this tool offers a free trial for every newcomer, so why not download it and have a try?
Free Download Buy with 20% off Free Download Buy with 20% off


