Some people regard M4A as the successor to MP3 since M4A has better quality but smaller size than MP3. Many iPhone users are looking forward to the day when Apple can increase the compatibility of M4A since the poor compatibility of M4A has caused a lot of troubles. For example, M4A files can only be played on iTunes and Apple devices while they are not compatible with Windows Media player or some popular auditors like Audacity and Wavosaur.
To increase the compatibility of M4A, converting M4A to WAV is a good choice because WAV can be played on Android, Blackberry, Windows Media Player, PS3, PSP, Creative Zen, etc. and edited perfectly in Audacity, Wavosaur.
As you can't directly convert M4A to WAV with Windows Media Player or Audacity, here are 2 direct ways to convert M4V to WAV files on Windows 10, 8, 7, and Mac.
# M4A vs WAV: Which is Better?
M4A is slightly compressed thus has a relatively lossy audio quality while WAV is not compressed and has a higher quality. That’s why WAV files usually take a lot more space than M4A files. Since M4A is a lossy compression with lower quality, its audio quality won't be improved by being converted to WAV and the M4A will instead take more space after the conversion. So it is better to convert M4A to MP3 (https://www.fonepaw.com/tutorials/convert-m4a-to-mp3.html) for both of the two formats are lossy compression.
# How to Convert M4A to WAV
If you insist on converting M4A to WAV for some reason, FonePaw Video Converter Ultimate (opens new window) will be of help. Except for converting videos, this software also converts audios with fast speed. Compared with converting M4A to WAV online, using FonePaw Video Converter (opens new window) is much faster.
Besides, the app allows you to improve the quality of the output WAV files by configuring sample rate, bitrate, etc. What's more, this app not only supports M4A to WAV or WAV to M4A conversion but is also able to convert audio and in videos in many other formats.
Download the free trial version by clicking the blue icon below
Free Download Buy with 20% off Free Download Buy with 20% off
Step 1: Load M4A files to the program
Launch the program you've just downloaded and installed on your computer. Then, click the "Add Files" button to import M4A files.
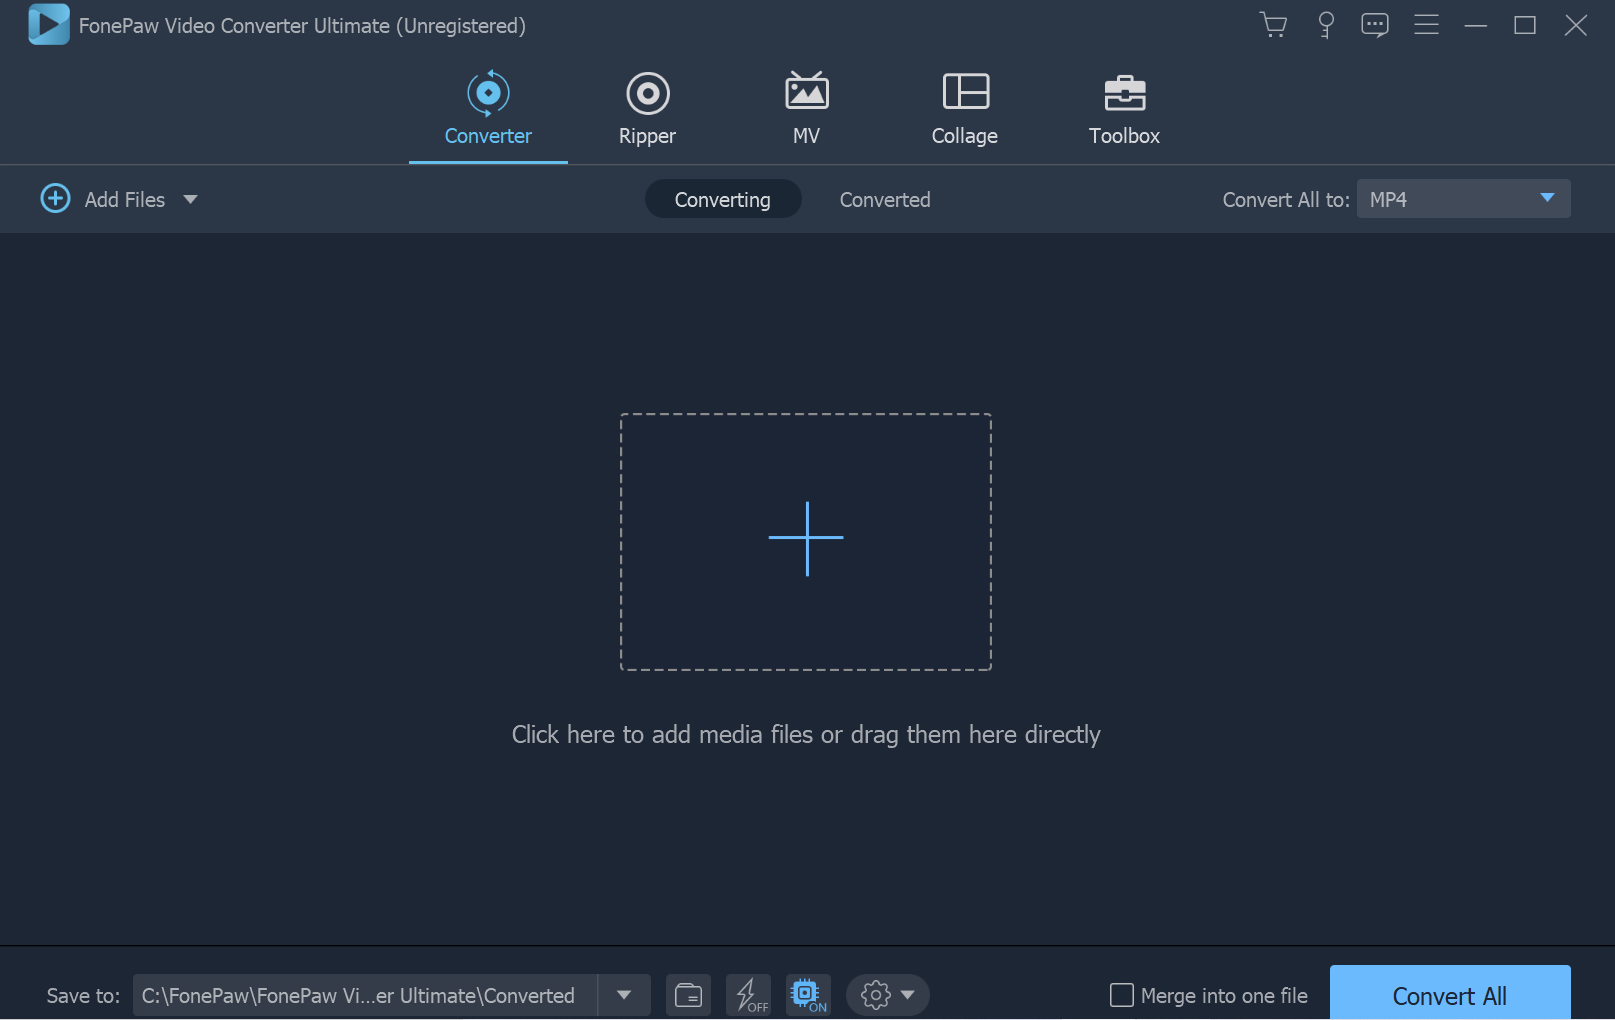
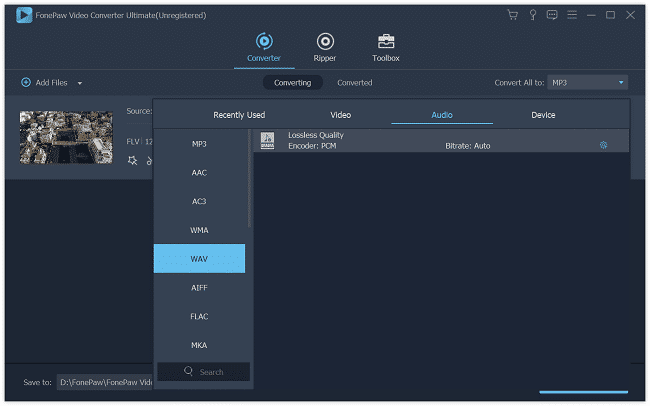
Step 2: Set WAV as the output format
Click the small triangle to the right of "Convert All to" to open the format window. Then, set "WAV" as the output format from the "Audio" category.
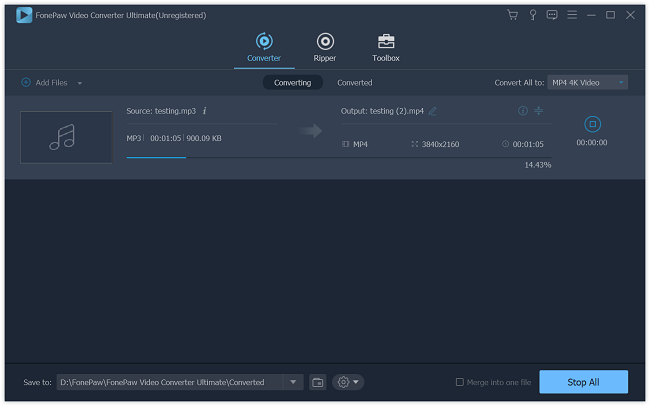
Step 3: Start M4A to WAV Conversion
Click the "Convert All" button to start M4A to WAV conversion. Once the conversion is completed, simply click the "Open output folder" to locate the converted files and start enjoy.
# Convert M4A to WAV with iTunes
iTunes is another tool you can use to convert M4A to WAV. However, in comparison to FonePaw Video Converter Ultimate (opens new window), this method may not be that convenient. One the one hand, iTunes doesn't support batch conversion processing, which may slow down your work. On the other hand, since iTunes is not a dedicated audio converter, there may be quality loss after converting the M4V files to WAV.
Step 1: Download iTunes and launch the app.
Step 2: Click Edit on the upper left corner and select Preferences.
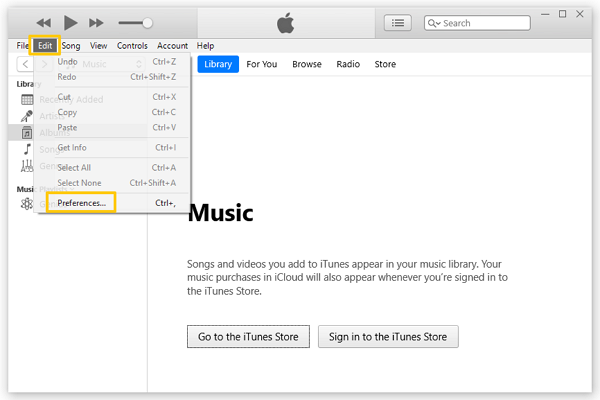
Step 3: In the General tab, click Import Settings.
Step 4: Select WMV Encoder in Import Using and then click OK.
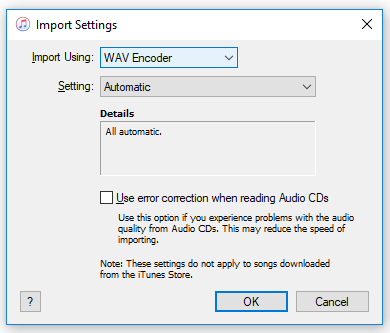
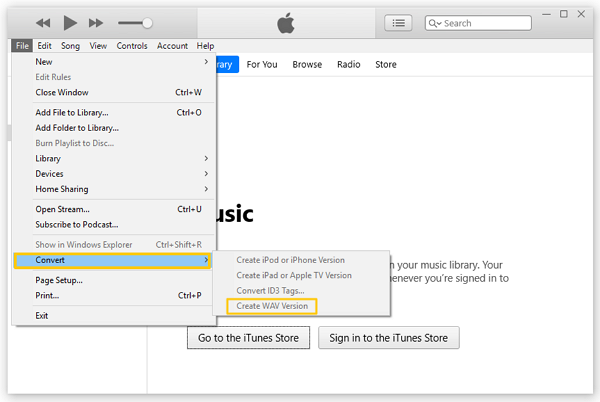
Step 5: Choose your M4A files for conversion, click the right button, and select "Create WAV Version".
# Conclusion
The above two methods can both help you convert W4A to WMV. If you already have iTunes on your computer, you can just use it as a converter. If you want to have a better converting experience, don't hesitate to use FonePaw Video Converter Ultimate (opens new window).


