When the phone runs slowly or becomes sluggish, everyone knows to check the storage because little free storage space usually leads to a slow iPhone. While checking the iPhone storage, many users have found some apps have an extraordinary large "Documents and Data" size that usually takes up several and even tens of gigabytes of iPhone storage space. And what makes users more confused is that they cannot tap and check what is what is in documents and data and the huge "Documents and Data" cannot be deleted directly.
What are documents and data on iPhone? And how to clear documents and data in order to save more storage space on the phone? If you're also puzzled by the Documents and Data on your iPhone 6/6s/7/8/X/XS/XR, glad to tell you that you've come to the right place. This post will show you what counts as Documents and Data on iPhone and how to reduce them on iPhone.
1. What Is Documents and Data on iPhone 6/6s/7/8/X/XS/XR?
In Settings > General > iPhone Storage (for iOS 10 and below: Settings > General > Storage & iCloud Usage> Manage Storage), it is not hard to notice the "Documents and Data" of each app on the phone. And it usually takes up the most storage space.
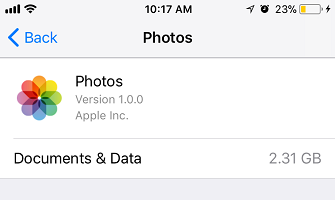
Many users may wonder: what on earth it is? Simply speaking, Documents and Data are all the data created by the app, such as the caches of images and videos, downloaded photos and videos, login information, cookies, visiting history and other related app data. When you are using Instagram, for example, since the moment you log in with your account and password, it has already generated the login cache which is one part of its Documents and Data. Each time you tap into a picture or watch a video, the loading process will also add up the cache data.
Although these stored data can help users get better usage experience, such as accurate recommendations according to the browsing history, if you don't have the habit of clearing them regularly, it can be a big storage problem for your iPhone. So here comes the key point: how to CLEAR the large documents and data on iPhone XS/XR/X/8/7/6.
2. How to Remove Documents and Data on iPhone
Here will recommend six solutions for you to get rid of the Documents and Data on iPhone. Take a look and pick the one you need!
Workaround 1. Delete or Offload App
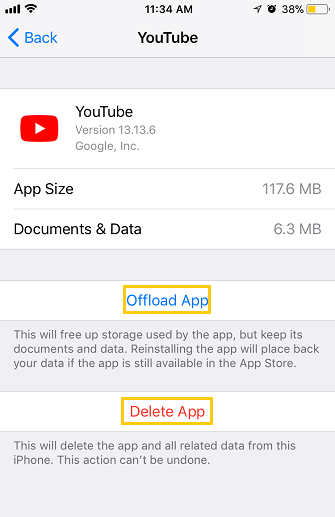
The most direct and also the easiest way is to delete the app. But if you are using iOS 11/12, iPhone offers the option of "Offload" the app which means you can uninstall the unused app on your phone without removing its data (cookies, caches, etc.). When you re-install it later, you can enjoy it with the previous data. However, offloading an app can only reduce its documents and data while its cached and downloaded data is still occupying your iPhone storage. To completely remove documents and data of an app from iPhone, you are recommended to delete the app and start over.
Step 1 Go to Settings > General > iPhone Storage. (For iOS 10 and below: Settings > General > Storage & iCloud Usage > Manage Storage)
Step 2 In the app list, tap on the app that you want to clear the Documents and Data.
Step 3 Choose either "Offload App" or "Delete App" according to your own need.
(Note that by choosing "Delete App", both the app and all the data it contains will be removed from the phone. And it is UNDONE.)
But what if you want to clear documents and data on iPhone without deleting the app? Read on to find how to do so.
Workaround 2. Clear Cache and Data of Third-party Apps
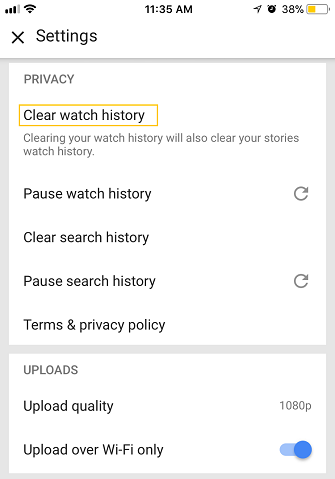
Though the Documents and Data option in iPhone's settings don't allow users to remove the data, some third-party apps have their built-in data clear feature. In Facebook, for example, there is the "Browser Settings" in which you can clean the browsing data as well as cookies and caches to decrease its Documents and Data size. The same in YouTube, you are able to delete the watch history and search history within the app.
Workaround 3. Remove Photos
Sometimes it is the stock app that takes up large space, such as the Photos app. To clear its Documents and Data, you'd better delete those duplicate photos in your photo library. But it is quite time-consuming to browse thousands of similar pictures and remove them one by one on the phone.
If there is an automatic duplicate picture finder and remover tool, things will be easier. Luckily, FonePaw App (opens new window) is that kind of app which can help you solve the problem perfectly. It is a well-rounded phone management app with a clean-designed interface that offers the feature of sorting out duplicate pictures and removing them with just one click. To find out duplicate or similar pictureson your iPhone and delete them with FonePaw App, you just need to follow 4 simple steps:
Step 1: Get the App Ready
Download and install FonePaw App from App Store. It is compatible with all iPhone models, including the newest iPhone XS/XR.

Launch it and tap on "Similar Photos" option. The app will scan your photo library automatically and detect all the duplicate and similar pictures.

Step 2: Select and Delete the Duplicate Pictures
After the scanning process, the Similar Photos and Screenshots will be presented. They are classified according to the date and you can look through to decide which one will be removed.
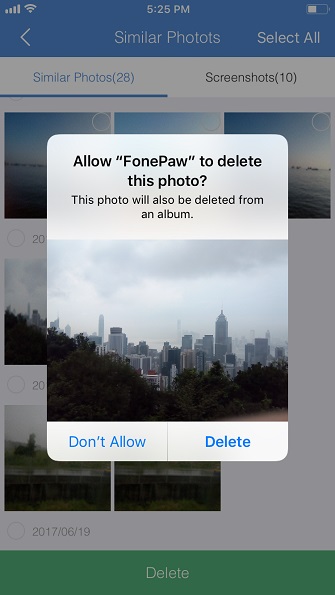
Tick the unneeded pictures and tap on "Delete" button. There will be two prompts for you to confirm whether to delete them or not.
Step 3: Delete All the Duplicate Pictures
If you don't want to keep any one of those similar pictures, tap the "Select All" option at the upper right corner and then choose "Delete" to remove all of them from your phone to save up space.
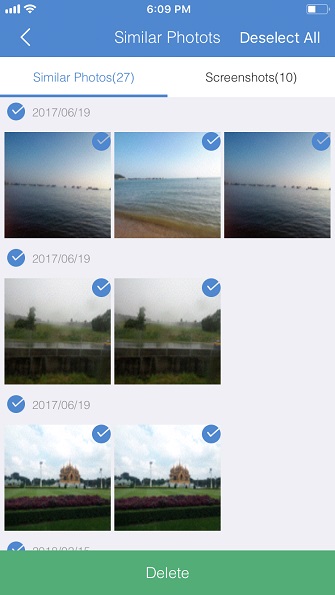
When the deletion is done, FonePaw App will tell you the space amount you've saved by clearing the duplicate pictures.
Workaround 4. Transfer Unused Music, Movies & TV Shows, Videos to PC
Some users may store the music they like, some movies and fancy videos on the iPhone for offline watching. But these media files usually take up huge storage space. If you are not willing to delete that precious music and videos, it is suggested transferring them to PC in order to relieve your iPhone's space.
Among so many data transfer apps, FonePaw DoTrans (opens new window) is highly recommended. It is a powerful iPhone data management app with multiple features, such as importing files from computer to iOS devices, transferring data from iPhone to PC, transferring data from one iPhone/iPad/iPod to another iPhone/iPad/iPod and making your personalized ringtone. It is super easy to use and also supports transferring various kinds of data from the phone to PC, including music, photos, videos, contacts, and messages.
Free Download Buy with 20% off
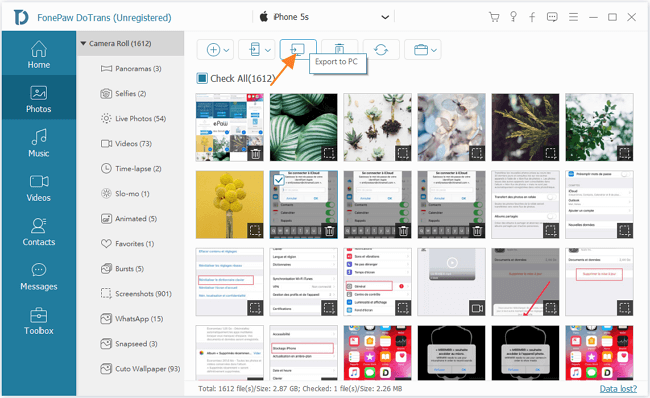
Detailed steps of how to transfer media files from iPhone to PC, head to How to Transfer iPhone Files to Computer (opens new window).
Workaround 5. Clear Safari Browsing History on iPhone
The browsing history in Safari is one part of its Documents and Data. To clear Safari's browsing history to decrease Documents and Data, just follow the steps below:
Step 1 Open Safari and tap the Bookmark icon at the bottom.
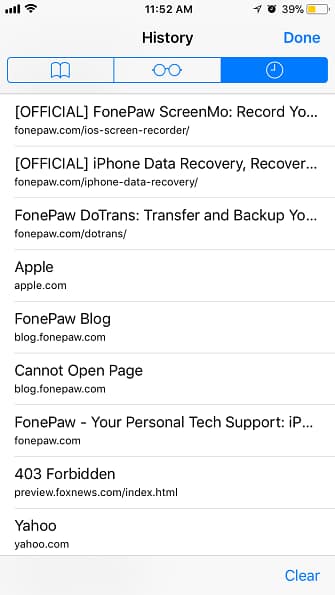
Step 2 For iOS 10 and below: tap on "History". For iOS 11/12: tap on the third clock icon at the upper right to open History.
Step 3 To delete an individual history: Locate the website you want to delete, swipe left and tap on the red Delete button.
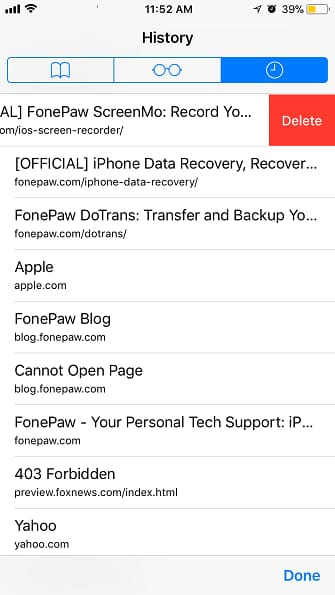
Step 4 To clear all the browsing history: Tap on the Clear button at the bottom right corner. There will be four options according to different time settings:
- The last hour
- Today
- Today and yesterday
- All time
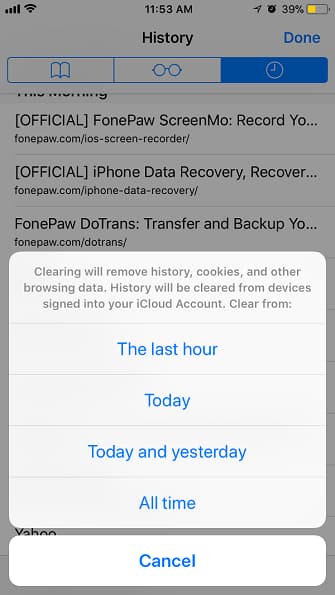
Step 5 Select the one you'd like and then you'll find the browsing websites disappeared from the list. Remind you that if you delete the browsing history, all the cookies and website data will be also removed.
Workaround 6. Remove Mail Caches
If you've used the stock Mail app to check emails, all the mails data as well as the attachments will be stored on the phone and become Documents and Data on the storage space. As long as you don't need the mails and attachments anymore, you'd better clean up the mail cache. But remind you that by doing so, all the email data will be erased on your phone, so remember to back up the important information before you clear the caches.
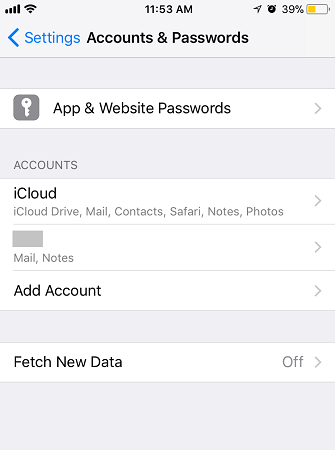
Step 1 Head to Settings > Accounts & Password.
Step 2 Choose your Email account.
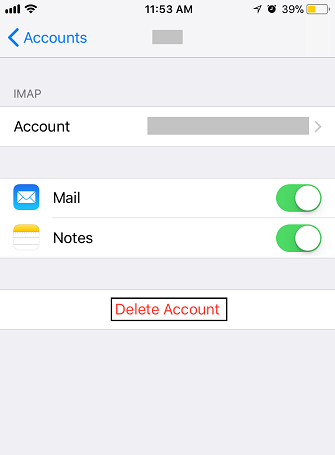
Step 3 Tap on "Delete Account" option and confirm it by tapping "Delete from My iPhone".
Step 4 Now the email account along with its past caches is removed from your phone. For future use, re-add the email account again.
Any other good solution for removing documents and data from iPhone is welcomed to share with us in comments! If you find this post useful, please share it with your friends and family!


