


Transferring files from iPhone to iPad becomes an indispensable skill for seamless data management for iOS users, especially when you buy a new iOS device. Therefore, we explore 5 user-friendly methods in this article. Make this task as seamless as possible with step-by-step instructions. You can easily select and implement the solution that best fits your needs, enhancing your digital experience across your Apple devices.
Method 1. Sync Files from iPhone to iPad with Quick Start
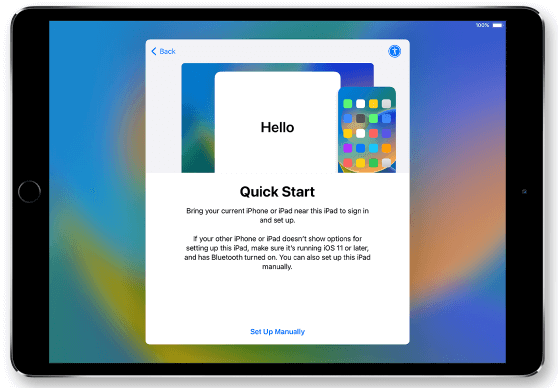
Quick Start is a built-in feature in iOS devices, available for iPhones with iOS 11 or later. It facilitates hassle-free data transfer from iPhone to iPhone, and iPhone to iPad. Quick Start allows you to transfer various data types, such as photos, videos, contacts, messages, settings, and more. However, ensure that both devices are running on iOS 11 or later and have Bluetooth and Wi-Fi enabled.
Additionally, if you want to transfer your iPhone to your older iPad, you need to go to "Settings > General > Transfer" or "Reset iPad > Erase All Content and Settings" to erase the device. Since the two devices will be occupied, you are advised to use them when you are free. Now, let's delve into the step-by-step process of using Quick Start to sync files from your iPhone to your iPad.
Step 1. Get the two devices connected with the same WIFI, and Bluetooth turned on.
Step 2. Choose a language for the iPad and select a location. After that, you can see a Quick Start notification pop up. Put the two devices close to each other.
Step 3. Go to your iPhone. Unlock your iPhone and tap Continue. Then, a pop-up will appear on your iPhone.
Step 4. On your iPad, set your Face ID or Touch ID, and follow the on-screen instructions to complete the processes.
Method 2. Sync Data from iPhone to iPad with AirDrop
Compatible with iOS 7 and later, AirDrop is also an iOS built-in device that helps you with iPhone data migration, like transferring iPhone photos to iPad, etc. However, ensure both devices keep the AirDrop interface open during transfer. While smaller files transfer swiftly, larger ones may take longer due to network conditions. Occasionally, transfer interruptions may arise from network instability. Therefore, this method is more suitable for transferring a small amount of data.
Step 1. Open the Control Center on both your iPhone and iPad by swiping down from the top-right corner of the screen.
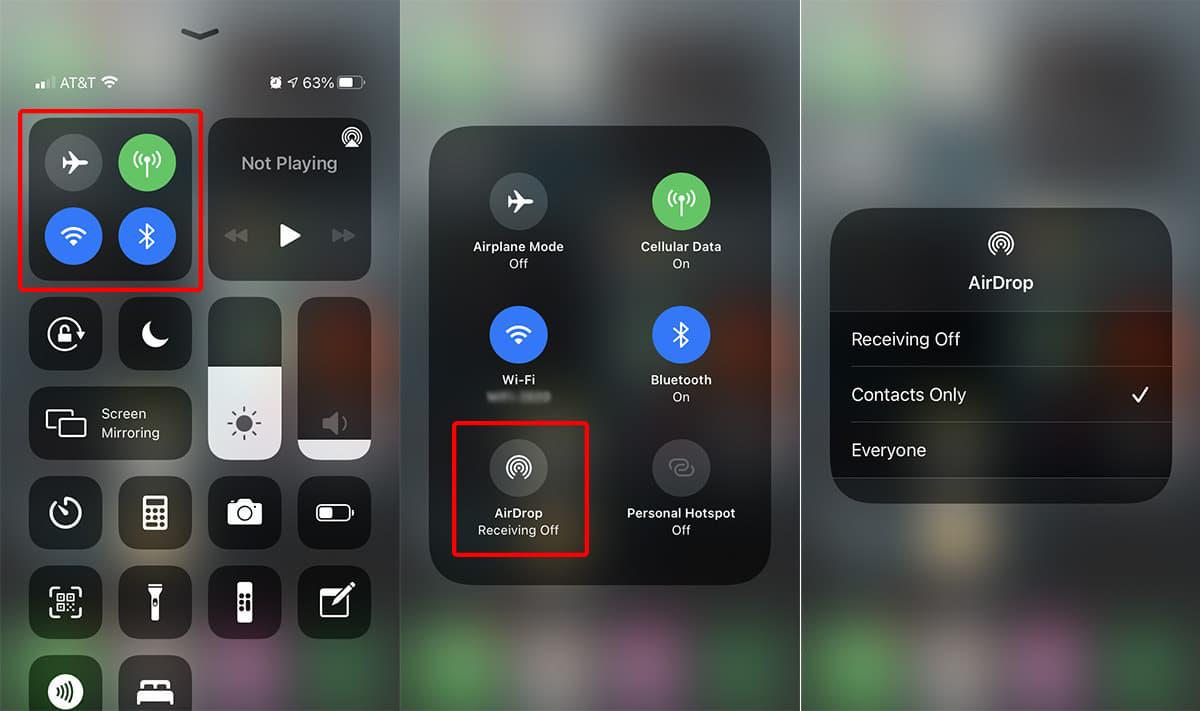
Step 2. Press and hold the network settings in the top-left corner of the Control Center on your iPhone.
Step 3. Tap on "AirDrop" to open the AirDrop menu and select "Contacts Only" or "Everyone," depending on your preference.
Step 4. Navigate to the file you want to transfer on your iPhone and tap the "Share" button.
Step 5. Tap on the recipient's device name in the AirDrop section of the Share menu on your iPhone.
Step 6. Accept the incoming AirDrop notification on your iPad to initiate the transfer.
Method 3. Transfer Data from iPhone to iPad with iCloud
There is also a method that syncs data from your iPhone to your iPad using iCloud. With iCloud, you can transfer photos, videos, contacts, and more seamlessly across devices. For a comprehensive transfer, iCloud backup and restore functions are available and allow for file sharing and synchronization across multiple devices.
However, interruptions due to network conditions may occur. It's important to note that restoring from iCloud backup will overwrite existing data. Let's explore the steps.
Step 1. On your iPhone, go to "Settings" > your ID > "iCloud" > "iCloud Backup."
Step 2. Tap "Back Up Now" to create a recent backup of your iPhone to iCloud.
Step 3. On your iPad, go to "Settings" > "General" > "Reset" > "Erase All Content and Settings.
Step 4. Follow the prompts to erase your iPad and set it up as new.
Step 5. During the setup process, select "Restore from iCloud Backup" and choose the most recent backup from your iPhone.
You can also choose to sync your iPhone data through iCloud Drive.
Step 1. Ensure iCloud Drive is enabled on both your iPhone and iPad.
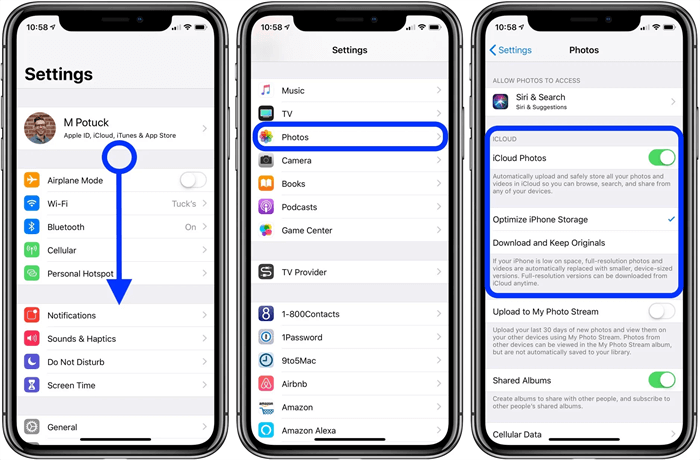
Step 2. On your iPhone, open the app containing the files you want to transfer, such as Photos or Files.
Step 3. Select the files you want to transfer and tap the share icon.
Step 4. Choose "Save to Files" and select iCloud Drive as the destination.
Step 5. On your iPad, open iCloud Drive and access the transferred files.
Method 4. Transfer Data from iPhone to iPad with iOS Transfer Tool
While transferring data between iPhone and iPad, you may encounter issues like transfer failures or interruptions and slower transfer speeds. If you want to stably transfer your files from iPhone to iPad, opting for a wired transfer using an iOS Transfer Tool ensures efficiency and reliability.
FonePaw iOS Transfer is such a software program designed to help users manage and transfer data between iOS devices (like iPhone, iPad, and iPod touch) and computers. It provides various features, such as multiple formats supported, and serves as an iPhone backup tool. Here are some of its outstanding features. Take a look:
Free Download Buy with 20% off Free Download Buy with 20% off
- Support all series of iPhone and iPad (iOS 17 included)
- Transfer various data types, including photos, videos, music, contacts, messages, and more.
- Backup and restore your iPhone and iPad data without iTunes.
- Manage all your iOS device data easily regardless of its version, such as deleting unwanted files or creating backups selectively.
- 100% Safe and Secure
To utilize FonePaw iOS Transfer for transferring data from iPhone to iPad, follow the steps:
Step 1. Download and install FonePaw iOS Transfer on your computer. Launch the software, connect both your iPhone and iPad to the computer using USB cables.
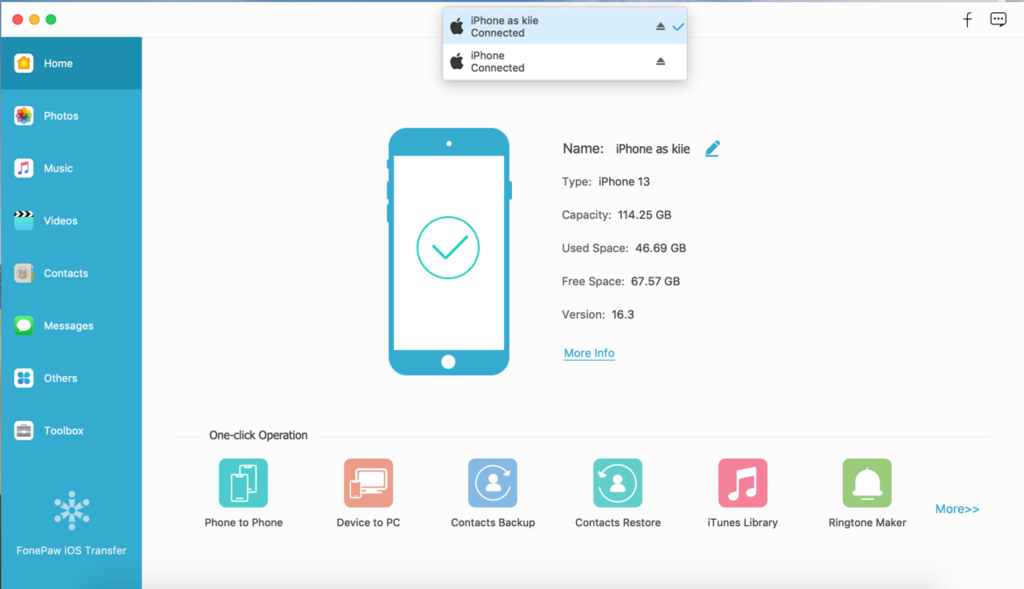
Step 2. Select the desired data you want to transfer from iPhone to iPad.
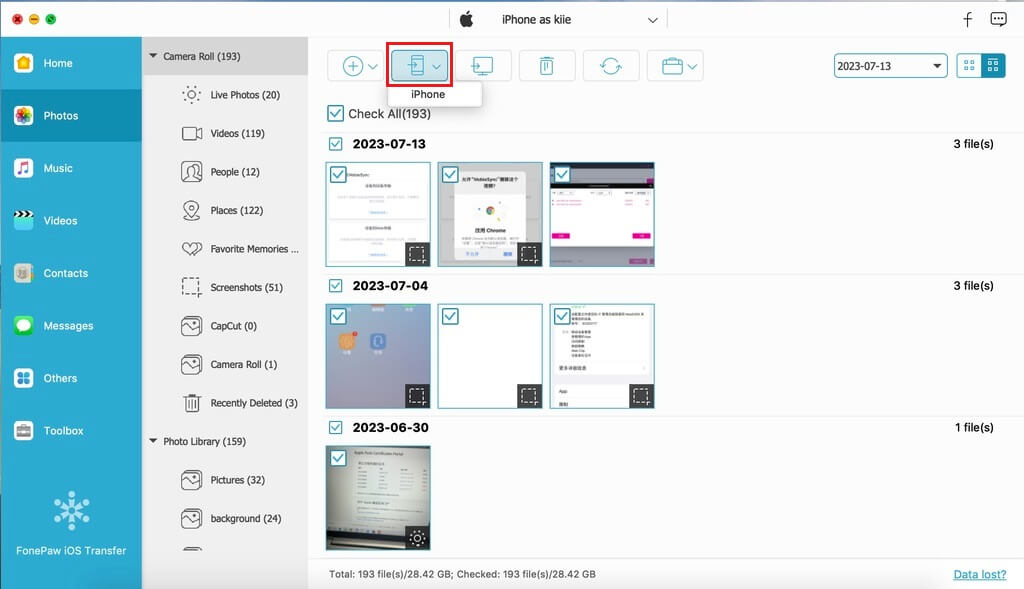
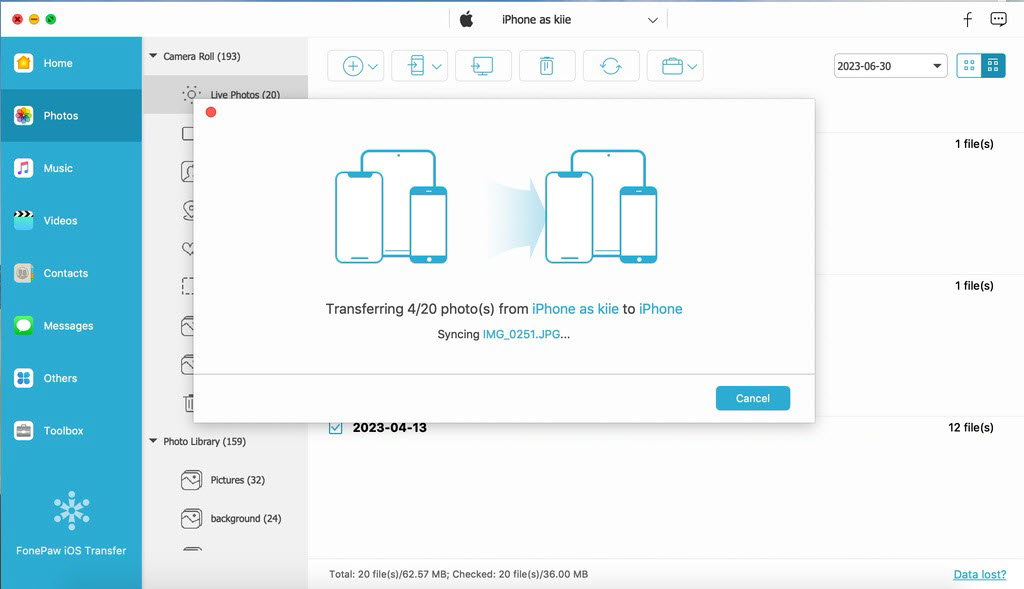
Step 3. Click on the "Export to Device" button to transfer the selected data from iPhone to iPad seamlessly.
Method 5. Sync Files from iPhone to iPad with iTunes
It is believed that not all iOS users are familiar with iTunes. You can also use iTunes to transfer your iPhone data to your iPad. Actually, it transfers your backup files to the iPad. So, when syncing files from iPhone to iPad using iTunes, it's crucial to be aware that this process may result in the overwrite of existing data. This means any data on your iPad already may be replaced by the synced content from your iPhone. Here are the steps.
Step 1. Connect your iPhone to your computer using a USB cable and launch iTunes if it doesn't open automatically.
Step 2. Click on the device icon located near the top left corner of the iTunes window. Then select "Summary" from the sidebar on the left.
Step 3. Under the "Options" section, check the box next to "Sync with this iPhone over Wi-Fi" if you want to enable wireless syncing.
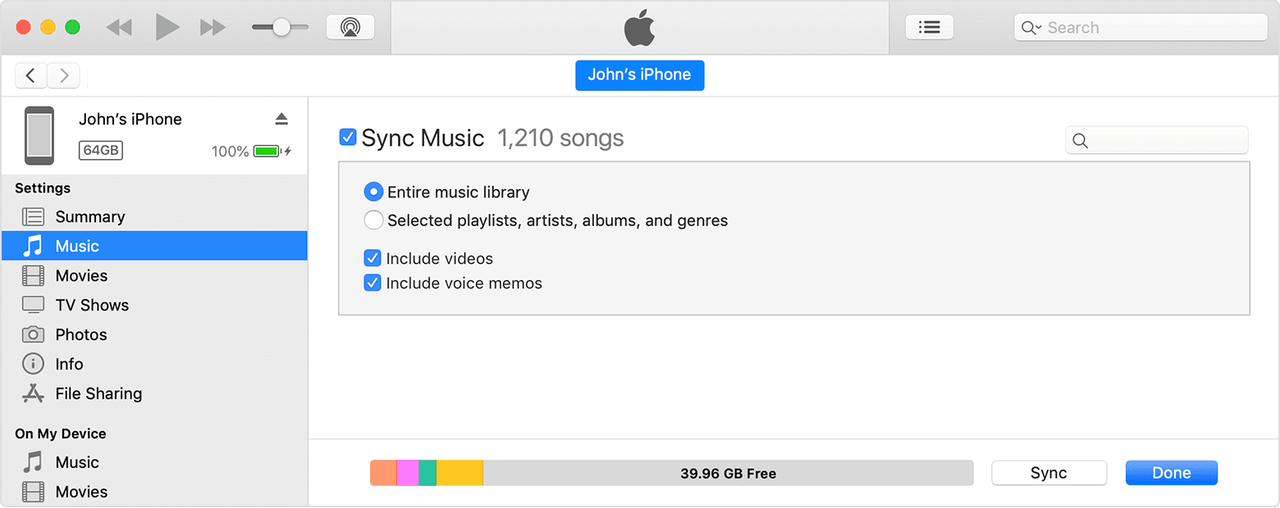
Step 4. Choose the type of content you want to sync from the tabs at the top of the iTunes window, such as Music, Movies, TV Shows, Photos, etc.
Step 5. Check the box next to "Sync [content type]" to enable syncing for that type of content.
Step 6. Click on the "Apply" button in the bottom right corner of the iTunes window to start the syncing process. Once the syncing is complete, disconnect your iPhone from the computer.
Step 7. Connect your iPad to the computer using a USB cable.
Step 8. Repeat steps 2-6, but this time select your iPad from the device list.
Step 9. Click on the "Apply" button again to start syncing the selected content to your iPad.
Conclusion
In this guide, we explored 5 effective methods to transfer data from iPhone to iPad. Each caters to different preferences and needs. If you prefer wireless methods, you can built-in features like Quick Start and AirDrop, or use iCloud for seamless synchronization.
However, if you seek more stable performance of data transfer, utilize wire methods like using third-party iOS transfer tools like FonePaw iOS Transfer for efficiency, or relying on iTunes for comprehensive backup and syncing. Now, pick the most suitable way to transfer files from your iPhone to iPad!
Free Download Buy with 20% off Free Download Buy with 20% off