Currently, there are many iOS users using Viber for communication. What people especially love about Viber is its features for messaging session, allowing users to add emoticons, stickers, photos and videos in messaging. So the app could bring lots of fun to those who prefer chatting with images. But what to do if we accidentally delete the chats before we could save those awesome photos or videos on our iOS device? Or lose the photos or videos because of an iOS 12 update failure?
Actually, when you delete a Viber chat, you can't find the chat on Viber but a small part of its data is still stored on your iOS device memory. If you could recover this part of data before it is overwritten by the new generated data, there is great chance that you can retrieve your Viber photos and videos. To do that, you need a tool named FonePaw iPhone Data Recovery (opens new window).
The program works perfectly in Window or Mac OS environment. After your iOS device is connected to the computer, the program can detect the information of the deleted Viber photos and videos on the device and recover these media files to the computer. It is a simple tool for non-technical person like you and me. All you have to do is to download the program and click several buttons with your mouse.
Free Download Buy with 20% off Free Download Buy with 20% off
You can watch the video tutorial to use FonePaw iPhone Data Recovery.
Video Tutorial: FonePaw iPhone Data Recovery
Part 1 Viber Photos & Videos Recovery via iOS Devices
Step 1 Scan iOS Device Data
Launch FonePaw iPhone Data Recovery on your Win or Mac computer and connect your iPhone or iPad to the computer using USB connector. When your device appears on the program, click "Start Scan" to scan the Viber photos and videos. The scanning will be finished quickly.
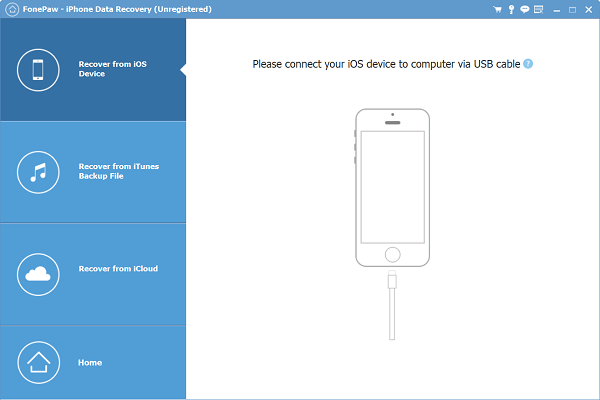
Step 2 Find Viber Photos & Videos
After the scanning, all data on your device will be displayed. Find the Viber photos and videos by clicking "App Photos"/ "App Videos" > "Viber" folder, where the Viber photos and videos on your device are stored. You can double click the photos to preview the photos.
Besides, here is a direct way to get Viber photos and videos back. Hit "Viber Attachments" to preview the photos and videos that you sent and received via Viber.
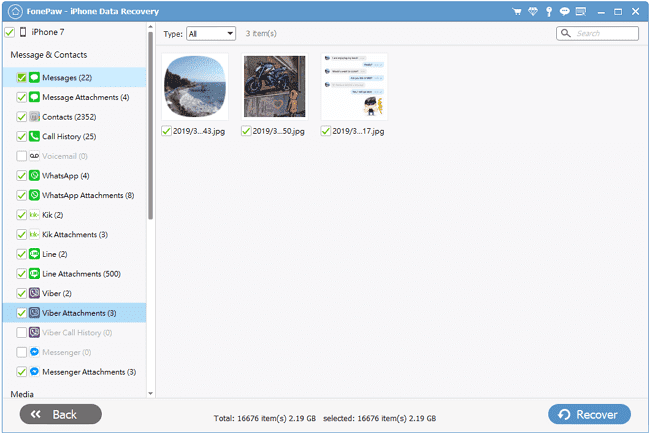
Tip: If you couldn't find the photos or videos on "App Photos"/ "App Videos", you can try "Camera Roll" to find the files.
Step 3 Recover Viber Photos and Videos
After you have found the Viber photos or videos that you need, tick the blank besides the name of the photo/video, and click "Recover" on the bottom right. The photos and videos will be recovered to your computer.
Note: It is also possible to restore Viber chat history and call history. Just click "Viber" and "Viber Call History" to find your targets.
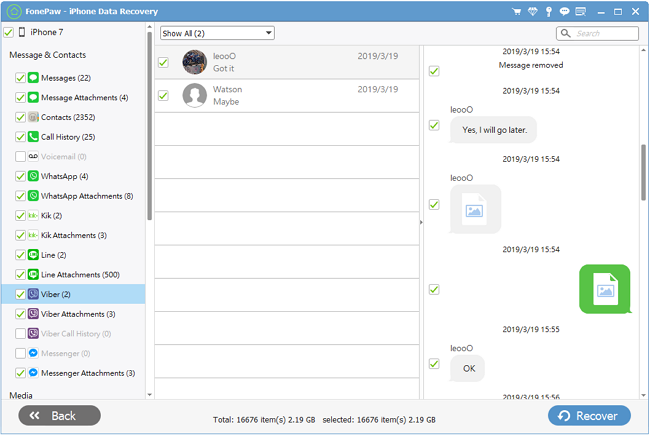
Part 2 Viber Photos & Videos Recovery via iCloud Backup
Besides scanning Viber data directly from your iOS device, FonePaw iPhone Data Recovery also supports photos and videos recovery using your iCloud backup. Here is the simple steps.
Step 1 Sign in iCloud Account
Open the FonePaw program and choose the last one "Recover from iCloud Backup File" mode. Sign in your iCloud account with Apple ID and password.
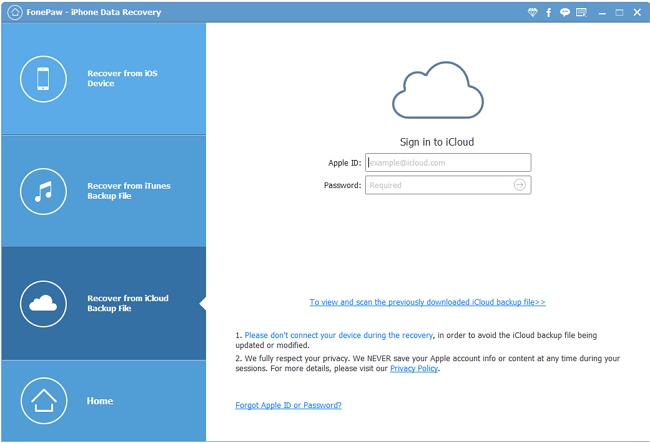
Step 2 Download a iCloud Backup File
From your iCloud backup files listed, choose the one that contains the Viber photos & videos that you need according to the backup date. And click "Download".
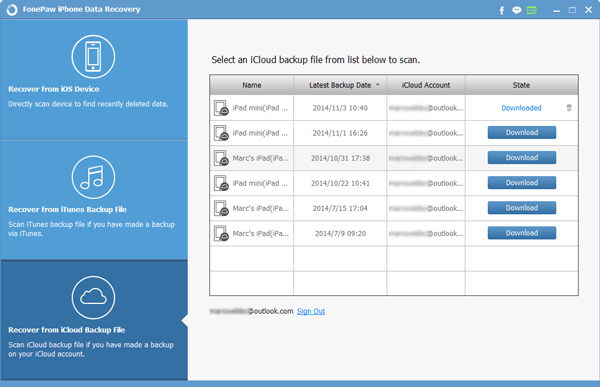
Step 3 Recover Viber Photos & Videos
After the backup files have been downloaded, on the left column, click "App Photos" or "App Videos" to locate the Viber media files. You can find the photos or videos on a folder named "Viber". Or go to "Viber Attachments" to preview them.
If not, you may go to the "Camera Roll" to find the files. Tick all the photos or videos that you want to recover, and click "Recover" button.

Part 3 No More Data Loss: Two Ways to Save Viber Photos & Videos
Although recovering Viber photos and videos via FonePaw iPhone Data Recovery is easy, it is better that you have made backup of the important photos and videos. There are two ways to back up Viber photos and videos on iPhone and iPad.
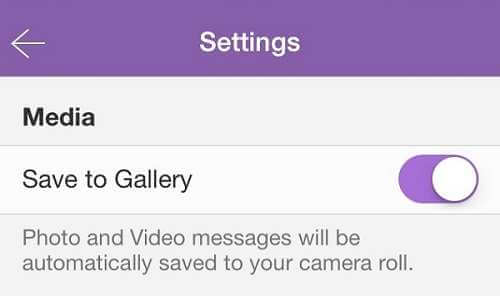
--Automatically Save to Camera Roll Launch Viber on iPhone or iPad, go to "More" > "Settings" > "Media" > "Save to Gallery". Toggle on the feature, photos messages you receive will be automatically saved on Camera Roll on the device.
--Manually Save to Camera Roll Tap on the photo or video you like, it will be displayed in full screen. Tap "Save" on the button, the photo or video will be saved on the Camera Roll.
Enjoy Viber with these methods in mind. If you have more questions about Viber, feel free to leave a message below. If you need help to recover WhatsApp (opens new window) data, FonePaw iPhone Data Recovery (opens new window)is also here for you.
Free Download Buy with 20% off Free Download Buy with 20% off


