Many people choose Microsoft PowerPoint to build a presentation file because the PPT can be saved as a video, which makes communication and presentation clearer.
Meanwhile, there are more people who opt for Google Slides, which allow collaboration and sharing among a group of people especially when members are working from home or when you are having a presentation with co-workers all around the world. All of you can work on the same slide simultaneously.
What's more, with steps in this post, you can turn your Google Slides into a video as well. By saving Google Slides into video, you can not only share the important points with co-workers who are absent for the meeting but also upload your great idea, products, or whatever you want to YouTube, Vimeo, which can drive more audiences to your speech and presentation.
Record a Google Slides Video
To save your Google Slides as a video, you will need a screen recorder first.
There are many screen record programs and here we'd like to introduce FonePaw Screen Recorder (opens new window), which has won many users around the world for its versatile functions.
In addition to meeting your need of making Google Slides into a video, you can even add voice over (opens new window) to your slides. Besides, if you have anything to highlight in the slide, you can add a line, text, or annotation to Google Slides video directly. It also enables you to take a screenshot during the recording. When you finish the recording, you can save the video in different formats, such as MP4, MOV, GIF.
If you are a speaker or a teacher, one of the most attractive features is that it can record the screen and the webcam at the same time (opens new window). In this way, you can do your speech and presentation vividly by showing your facial expressions or gestures.
Steps of Turning Google Slides into A Video
Here are the simple steps to turning Google Slides presentation into a video.
Step 1 Enable FonePaw Screen Recorder
To make the video, click here to download FonePaw Screen Recorder (opens new window) first.
Free Download Buy with 20% off Free Download Buy with 20% off
Open the recorder and you will see three options.

Choose Video Recorder and open the slides you need to record.
Step 2 Customize the Video
You can choose to record the whole screen or drag the cross cursor to customize the area and record the slides only. If you want to record yourself, you can turn on the webcam in the meantime.

Click the gear icon to set your preferences. You can save your video as WMV, MP4, or even GIF.
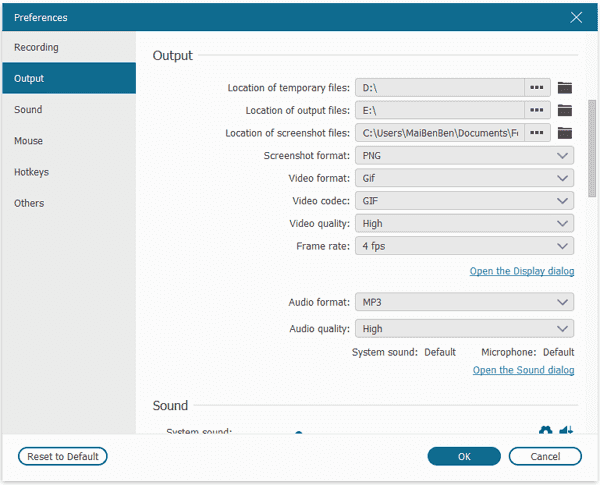
When everything is set, click REC to begin recording.
Step 3 Record your Google Slides
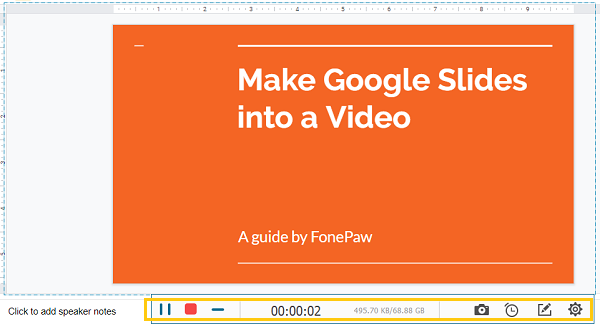
During the recording, you will notice the toolbar below.
Click the Pause button to stop the recording.
Screen Capture helps you take a screenshot during the recording.
Set record length allows you to decide the length of the video.
Edit makes it easy for you to draw and add text and annotation.
When you finish, click the red square button to end the recording.
Step 4 Export the Google Slides Video
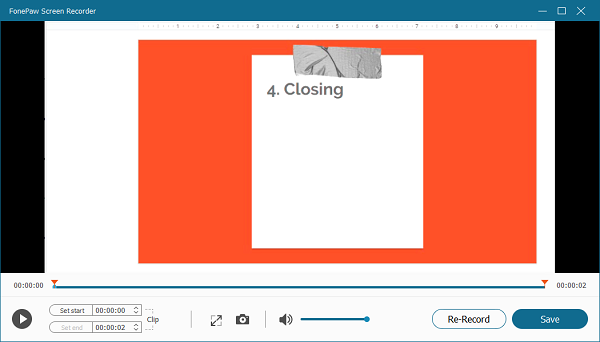
When you end the recording, you can preview the video in advance. If you are not satisfied with the presentation, click Re-Record to do it again. But the original one will not be saved. If everything is OK, click Save to select a saving path.
Before you send the Google Slides video to others or upload it to YouTube, you can edit the video (opens new window) to make it better. For example, you can cut the unsatisfactory part or add background music, effects, and subtitles to make your video more attractive.
Easy Tips for Google Slides
1. Add voice over to Google Slides
There are two ways to add sound to Google Slides.
First, insert audio directly.
Upload your audio to Google Drive in advance.
Go to Google Slides > Insert > Audio.
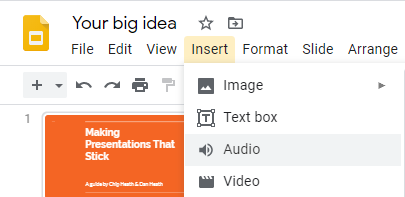
Select the audio and it will be added to the slides.
Second, insert the link of the audio.
You can embed the video on YouTube as the background sound of your slides.
Go to Google Slides > Insert > Video.
Copy the link of the video and select it.
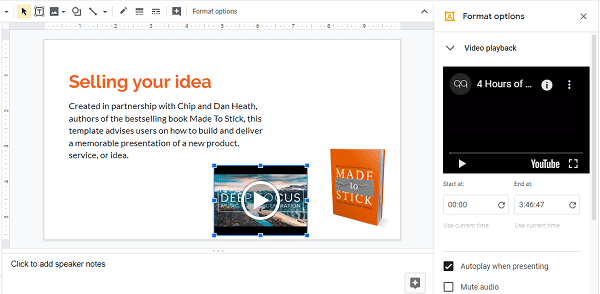
When the video is added, you can customize the size of the video and check Autoplay when presenting.
2. Upload Google Slides to YouTube
When you finish converting and editing the video, you can upload it to YouTube within several steps.
First, log in to your YouTube account.
Second, find the upload button in the upper right corner.
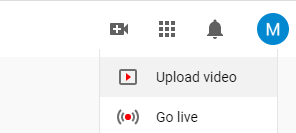
Third, click Upload Video and select your Google Slides video.
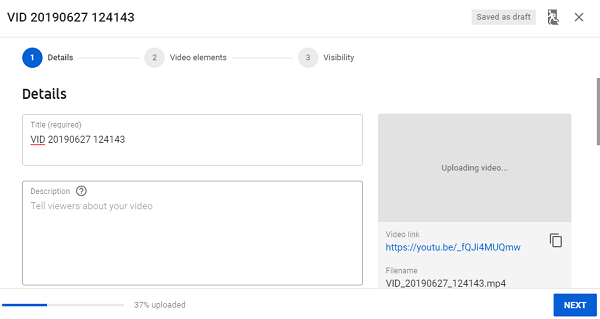
Fourth, edit the details of your video and click Publish to upload it.
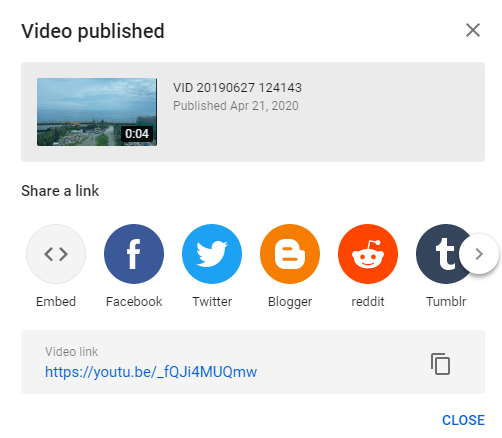
Finally, you can share the link to your social media or copy the link to others.
3. Convert Google Slides to PowerPoint
It’s easy to save Google Slides as a Microsoft PowerPoint file.
Open Google Slides in your browser.
Click File > Download > Microsoft PowerPoint (.pptx)
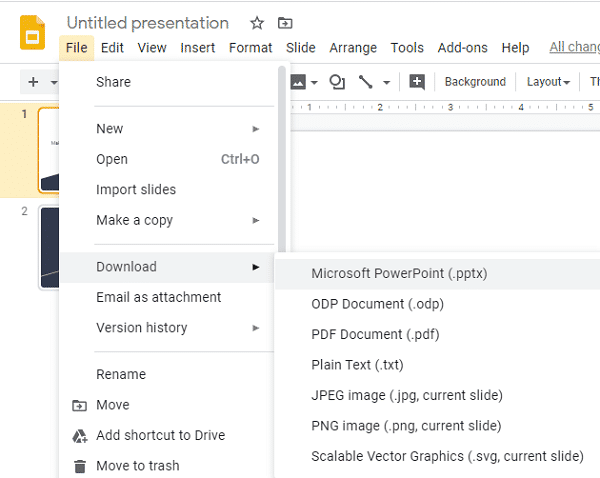
Your browser will download the PPT file automatically.


