What is Screen Record Timer?
Screen Record Timer feature is designed to automatically start the recording schedule of the video and audio. It records according to the length or the specific time you've set.
With so many great streaming videos and audio online, you don't have time for each one of them. If there is an interesting live stream or an internet radio program that you don't have time for, you will need a Screen Recorder with Timer to help you record them for later viewing or listening.
This post will introduce a screen & video recorder with a timer, which allows you to schedule video or radio recording for the streaming video or audio that you like. You can use it to schedule and record live video from Netflix, Hulu, Amazon Video, Facebook Live, YouTube, and streaming audio from internet radio stations, and more on PC and Mac.
Screen Recorder with Timer
The schedule video recording software introduced here is FonePaw Screen Recorder (opens new window). It can record live streaming videos and any other screen activities on Windows and Mac with a timer, providing two modes for scheduled video recording. You can either set the video length to let the video recording end automatically or schedule a recording task for the recorder to automatically start and end the recording.
The videos can be recorded with audio and saved as MP4, F4V, WMV, MOV, TS, AVI, GIF.
Free Download Buy with 20% off Free Download Buy with 20% off
Set a timer to automatically stop video recording
With FonePaw Screen Recorder, you can start a video recording and don't have to wait up next to the computer to stop the recording. You can simply set a timer to auto stop recording.
Step 1 Open FonePaw Screen Recorder. Go to Video Recorder.

Step 2 Click the first clock icon that says "Set record length". Enter the length of the streaming video that you are recording. If you want, tick "Shut down when stopping recording", which will shut down the computer when the recording stops.
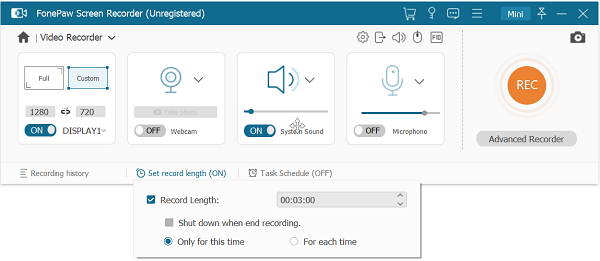
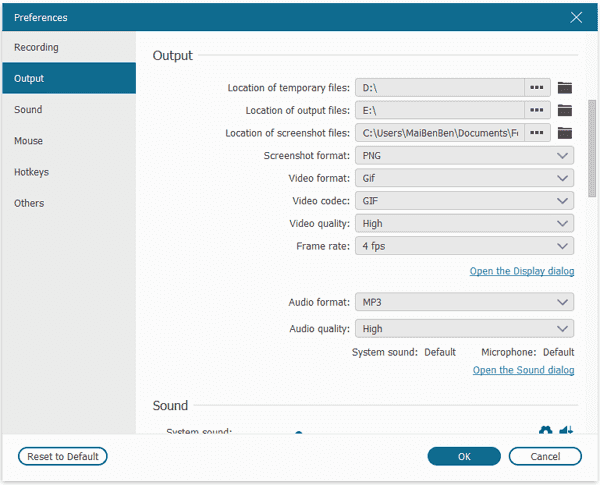
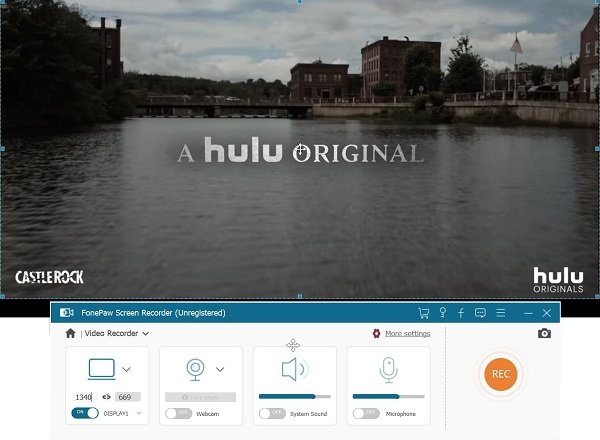
Step 3 Adjust the blue dash line to fit the video playback window, turn on System Sound and turn off Microphone. You can also click Output Settings to customize the video format, quality, frame rate, etc.
Step 4 When everything is ready, click the REC button to start the video recording. The recording will automatically stop when the video is finished. You should make sure the computer is on during the recording.
Schedule a video recording
FonePaw Screen Recorder can also automatically start and end video recording. It is perfect to record live videos, sports events, and more.
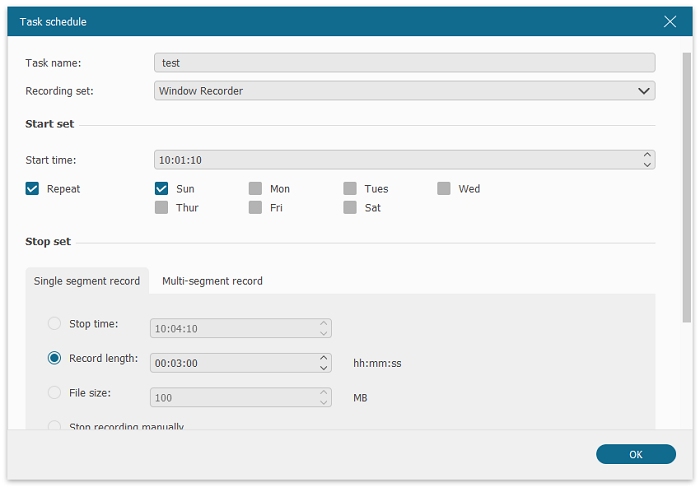
Step 1 On Video Recorder, click the Task Schedule.
Step 2 Click Add New Task. Then you can enter the time to start and stop recording. It can even repeat the scheduled recording on a specific day. For example, if your favorite show is on every Wednesday, tick Repeat > Wednesday.
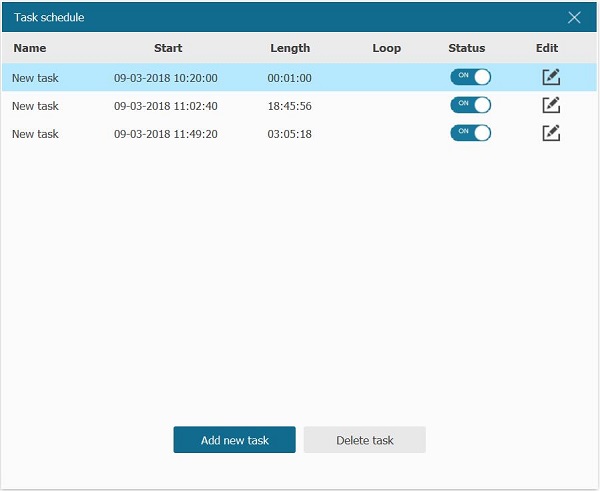
Step 3 Click OK. When it is time, the recorder will automatically start recording.
Note:
To make sure the recording can start automatically, do not shut down or lock the computer, or put the computer in sleep mode on the scheduled date and time. Make sure you have set the right recording area.
Scheduled Audio Recorder
FonePaw Screen Recorder is not only a video recorder with the timer but also a scheduled audio recorder (opens new window). To schedule, an audio/radio recording is also very simple. The audio can be recorded in MP3, AAC, M4A, WMA.
Free Download Buy with 20% off Free Download Buy with 20% off
Step 1 Open Audio Recorder.

Step 2 Toggle on System Sound. And if you need, you can turn on the Microphone to record external sound recorded by Microphone.
Step 3 Click the clock icon and set the length of the audio recording. Then the recorder will automatically end recording when the time is up.
Note: You can also click Task Schedule and set a new task to schedule an audio recording to start and stop automatically.


