Have you ever found it impossible to record the Mac screen with internal audio? Things often happen when interal audio needs to be recorded on a Mac computer, such as music, podcasts, or even PPT audio. As we all know, the Mac's recording function can only record external sounds using built-in microphones. The function cannot satisfy your demand, but don't worry, this article is going to tackle your problems.
How to Screen Record on Mac with Internal Audio Using QuickTime Player
QuickTime Player is a built-in program on a Mac, which has useful capabilities such as screen recording and audio recording. However, if you want to record internal audio and screen at the same time, it won't meet your needs. Luckily, the Soundflower plug-in will work it out.
Here are steps for you to follow.
Install Soundflower Plug-in and Change Audio Settings on Mac
Step 1. Simply download Spindflower Plugh-in from Github.

Then, decompress the downloaded file and run the installer. Due to a security warning, you may need to grant access by going to the "Apple menu > System Preferences > Security & Privacy" to proceed with the installation.
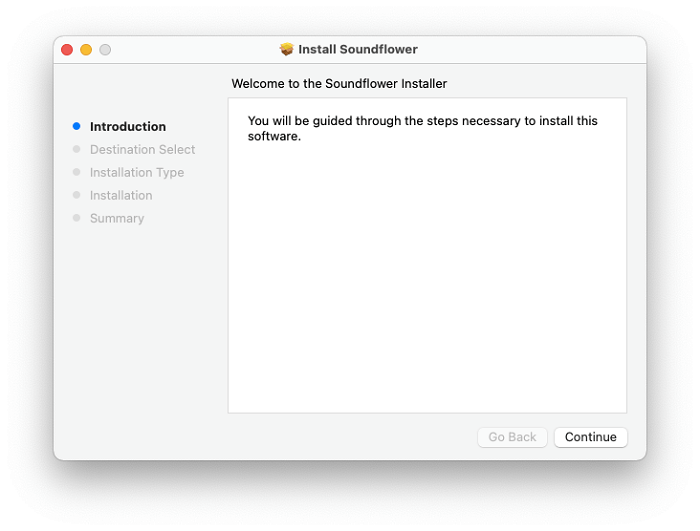
Step 2. The audio device should be configured in order to record the screen with internal audio. Audio MIDI Setup can be found in "Finder > Applications > Utilities".
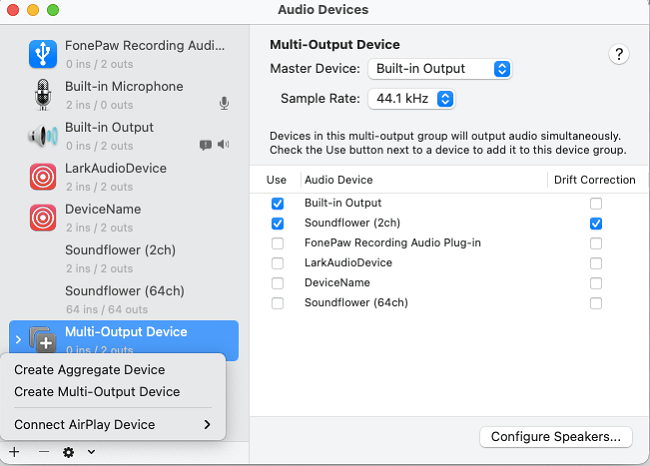
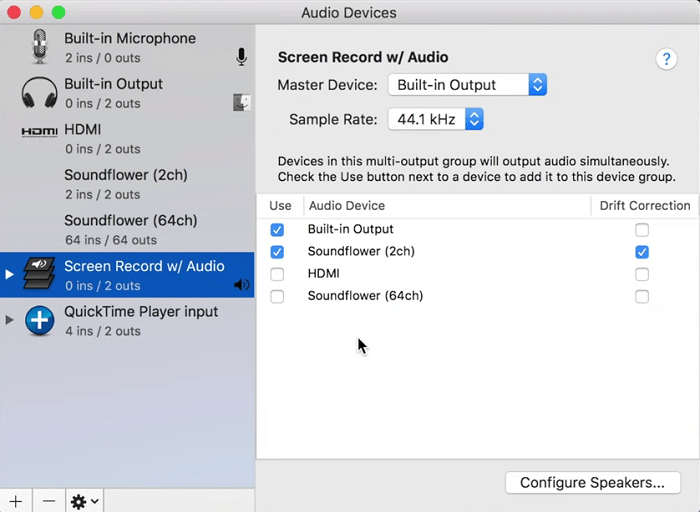
Step 3. Clicking the "+" button in the lower left corner to add an aggregate device.
Step 4. Pick devices including "Built-in Microphone" or "External Microphone" and "Soundflower (2ch)" to let them show in the recording video simultaneously.
Step 5. Turn to "System Preferences > Sound" and choose Aggregate Device that you have set up.
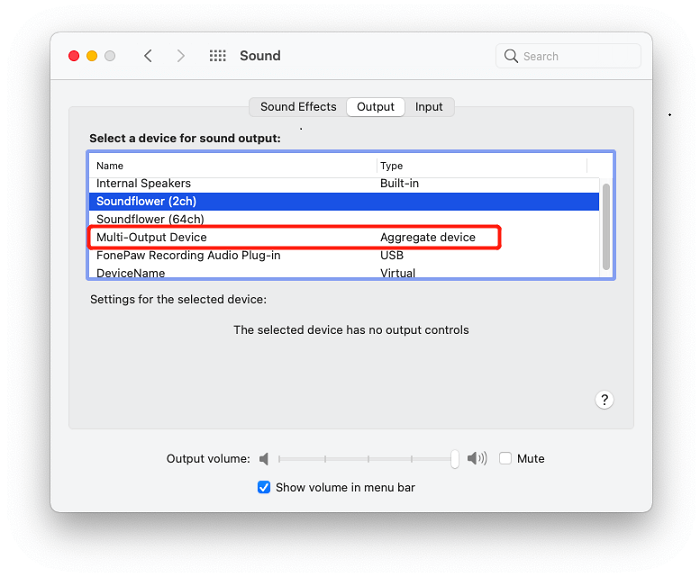
Now, you're all set to use QuickTime Player to record your Mac screen with internal audio.
Use QuickTime Player to Screen Record on Mac with Internal Audio
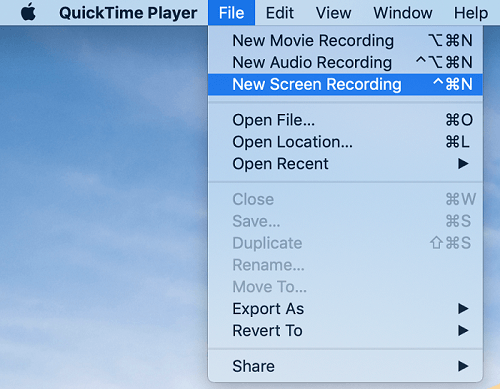
Step 1. Launch QuickTime Player, and click "File> New Screen Recording" to initiate the recording bar. Once it appears, click on "Options" and check "Aggregate Device" in the Microphone setting.
Step 2. With one hit on the Record button after the audio settings are complete, screen recording will start right away! You will be asked by QuickTime Player to grant recording rights.
Additionally, you can choose whether to record the entire screen or only the specified portion.
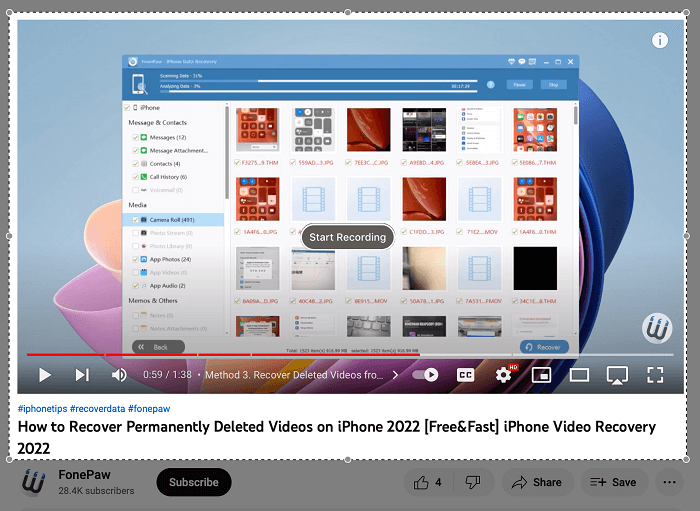
Step 3. Click the Stop button after the recording is finished so that QuickTime Player may automatically save it to the specific folder on your Mac. If you need to cease recording, please press "Option" and hit the Record button. Hit it again to continue
How to Screen Record on Mac with Internal Audio Using FonePaw Screen Recorder
FonePaw Screen Recorder is a superb screen recorder for iMac and MacBook. It can suit practically all of your screen recording needs and is a wonderful alternative to Mac's built-in recording tool. Don't pass up this essential screen recorder if your Mac is running Mac OS X 10.12 or later (Big Sur and Monterey are also supported).
Free Download Buy with 20% off Free Download Buy with 20% off
- Easier operation than QuickTime Player when recording the Mac screen with internal audio.
- More output formats are supported, such as MOV, MP4, M4V, and GIF, which effectively makes the video file size smaller.
- Recording screen and webcam simultaneously (while QuickTime Player cannot).
- Taking screenshots and adding real-time annotations are supported during the recording process, which is useful for creating teaching videos.
- FonePaw Screen Recorder offers much more customizable settings than QuickTime Player which only provides basic functions for video recording.
Now let's see how to use FonePaw Screen Recorder to make Mac screen recordings with internal audio. You can watch the video tutorial or follow the step-by-step instructions below.
Step 1. Choose Video Recorder and Customize your settings
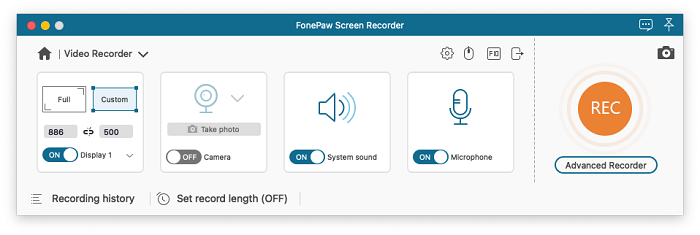
After installing FonePaw Screen Recorder, launch it. Hit the "Video Recorder" icon from its main menu.

With FonePaw Screen Recorder, you may record the entire screen or any size at will. So, please adjust the recording area in the Video Recorder's options as you want.
Don't forget to turn on System Sound and Microphone options to record the Mac screen with internal audio. To get better performance, you can also customize the recording volume.
Step 2. Start to record the Mac screen with internal audio
When all settings are as you desire, simply hit the large "REC" icon on the screen.
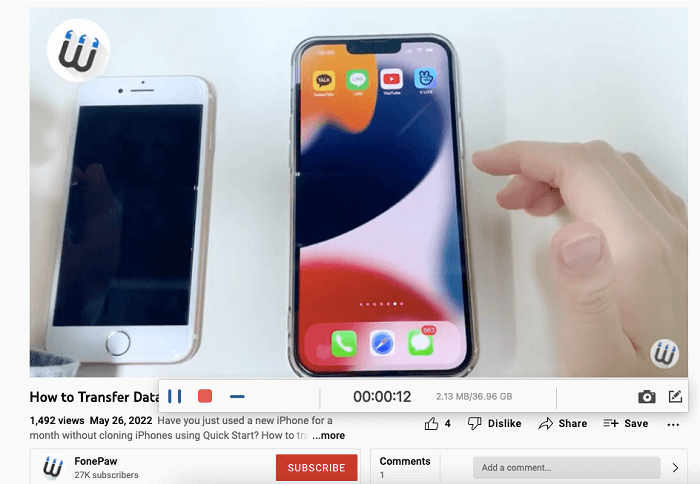
After counting down from 3, FonePaw Screen Recorder will begin to capture the screen area you have set. Meanwhile, you can unfold the floating bar to add annotations and effects, set a recording length, and do more during the screen recording on Mac.
Step 3. Stop and save the recording file
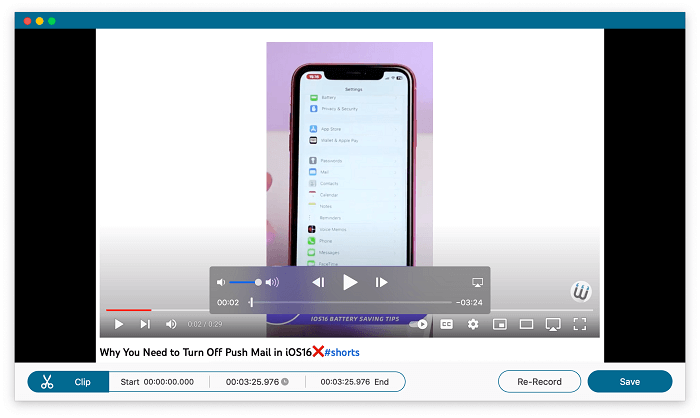
Please press the red square icon to cease the screen capture after the recording is complete. Then you can preview and edit the video with internal audio you recorded.
The video will be saved to the location you have set, and it will also be conveniently accessible in FonePaw's Recording history.
FAQs About Screen Recording on Mac with Internal Audio
Can QuickTime Record Internal Sound?
As we mention in the first part, QuickTime can record video and microphone sound. To screen record on Mac with internal audio, you need to download a third-party extension like Soundflower and change your audio settings accordingly.
How Do I Record Internal Audio on My Mac Without External Audio?
There are two ways to record. One is to install an audio plug-in for QuickTime Player. The other is to utilize A third-party screen recorder - FonePaw Screen Recorder. The second one is more recommended, especially for those who don't like complex set-ups, because there is no need to manually install the plug-in and change the default sound output of your Mac system with the FonePaw tool.
Conclusion
Generally speaking, there is no straight way to record the Mac screen with internal audio. As mentioned above, QuickTime Player can not meet your demand without installing the Soundflower extension. Now, you can start to utilize FonePaw Screen Recorder which we have introduced to you. And to let you have a better screen recording experience, FonePaw Screen Recorder provides you with more functions and convenient operations.
