YouTube is one of the most popular streaming platforms where users can watch all kinds of videos and listen to music. However, it doesn’t come with a download feature. If you pay for a premium subscription, you can save the video to your YouTube account for a period of time. But the membership function is not supported in some countries and regions. What's more, once the subscription expires, you can no longer access them.
So, if you want to save some interesting YouTube video clips on your Mac and then share with your friends, you need to use third-party download software or video recording programs. In this article, we've concluded 4 useful ways, including Mac embeded recording tools and third-party YouTube recorders, to help you record YouTube videos on Mac effortlessly.
The Best Tool to Record a YouTube Video on Mac
Although Mac comes with a recording tool--QuickTime Player, FonePaw Screen Recorder is still our most recommended screen recorder for it has multiple functions, needs only simple operation, and comes with an intuitive user interface. FonePaw Screen Recorder is a top-ranked program that can record anything on screen with audio and webcam. It can record both internal system audio and external microphone sound, which can't be done with QuickTime Player.
In addition, this software has more than 20 recording modes, including game recording, window recording, phone recording and so on. With FonePaw Screen Recorder, you can also add annotations during the recording, and edit the video files after the recording. This app meets almost all your recording needs.
- Record YouTube video and internal audio at the same time.
- Capture both things on screen and webcam.
- Support a wide range of output formats, such as MOV, MP4, and M4V.
- Preserve high-definition video quality while taking up less disk memory.
- Provide Task Schedule function to start and end recording automatically.
- Build in multiple recording modes such as window recorder to avoid interference.
Let’s see how to record a YouTube Video on Mac with FonePaw Screen Recorder.
Free Download Buy with 20% off Free Download Buy with 20% off
Step 1. Launch FonePaw Screen Recorder.
Free download FonePaw Screen Recorder and install it on your Mac. Run the program and click "Free Trial" to go to the next page. Then, choose "Video Recorder" on the home page.

Step 2. Configure the settings.
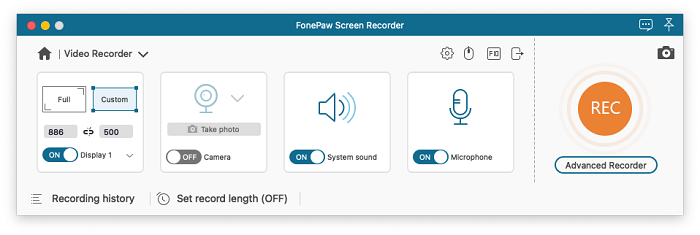
Next, adjust recording settings. You can select "Full" to record the whole screen or choose "Custom" to adjust recording area that you want. And then configurate webcam, speaker and microphone settings as you need.
Step 3. Start screen recording on Mac.
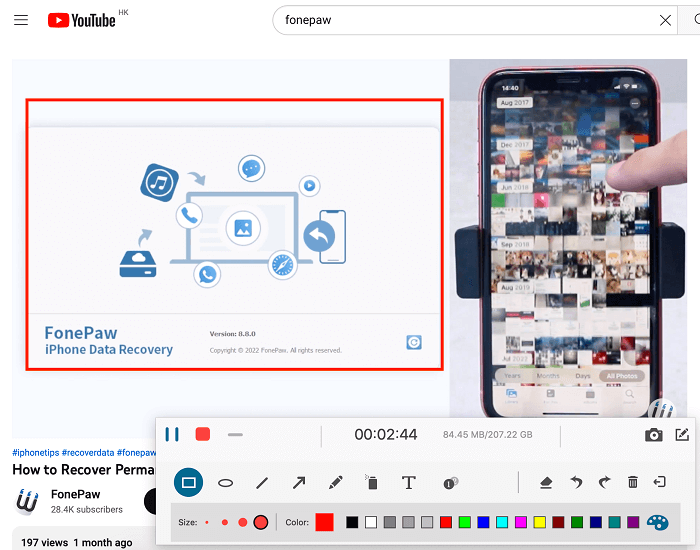
Then, click "REC" to start recording. While capturing the screen, you can also click the menu bar to draw lines or add annotations to emphasize some key points.
Step 4. Edit and save recording.
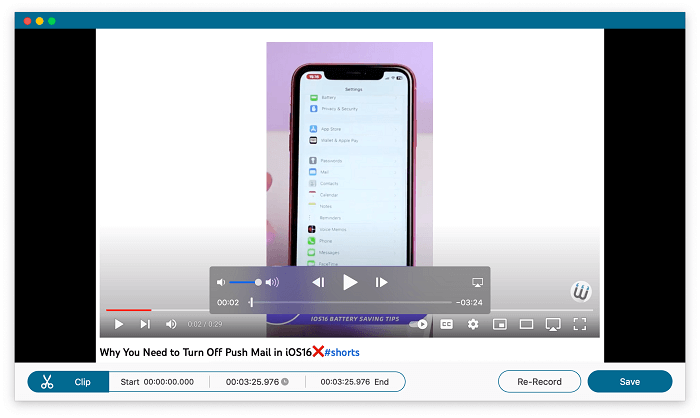
When the recording is complete, hit the "Stop" button in the menu bar. Then it will go to the editing page where you can review and trim the video. Then, click on "Save" to keep your recording file. You can check it in “Recording history” in the main page.
Record a YouTube Video on Mac with QuickTime Player
QuickTime Player is a screen recording tool that Mac comes with. It was developed by Apple and is free to use on Mac. QuickTime Player lets you make common movie edits like trimming, rearranging, and rotating. It also supports creating a recording of your entire Mac screen or selecting just a portion of it.
However, QuickTime Player can only record the screen and microphone sound. You'll need another program--Sondflower to record the system radio. Therefore, it’s fine if you want to record a short video for a second edit with your own voice recording. But if you want to record a YouTube video or music and enjoy them offline, it doesn’t work for you.
In addition, QuickTime Player only supports recording video to MOV format, which may take up a lot of disk memory. Here’s how to use QuickTime Player to record a YouTube video.
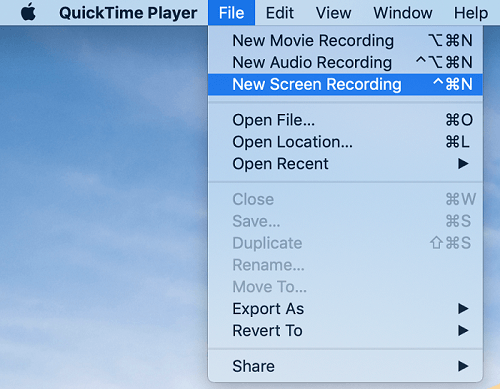
Step 1. Open QuickTime Player from your Applications folder on your Mac. Then, click "File" from the menu bar at the top of the screen and choose "New Screen Recording".
Step 2. Then, click the arrow button next to the "REC" icon in the control panel. You can select the recording options: Microphone, Camera, and Recording Quality. And then, drag the slider to adjust the sound volumes.
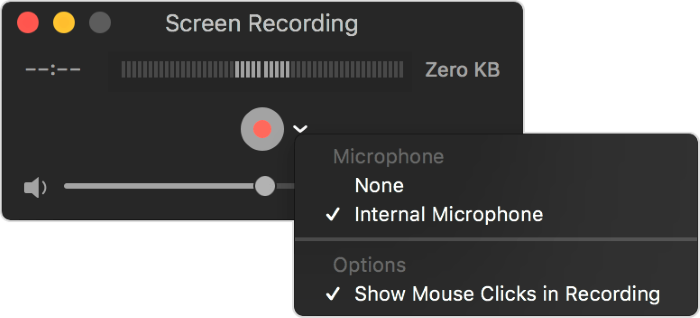
Step 3. Then click the Rec button and customize the recording area to start recording.
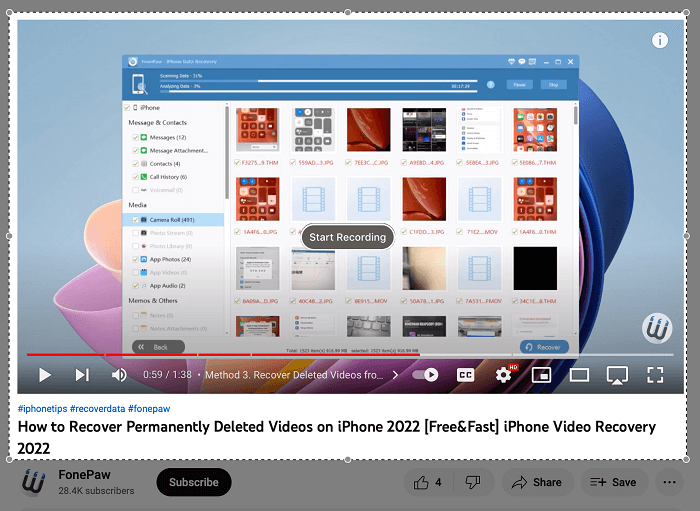
Step 4. To stop recording, click the "REC" button again. Finally, you can preview, name and save the video.
Record a YouTube Video on Mac with Screenshot Toolbar
Screenshot Toolbar is a built-in tool for Mac with macOS Mojave or later. So, it's also convenient for Mac users. Screenshot Tool is flexible enough to be used for capturing and recording screens. However, the same as QuickTime Player, internal audio recording is also not available with Screenshot Toolbar.
Here’s how to use Screenshot Toolbar to record screen on Mac:
Step 1. Press "Command+Shift+5" to launch Screenshot Toolbar on your Mac.
Step 2. Then, you'll see several icons on the menu bar, including screenshot settings and recording settings. You can choose to record the entire screen, or adjust a specific area. Click the "Options" button, you can choose the output location, set Timer, and customize Microphone and other features.
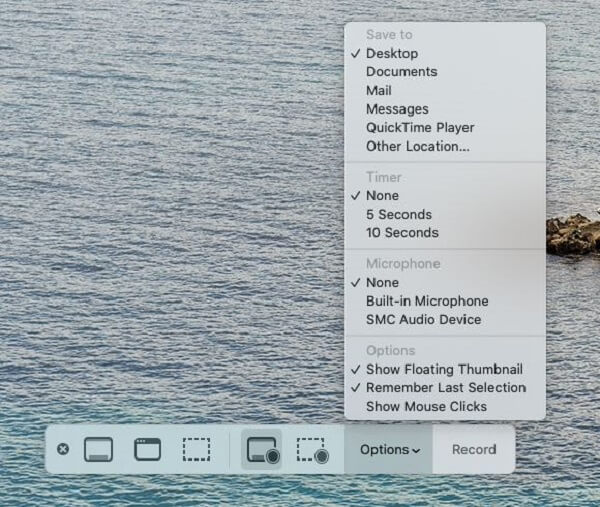
Step 3. Once you have finished adjusting, click the "Record" button to start recording the screen.
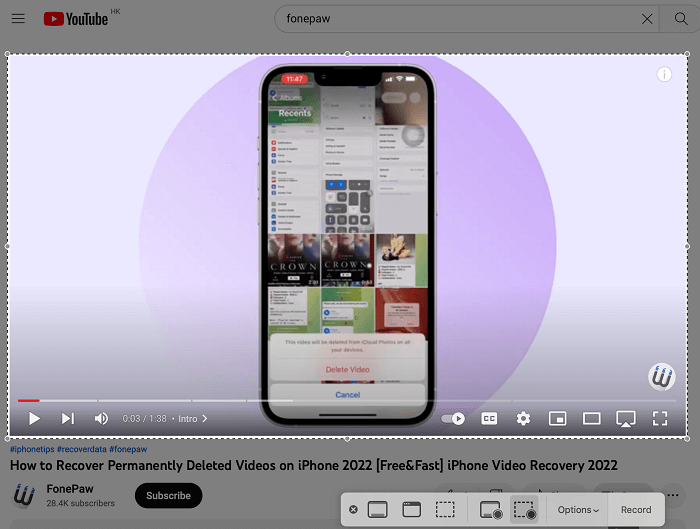
Step 4. To stop recording, click the "Stop" button in the menu bar, or use the hotkeys "Command+Control+Esc". Then, check the saved video in the disk folder.

Extra Tip: How to Download a YouTube Video on Mac
While convenient, video recording can be time-consuming if you want to save a long video or grab multiple video clips at the same time. In this case, it is recommended to use a YouTube downloader, which can have the work done with simple clicks.
VideoHunter is a powerful downloader. It allows you to download 1080p, 4k and even 8K videos from a variety of websites including YouTube, Facebook, Twitter and more. VideoHunter supports batch download YouTube playlists and handles different download tasks at the same time, saving time and effort. Let's go through its detailed download steps.
Step 1. Install and run VideoHunter on your Mac. And then locate the video you want to save on the YouTube webpage. Copy the video URL by right-clicking the address bar.
Step 2. Paste the video URL to the downloader's inputting bar, and click "Analyze".
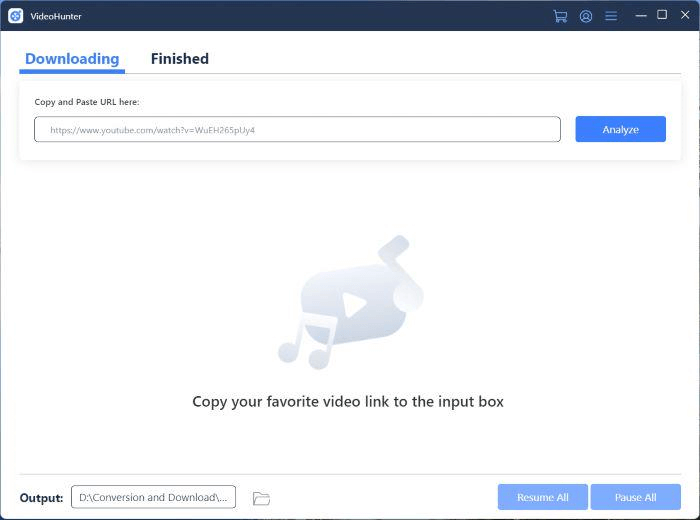
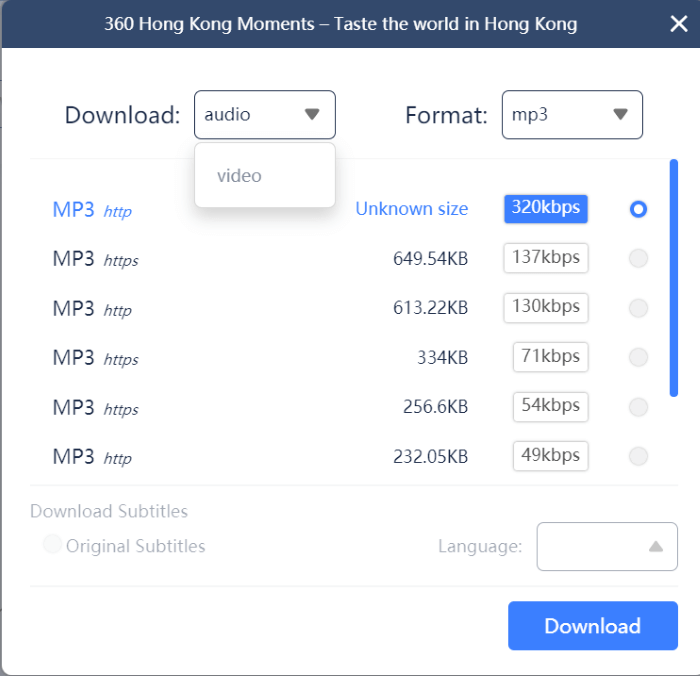
Step 3. When the conversion is complete, a window will pop up with the output setting options including download format, quality and subtitles. Choose and then hit "Download".
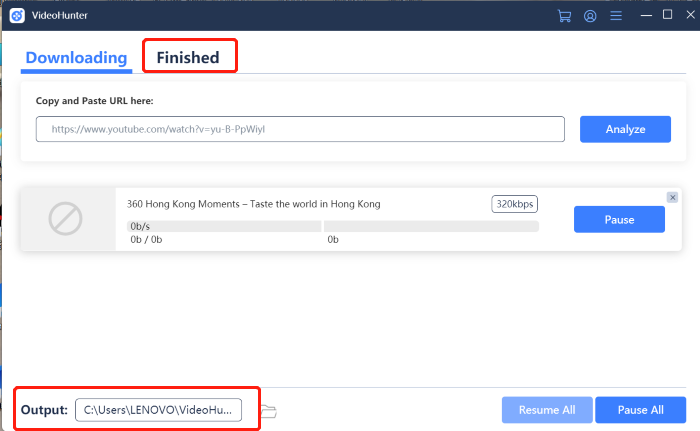
Step 4. When the download is finished, click the "Finished" button to view the downloaded video in your local folder.
Conclusion
Above all are 4 feasible ways to record YouTube videos on Mac. Quicktime Player and Screenshot Toolbar are two Mac embeded recorders, which are easy to use. However, either of them can record internal system audio.
Therefore, we recommend FonePaw Screen Recorder more. It is a versatile tool that allows you to record both the screen and webcam, system audio and microphone sound. In addition, it provides different screen recording modes to meet different needs. It has several output formats and preserves original video quality.
VideoHunter will make things easier if you want to grab YouTube playlists or channels at a time. It helps you get the videos you want easily and quickly with simple clicks.
