Discord is somewhere you can make friends with people from all walks of life and make low-latency voice and video calls through the internet. However, when it comes to recording Discord calls, people get lost.
Actually, Discord doesn't offer an option to record audio and video calls. That's probably why you're looking for a workable way here. Thankfully, there are 4 Discord call recorders that work like a charm. Now, let's get to learn how to record Discord audio calls and video calls.
Best Method. Use FonePaw Screen Recorder to Record Discord Calls
The first method is to turn to third-party tools such as FonePaw Screen Recorder, which is taking the lead in desktop recording technology. As a versatile recorder, it enables users to record Discord audio and video calls without latency. Meanwhile, you can use it to record Discord audio and streams on any server with up to lossless quality. Better yet, you can record gameplay when interacting with your gaming team on Discord.
Free Download Buy with 20% off Free Download Buy with 20% off
- 🎥 Lossless Recording Quality - This dedicated recorder encodes your recording with advanced codecs like H.264, H.265, AAC, HEVC, etc. Also, it can record any onscreen activities/audio with up to lossless quality.
- 💾 Popular Output Formats - FonePaw Screen Recorder supports recording Discord audio in MP3, M4A, AAC, FLAC, WAV, WMA as well as videos in WMV, MP4, MOV, F4V, WebM, and MPEG-TS.
- 💻 Various Recording Modes - With up to 9 recording modes, FonePaw Screen Recorder cater for any scenario including gameplay, live videos, speeches, lectures, online meeting, and so on.
- 📸 Webcam Overlay Included - While recording the screen, you can record a webcam of yourself along the way. Moreover, you can set up the resolution, style, opacity, and position for a custom overlay.
- 📝 Real-Time Annotation - You can add real-time drawings, notes, shapes, images, steps, and highlights to make a detailed recording. Also, you can apply keystroke effects to get focus.
- 🎬 Practical Video Editing - After the recording ends, you can trim, split, compress, apply fade-in & fade-out effects, or add segments if necessary.
Download FonePaw Screen Recorder and install it on your computer. And then you can either follow the quick video guide or the text tutorial to record Discord video and audio calls.
Free Download Buy with 20% off Free Download Buy with 20% off
How to Record Discord Audio with FonePaw
First off, let's see how to record Discord audio calls with FonePaw Screen Recorder. Also, it's the same to record Discord audio in channels and servers you want.
STEP 1. Open the FonePaw recorder and click Audio Recorder.

STEP 2. Enable System Sound and Microphone as you need, and adjust their volume. You can also do the Sound Check before recording. For better sound quality, it's recommended to enable Microphone noise cancellation and Microphone enhancement.

STEP 3. Before you begin the Audio chat, hit REC to record. Then, back to Discord and make an audio call.
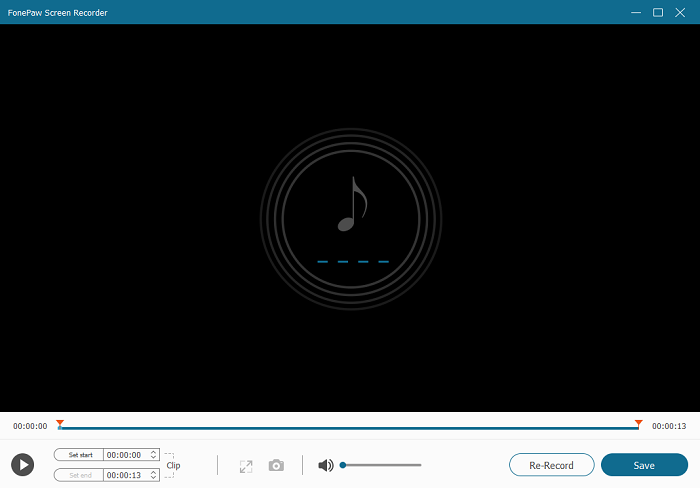
STEP 4. When your audio call finishes, hit the red square button to end the recording. You can preview the recorded audio, cut the unwanted part and click Save to keep it.
How to Record Discord Video Calls with FonePaw
Now, you may want to know how to record Discord video calls in instant messages, group chats, or channels. Better yet, you can follow the steps below to record Discord streams as well.
Free Download Buy with 20% off Free Download Buy with 20% off
STEP 1. Download FonePaw Screen Recorder. Open it and click Video Recorder.
STEP 2. To avoid disturbing by other programs, you should select the Discord window as the fixed area for recording. Meanwhile, you can turn on the webcam/system sound/microphone options.

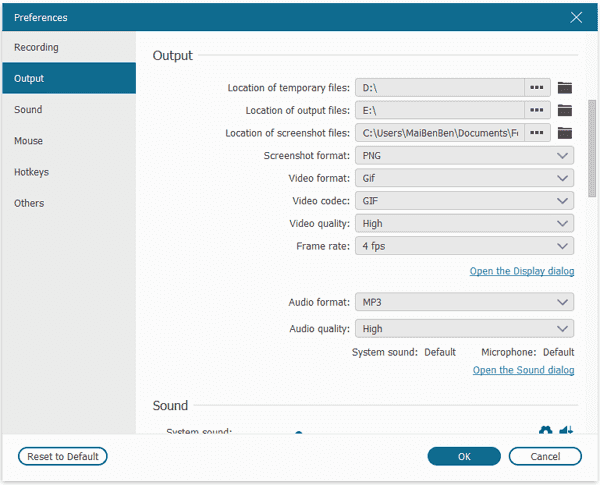
STEP 3. You can also go to preferences to set up the output format, save location, video quality, whether to include mouse action in your recording and more.
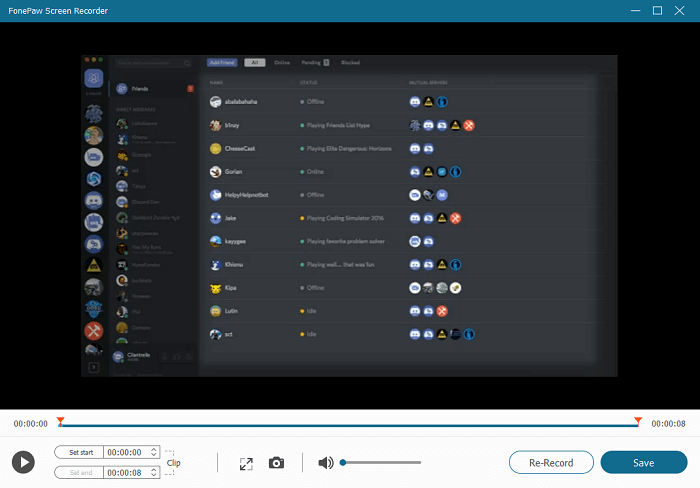
STEP 4. Click the REC button to start recording, and then join a video call. Similarly, end the recording with the red button, and you can preview and use the inbuilt trimmer to make a clip.
Check the video below if you want to learn more about this method.
Method 2. Use Craig Bot to Record Discord Audio
Craig was first introduced in 2017 as the official recording bot on Discord. Since then, you're able to invite Craig Bot to join your server and start recording Discord audio automatically. With its multi-track recording, Craig will generate a separate audio file for each speaker.
This seems wonderful for podcasts, but it's indeed cumbersome if you want a continuous audio recording. Also, please note that only the server owner can record Discord audio with Craig Bot. The recording will be up to 6 hours at max and kept for 7 days after it's unavailable.
How to Use Craig Bot on Windows/Mac
You may want to walk through the tutorial below and see how to record Discord audio via Craig Bot on Windows and Mac computers. It's actually as easy as falling off a log.
STEP 1. Launch the Discord app and log in to your account.
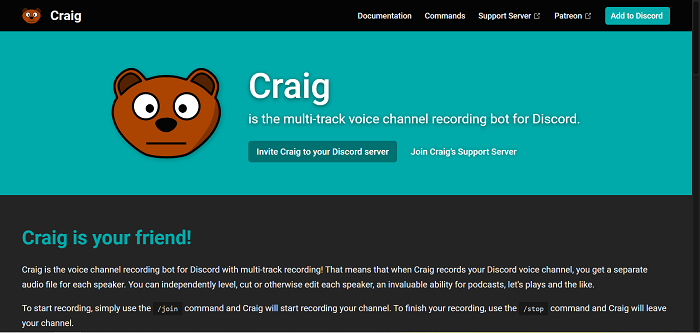
STEP 2. Go to the official web of Craig and click the Invite Craig to your Discord server.
STEP 3. In the new window, you need to select Your server and click on the Authorize button.
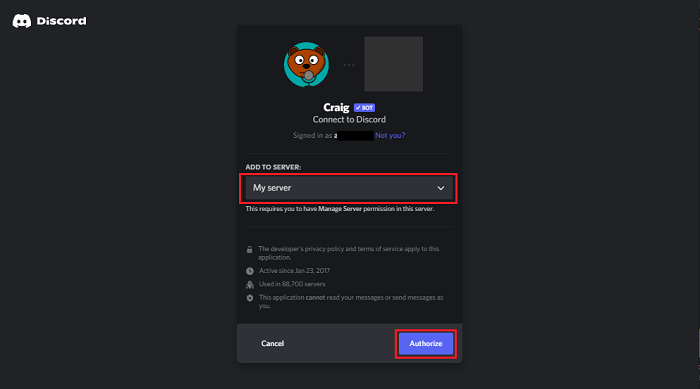
STEP 4. Now the Craig bot is on your server. You can exit the page and go to your Discord app.
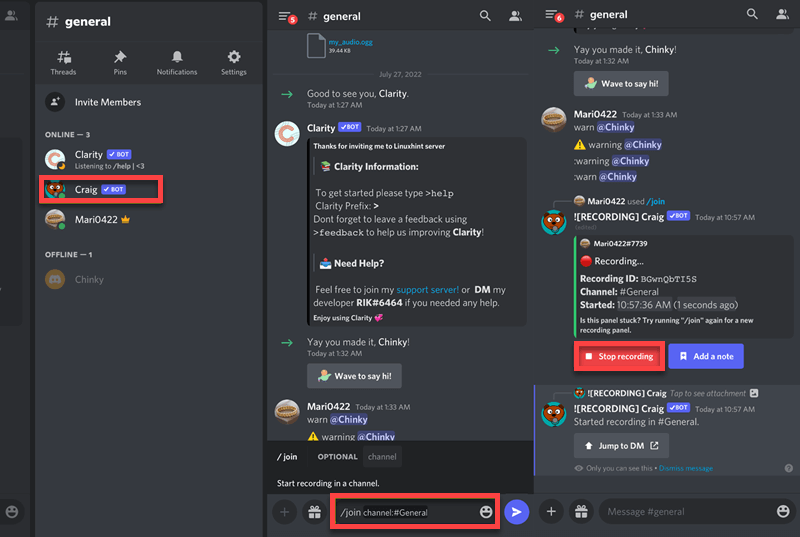
STEP 5. To start your recording, type in the command craig:, join to invite the bot. The Craig bot will join in the conversation and start recording.
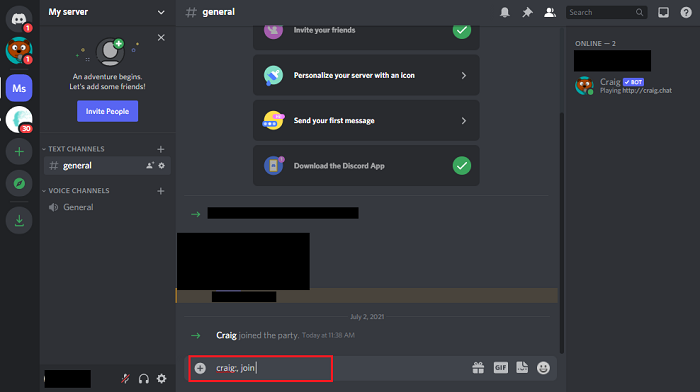
STEP 6. To end the recording simply type craig:, leave. This will stop Craig from recording and the bot will leave the voice channel.
STEP 7. After finishing the recording, Craig will send download links to you for downloading the audio files.
How to Use Craig Bot on iPhone/Android
The procedure to record Discord audio using Craig Bot is basically the same as the tutorial above, but there are a few differences. To make it clear to you, let's check out the details below.
STEP 1. Visit the Craig Bot site on your browser on mobile and select Invite Craig to your Discord server.
STEP 2. Log in to your Discord account and select a server to which you want to add Craig. Then, tap Continue and select Authorise.
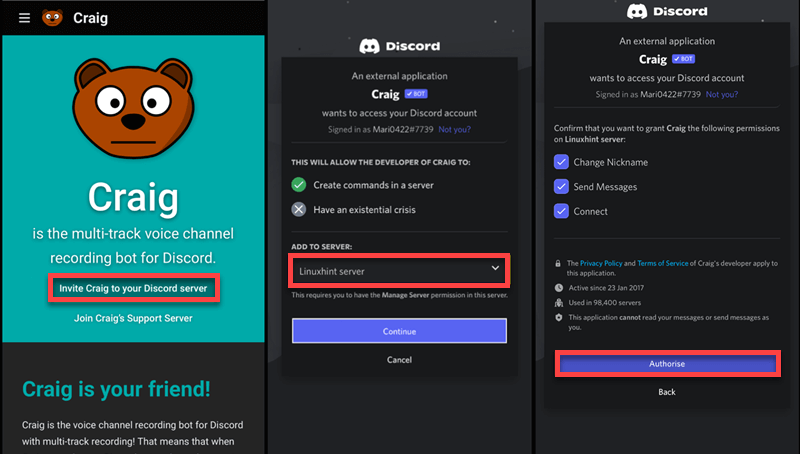
STEP 3. Now, open your Discord app and switch to the selected server. You'll find Craig as one of the server members.
STEP 4. Go to a channel and write out the /join command with the channel tab. Then, deliver this message and you'll be informed a message like Started recording in #channel.
STEP 5. When done, tap Stop recording and Craig will stop and send you a download link for the recording.
Method 3. Use Audacity to Record Discord Calls
Audacity is a free and open-source audio editor and recorder for Windows, Mac OS X, GNU/Linux, and other operating systems. It allows users to record sound and edit sound clips.
If you want to simply record Discord audios, then Audacity can be a good choice. But if you intend to record videos, you may need to use other apps for Audacity does not support this functionality. Besides, the complicated user interface with plenty of confusing icons and buttons makes this app a little daunting for the first-time user.
How to Record Discord Audio with Audacity
STEP 1. Download Audacity and launch the app.
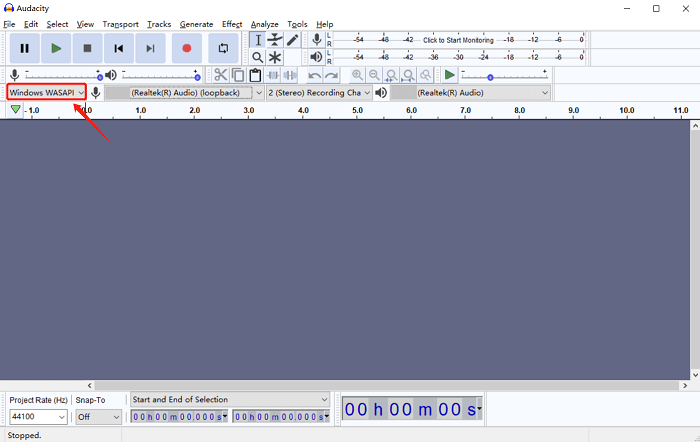
STEP 2. Given that most of you would like to record everyone's sound in the Discord call. You have to select Windows WASAPI as Audio Host, Recording Device with loopback (commonly the speaker), 2 (Stereo) Recording Channels, and Player Device accordingly on the toolbar.
 Note:
Note:-
If you just want to record your own voice, you should set MME as Audio Host, and then choose the input and output device you want to use.
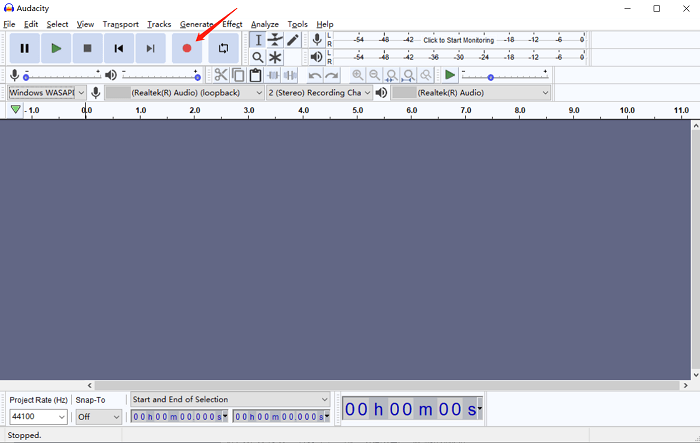
STEP 3. When you get prepared for a Discord call, click the red circular button to start recording.
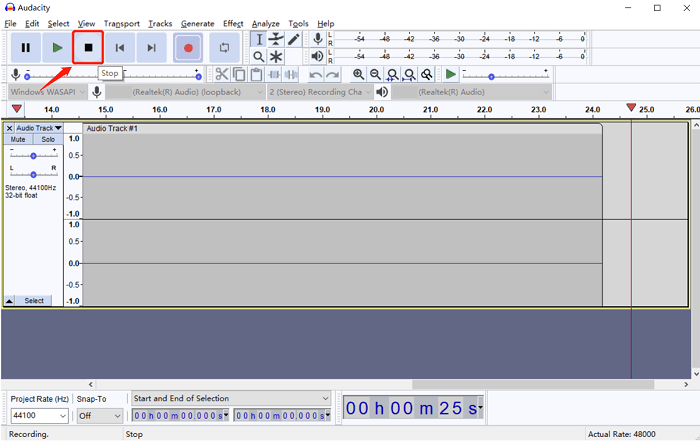
STEP 4. To end the audio recording, hit the black square button on the toolbar.
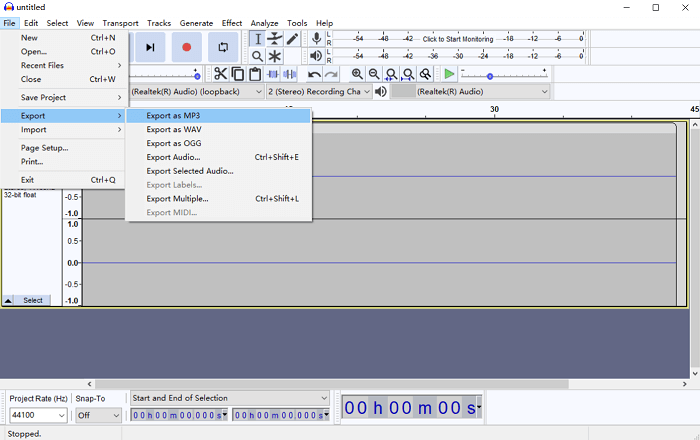
STEP 5. Click File on the top menu bar, and select Export to choose a format and location to save your audio file.
Method 4. Use OBS to Record Discord Calls
The last available tool for recording Discord audios and videos is OBS (Open Broadcast Studio). OBS is a free open-source software suite that is widely used for recording and live streaming. Besides real-time video and audio mixing and capturing, OBS also allows you to stream gameplay directly to Twitch, YouTube, or other services, with filters and an intuitive audio mixer making your video better performance. It's greatly applicable for recording calls on Discord.
How to Record Discord Audio with OBS
STEP 1. Download OBS, and launch it.
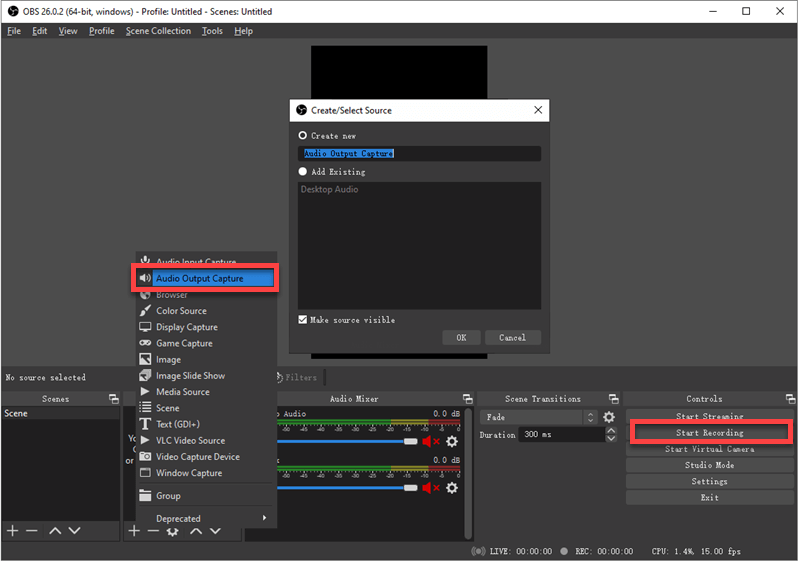
STEP 2. Click “+” under “Sources”. It's near the bottom-left corner of OBS. From the appearing list of sources, select Audio Output Capture.
STEP 3. Name the audio source you just added, and then click OK.
STEP 4. Open the drop-down menu and choose the device you are going to record, usually the speaker, tick Use Device Timestamps, and then click “OK”. Now the program can capture your desktop audio, you can test it before you are going to record.
STEP 5. Click Start Recording under Controls on the right side.
How to Record Discord Video Calls with OBS
It's also simple to record Discord video calls with OBS. You may want to learn the way around it by the steps as follows. All easy-peasy.
STEP 1. Launch OBS Studio on your Windows/Mac.
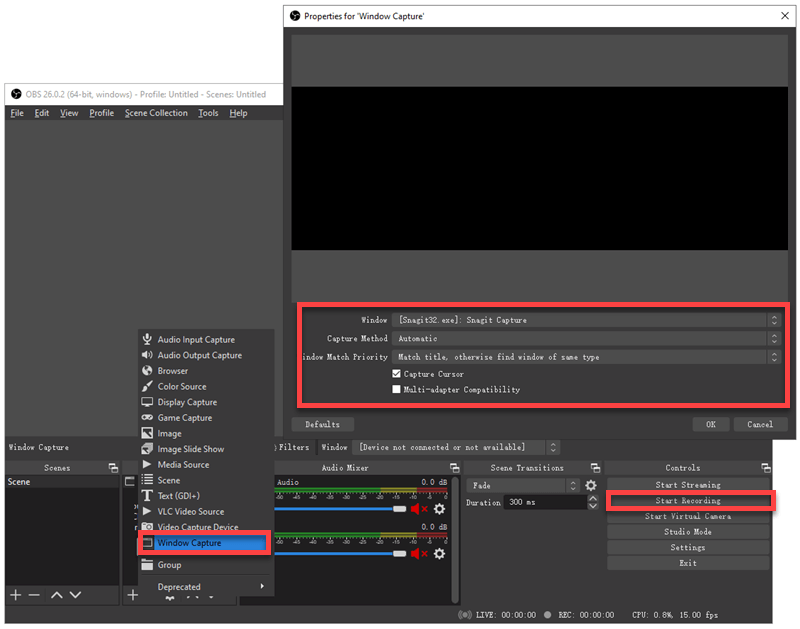
STEP 2. Click the + button in the Sources widget and choose Window Capture. Then, change the name if necessary and click OK to save the source.
STEP 3. Now, choose a Window, Capture Method, and Window Match Priority for your liking. You may also tick up the Capture Cursor or Client Area if needed. Then, click OK to save the changes.
STEP 4. Click Start Recording and back to your Discord to make a video call.
STEP 5. When done, click Stop Recording and get the file in the output folder.
FAQs About Discord Recording
You may have some lingering questions in mind about the Discord recording. If so, you'll probably resolve your misgivings with the answers below.
Is There an Official Way to Record Discord Audio/Video Calls?
No. Discord doesn't offer any recording feature for audio and video calls. Though Discord introduced Craig Bot to record audio in channels, it cannot be used to record Discord audio and video calls. So, how to record Discord video calls and audio calls? You can try out the methods below and get it solved.
Is Discord recording illegal?
It depends. If you're using Discord to contact friends and record Discord calls with authorization from your friends, it's totally okay. However, if your call involves something bad, you may get into trouble.
Can I record a Discord stream?
Discord also doesn't allow you to record live videos on it. However, where there's a will there's a way. FonePaw Screen Recorder is a handy recorder to capture all your activities in Discord, which means you can use it to record Record calls and streams with ease.
Can I Record Discord Calls on iPhone/Android?
You should be familiar with the default recorder on iPhone and Android devices. However, you'll find an all-black recording with nothing after you record Discord calls with it. It's because of the restriction by Discord. Therefore, you may use FonePaw Screen Recorder to record Discord calls on Windows or Mac. Or, you can use its Phone Recorder in FonePaw Screen Recorder to make it possible.

Conclusion
If you want to record Discord audio, both Craig Bot and Audacity are good helpers. However, Craig Bot will send you recordings with separate files while Audacity is exclusive to recording Discord audio-only. By comparison, FonePaw Screen Recorder will be the best choice to record Discord calls and streams without hassle. Better yet, it enables you to trim, convert, compress, merge, and split the recording if necessary. You may want to give it a shot and make Discord recording a piece of cake.
