When Google Slides has provided a versatile way for presentations, lectures, working cooperation, and more, it contains restrictions to carry out more works. For instance, as Google Slides is lacking in the recording feature, it turns out to be impossible when people need to record audio on Google Slides to create presentations or teaching materials with narrations. Therefore, this post mainly concentrates on the solutions that can help people to bypass the obstacle and realize the target at recording audio on Google Slides. If you are also one of those seeking a solution to Google Slides recording, please scroll down and continue reading.
3 Ways to Record Audio on Google Slides
To record audio on Google Slides to create nice narrations for the tutorials or lessons, you can try out the following 3 methods.
Record Audio on Google Slides with HablaCloud
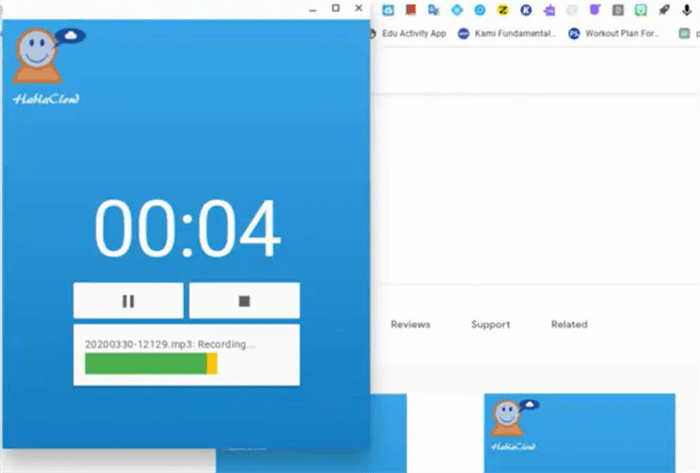
Oriented for Chromebook users, the ChromeMP3 Recorder launches by HalaCloud is definitely the simplest path to record Google Slides without offline program installed on Chromebook at all. Users can access this web app and activate its recording function for directly utilizing. Here guides you how to manipulate it:
- Access HalaCould and click on the CloudMP3 Recorder installation in web. When it is installed, you can access and launch it from Chromebook app launcher.
- Prepare the Google Slides to record. You ought to click on the Record button in CloudMP3 Recorder to initiate recording the slides. Pausing the recording is available while it is processing.
- When the Google Slides ends presenting, click on the Stop button to complete the recording in CloudMP3 Recorder.
- Subsequently, the recorder will guide you to save the MP3 recording to Google Drive for easier access on all devices with the same Google account logged in.

Although CloudMP3 Recorder does offer a convenient way for Chromebook users to capture audio on Google Slides, it can record audio only and offers MP3 as the only encoder to export the recordings. This app is not available if you are a Windows or Mac user, either.
Record Audio on Google Slides with Online Voice Recorder
Another effortless method to record audio on Google Slides is to make full use of the online tools like Online Voice Recorder. Unlike CloudMP3, this online service doesn't require a web app or third-party program to proceed the recording. Moreover, it is compatible with all devices, including Windows, Mac, iOS, Android, Chromebook, and more. Now, please take a whole to see how Online Voice Recorder functions to record Google Slides audio for you:
- Head to the Online Voice Recorder.
- Subsequently, click on the microphone button and proceed the recording. You can begin by narrating the content of Google Slides. Please notice that for the first-time users, authorizing the microphone on the recorder is required.
- When Google Slides ends, stop the audio recording by clicking on the Stop button.
- Now, you will be turned to the previewing window to check the recorded audio. If it's okay, click on Save the download the MP3 recording locally.

Record Audio on Google Slides with FonePaw Screen Recorder
To draw a simple conclusion, both CloudMP3 Recorder and Online Voice Recorder offer the easy-using online recording function to help capture audio on Google Slides within clicks. Nevertheless, they lack editing functions or are both unavailable for people to customize the output parameters. Worse yet, the online programs would heavily rely on stable Internet connectivity to process the recording.
Therefore, here would like to introduce a professional audio recorder for desktop users if you also seek a way to record Google Slides audio in a better quality and stable way.
FonePaw Screen Recorder is developed with multiple recording modes with high stability to ensure the recording outputs can be maintained at the best state. It enables people to customize the parameters, including the encoder (like MP3 and WAV, which are supported by Google Slides) and quality to determine the compatibility and sound effect of the output recordings.
To capture audio, FonePaw Screen Recorder also provides a practical feature - noise cancellation to ensure great quality to export the audio recordings. Now, please walk through its manipulation guide and see how FonePaw Screen Recorder helps to record audio on Google Slides without noise:
Free Download Buy with 20% off Free Download Buy with 20% off

Step 1. Open Audio Recorder in FonePaw Screen Recorder
First, please install FonePaw Screen Recorder and open it. On the main feed, you ought to select Audio Recorder.
Free Download Buy with 20% off Free Download Buy with 20% off

Step 2. Customize Audio Recording Settings
On Audio Recorder, you can toggle on recording both the System Sound and Microphone. It is recommended to test the volume before proceeding the recording. Subsequently, clicking on the down arrow next to the microphone icon, you will find the Microphone noise cancellation and Microphone enhancement option to improve the recording quality. Select them in your preferences.

Step 3. Configure Audio Settings
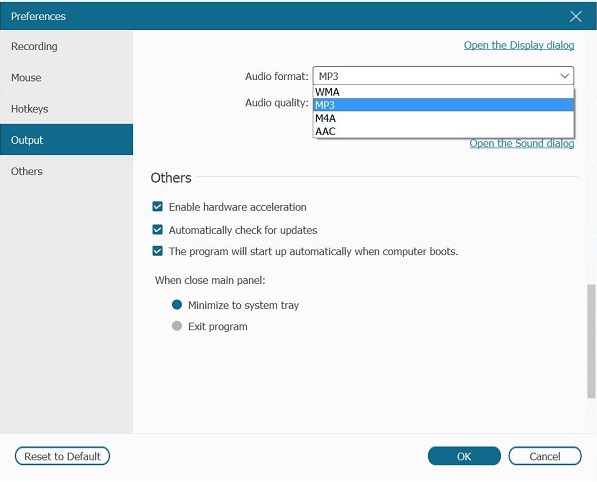
Go to Preferences. Here users are able to customize the Audio Format and Audio Quality in preferences. For Google Slides, you ought to select MP3 and WAV to make the recording compatible with the document.

Step 4. Start Recording Google Slides Audio
Subsequently, please open the Google Slides document and tap the REC button on FonePaw Screen Recorder Audio Recorder to initiate the recording. You can even preset the Task Schedule to keep eyes off the recording and let it proceed automatically.

Step 5. Save the Recording
Eventually, as the Google Slides presentation is over, tap the Stop icon and turn to the previewing window. Please check the condition or trim unwanted parts from it if necessary. Click on Save and then the audio recording will be saved locally on your computer.

Free Download Buy with 20% off Free Download Buy with 20% off
How to Add Voice Recording to Google Slides
After walking through the 3 easy ways to record audio for Google Slides, you may wish to process one more step to add the recorded audio to the document. In the following, simply follow the guidance and complete adding the audio recording to Google Slides:
- First, you ought to upload the recording audio to Google Drive.
- After uploading, access it and right-click to select Share. Please change the authorization to let all people access the link, then copy its sharing link.
- Now, please open the Google Slides and select the slide you wish to insert the recording to.
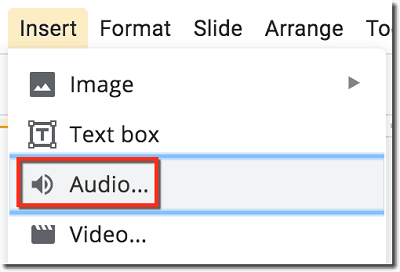
- Click on Insert >> Audio to select the uploaded recording in Google Drive. By confirming Select, the audio will be added in no time. You can freely place the playback icon in any position on the slide in preference.

Extra Tip: How to Record a Presentation on Google Slides
Replacing recording audio and adding Google Slides, if you wish to capture the window of Google Slides presentations with audio toggled on, FonePaw Screen Recorder offers the powerful Video Recorder to process it for you. The Webcam, System Sound, and Microphone can be turned on to record at once.
Instead, if you don't consider utilizing a third-party program, you can also convert Google Slides to PPT and utilize the default recording feature provided in PPT to convert PPT to video. The function is also simple to use.
Conclusion
When Google Slides becomes an important cooperation and working, studying tool in our daily life, the needs to record the slides are also soaring. Today's post introduces different ways targeting those who wish to record audio on Google Slides in simple, program-installation-free or stabler and more professional ways. Simply select an option to proceed with the recording if you are also seeking a solution!


