When the school suspends the class because of COVID-19 or other factors, or officers want to send a PPT file to the business partners, Google Slides will be so useful in continuing the class or doing an online presentation.
Google Slides is a web-based presentation program. It is available on Chrome, Firefox, IE, Safari, etc. Users can create and edit presentations online with others simultaneously. When the presentation or meeting is over, files can be saved as PPT formats like .ppt, .pptx, etc.
Although it sounds so powerful, it doesn't provide you with an audio recording option. If you want to elaborate your PPT to others, you will need a separate recorder to record the audio and then insert it into the file.
In this post, we will teach you how to add audio recording to Google slides so that you can present your PPT with voice-over.
How to Add a Voiceover on Google Slides with FonePaw Screen Recorder
To record your voice, you will need a voice record program and microphone. There are many voice recorders and here we would like to take FonePaw Screen Recorder (opens new window) as an example, which performs well in audio recording though mainly a screen recorder. Then, why choose FonePaw Screen Recorder to record the audio? Let’s view its highlights concerning the audio recorder:
- Can record microphone & system sound as MP3 within few clicks (Google Slides supports MP3 & WAV)
- Support lossless output audio files for high-quality voiceover
- Microphone noise cancellation & microphone sound enhancement are available to make clear sound for Windows users
With FonePaw Screen Recorder, you can easily record a voiceover for Google Slides with its powerful audio recorder feature. Let’s see how to record voiceover via the audio recorder in the following text.
Now, download it first and enable the recorder.
Free Download Buy with 20% off Free Download Buy with 20% off
Record a Voiceover via Audio Recorder
STEP 1. You will see there are three options on the homepage and choose Audio Recorder.

STEP 2. Connect your microphone to the computer and adjust the sound. Enable "Microphone noise cancellation" and "Microphone enhancement", which can make the original sound clear.

STEP 3. Turn off the System Sound in case you are interrupted by the system warning beep.

 Tips:
Tips:
- Before recording, please try to test with the soundcheck feature: Preference > sound > start soundcheck.
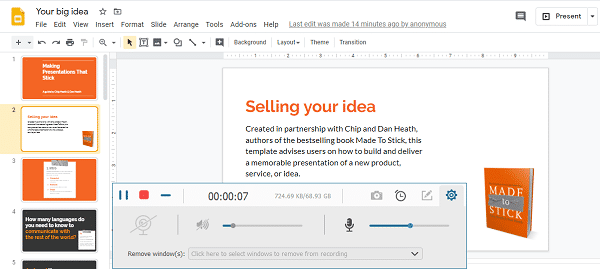
STEP 4. Open your presentation on the Google Slides webpage and present your PPT files. When you are ready, click REC and narrate your PPT to the microphone.
You can pause whenever you want by clicking the Pause button. When you finish speaking, click the red square button to listen to your audio.
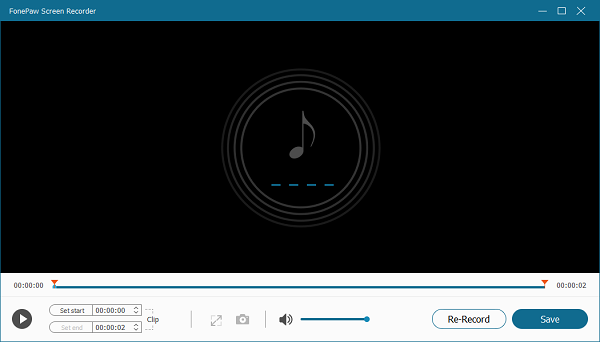
STEP 5. You can clip the audio if it is too long. Click Re-Record if you are not satisfied with the recording and the original one will not be saved. When everything is done, click Save to select the path to save your audio.
Now, you can begin to add the recorded voiceover to Google Slides.
Add Audio to Google Slides
Before adding audio to Google slides, you must upload the audio file to Google Drive. It is necessary to do that otherwise you cannot insert the audio in your PPT file. When you save the audio on your computer, it's time to add voice-over to Google Slides.
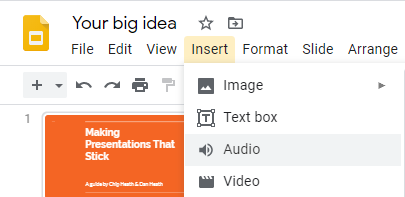
STEP 1. Click Insert at the top of the page and choose Audio.
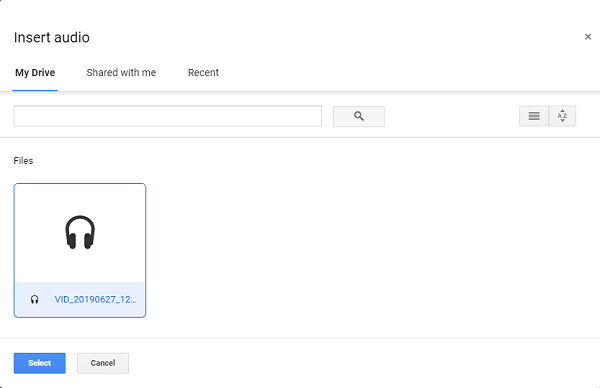
STEP 2. You will see your audio under My Drive. Choose it and click Select
STEP 3. When the audio is inserted, you will see the Format options on the right of the screen. Expand Audio Playback. You can choose to start the audio by click or automatically.
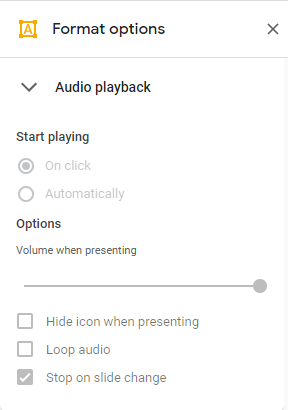
Now there will be a voice-over on your file.
Why Can't I Add Voiceover to Google Slides?
Some users tell us they fail to add audio to google slides, and you may also encounter the same problem even if you follow our guide above. To solve it, you should notice 2 things:
- Google Slides supports MP3 and WAV audio formats. Therefore, you'd better save the audio in MP3 or WAV after the recording.
- Google Slides only works with audio files stored in your Google Drive account. So remember to upload the audio files to the same Google Drive account first.
Now, you can try to add voiceover to Google Slides again.
How to Add a Voiceover on Google Slides with Online Audio Recorder
If you don’t want to download software, there are also some online audio recorders like Rev, Audacity, 123Apps, etc. that can help you record the audio. But those online audio recorders have less features or customization settings compared to FonePaw Screen Recorder. Here we’d like to take 123Apps as an example, and you can learn how to use it here.
STEP 1. Open https://online-voice-recorder.com/ and you will see a red record button on the page.

STEP 2. In the down-right corner, you can see a gear icon. Click it and choose the microphone you want to enable.
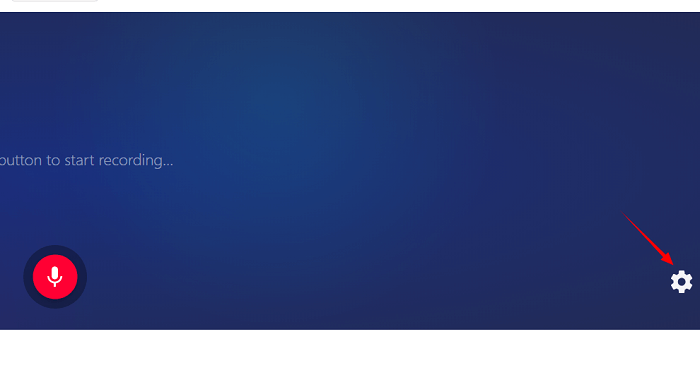
STEP 3. When things are ready, click the red microphone icon and the recording will begin. After you finish, click the red button again to stop. Now you can click Save to recorded file to your local folder.
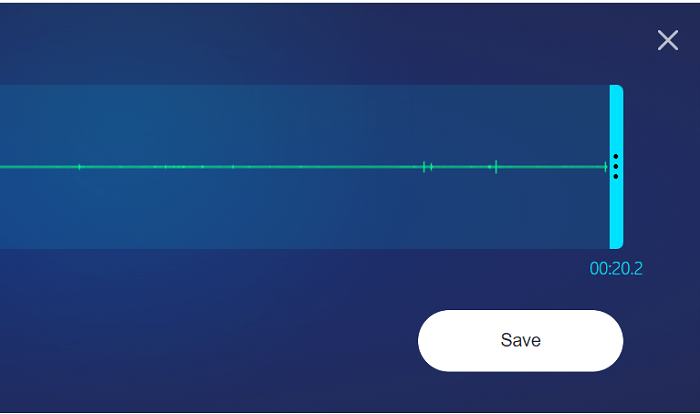
Next, just add the voiceover on Google Slides. You can go back to the former part to check the guide.
Extra Tips: How to Insert Music into Google Slides
With the instructions above, you already know how to add narration to Google slides. If you want to enrich your presentation by adding background music or quoting more professional commentary that you've watched on YouTube, here are two more tips.
1. Add voice to Google Slides using music streaming service
If you listen to music in Apple Music, Spotify (opens new window), Sound Cloud (opens new window), etc., and want to insert it into your file, you can find the links in the music streaming service first and copy it.

Open your Sliders and find an icon or text for the link. Click Insert > Link and paste the link > Apply.
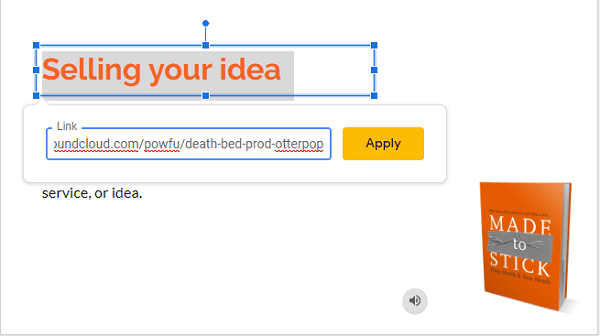
When the link is applied, click Present and hit the icon or text that contains the link of the music. A new browser that links to the music will pop out.
Now, click Play and minimize the browser. When you want to end the audio, go back to the web page, and pause the music.
2. Add audio to Google Slides using YouTube video
YouTube videos can also be used as the voice-over in Google Slides.
Just go to YouTube and open the video that you want to use.
Select Share and copy the link.
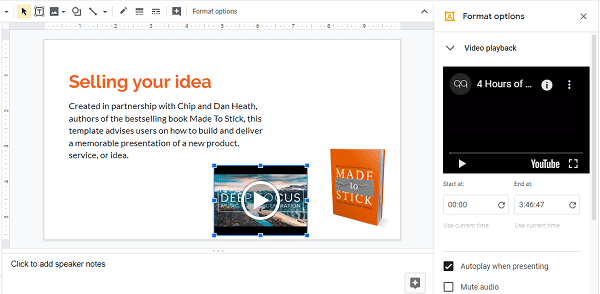
Open your presentation > Insert > Video and copy the link. A thumbnail image of the video will appear on the slide.
3. How Do You Make Audio Play Automatically in Google Slides?
Expand the Video playback to set the Start at and End at time. Check Autoplay when presenting. Click Present to begin your presentation and the sound will be played automatically.
Conclusion
In all, though we cannot do a voice-over directly on Google Slides, we can still add our voice in it with the help of recorders like FonePaw Screen Recorder (opens new window) and some online recorders. You can also add background music by inserting links.
Free Download Buy with 20% off Free Download Buy with 20% off


