Everyone will find the best thing for daily life, e.g: the best way to earn money, the best diet to keep healthy, the best cosmetics, and more. Likewise, you would search the best video recorder software if you tend to create a video tutorial. To judge whether the screencasting tool is best for yourself, you can try to check:
- Search "Best Screencasting Tool to Make Video Tutorials" or similar terms in Google to check the results.
- Compare the features and prices of the recommended recording ways and filter some of them depending on your need.
- Select the secure and easy method to begin your task. To be noted that the one suitable for others may not make you satisfied, so please choose according to your need.
With the steps above, you will see many tools, including FonePaw Screen Recorder (opens new window). Thus, we will illustrate how to make video tutorials with this best screencasting program. FonePaw Screen Recorder can capture your desktop activities, add annotations, record audios, take a screenshot of your computer, etc. That is why it is suitable for creating a clear video tutorial.
How to Make A Video Tutorial with the Best Screencasting Software?
Before capturing, please make sure that you have prepared the materials of this recording. Otherwise, we only can see the chaos in the recorded video and spend a lot of time in editing the video. When anything is ready, just begin your task.
Free Download Buy with 20% off Free Download Buy with 20% off
Step 1. Launch FonePaw Screen Recorder
Open the program on your desktop and the homepage will give you several options. As for your need to make video courses, the first one -Video Recordershould be selected.

Step 2. Customize Your Settings
Select the area or enter the size as you like in the blank; turn on or off the webcam; adjust the volume of the system sound and microphone. For more, you can set up in More settings.
Note: If you want to capture according to the last recorder's settings, you can select Last Recorder in drop-down list next to the homepage navigation button.

Step 3. Start Recording
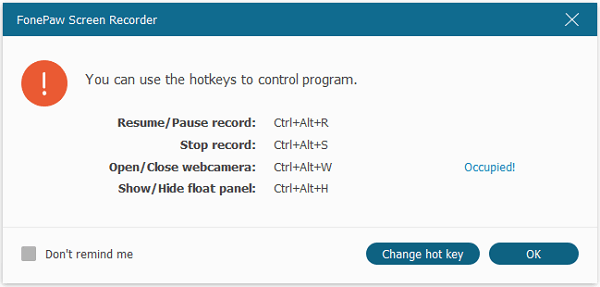
Click REC to begin your recording task but it will inform you that you can use or change the hotkeys in recording. After that, it will count down from 3 to 0 and then capture the desktop.


Step 4. Add Annotations to Your Recording
During the recording, you can hit the pencil icon to annotate: add texts, arrows, lines, step tools and more. Those features can make your video become a real tutorial which lets users know more details about your app, your product, your course...

Step 5. Preview What You Capture
As the recording is done, you can play it and snapshot for some interfaces. If you are satisfied with the video tutorial, save it. For output, you can customize the format, saving path, quality, etc.
After recording, you can share the video to others or transfer it to your other devices. Once you still want further editing, you can try FonePaw Video Converter Ultimate (opens new window).
When You Should Create A Video Tutorial?
For product managers: Video Tutorial is conducive to presenting your products to others, especially for the apps. The app developers or PM could show the ideas and usage of the software or commodities to their bosses, partners and even users.
For teachers: This is good for teachers to capture their course videos with annotations. Students can watch it to learn something new or review after class. Nowadays, more and more people would sign up online courses and actually, many of those classes will directly give the videos to students to study.
For salesmen: As we can usually see, there are many video tutorials on YouTube, Facebook, or other platforms. With those videos to explain how to use some products, people will get more familiar with the pros and cons of products. Furthermore, they may drive up sales.


