Just like remote work, the idea of studying from home is now adopted by more and more people. Even before the COVID-19 pandemic comes out, online courses are preferred by many people as it’s usually more convenient, easy to review, and can serve as a supplement to practical classes.
However, giving lectures online also exposes teachers to new challenges. When lectures are not delivered in the classroom, how to find a reliable recording tool and record lectures with it? This article is going to introduce 2 best screen recorders for lecture capturing to you with a clear step-by-step guide on how to record lectures with it.
FonePaw Screen Recorder – Best Recording Software for Lecture Capturing on PC/Mac
When we talk about the best screen recorder to capture lectures, we highly consider some points: Can this lecture recorder record videos in high-quality and long time? Is it easy to set up? Are there some bonus features that can help make the recording better for students to follow? And FonePaw Screen Recorder is the best recommendation to record lectures for PC and Mac based on these thinking.
Free Download Buy with 20% off Free Download Buy with 20% off
The basic features of FonePaw Screen Recorder enable you to easily record the desktop with the computer system sound, the microphone, and the webcam, so teachers and record slides and the face at the same time with both the computer audio and the voiceover.
In addition, FonePaw can record videos at up to 1920*1080p with no watermark, and there are up to 6 output formats to choose, for instance, MP4, WMV, MOV, F4V, TS, and AVI – which guarantees the high quality of the recorded video.
Not only that, FonePaw is also well enough to offer some useful extra features. For, example, you can use hotkeys to start or end a recording and emphasize important points with real-time annotations and mouse curser. To make your sound clearer, you can also enable microphone enhancement and noise cancellation to reduce distractions.
Look at the tutorials to see how to use FonePaw Screen Recorder to record lectures.
Free Download Buy with 20% off Free Download Buy with 20% off
How to Record Lectures with FonePaw Screen Recorder
Step 1. Download and Install FonePaw Screen Recorder.
Step 2. Choose Video Recorder on the main interface. This feature focuses on making standard recordings with the desktop, webcam, and full voice.

Step 3. Set up the recording settings of all sections.
- Customize the recording area as you need. You can record the full screen, a selected area, or a certain window. If you want this program to record only a locked window or extract some windows, you can also set it up in Advanced Recorder.
- Turn on the webcam if you want to show your face during the class. Open the drop-down menu > Settings, and you will be able to adjust the position, resolution, shape, and more about the webcam.
- Turn on the system sound if you want to record the internal audio of the computer. Same as the microphone for you voice. It’s recommended to do a soundcheck before the lecture and adjust your sound to a suitable volume. Of course, you can also adjust the sound during the recording.
When you get everything prepared, hit the orange “REC” button to start recording.

 Note:
Note:
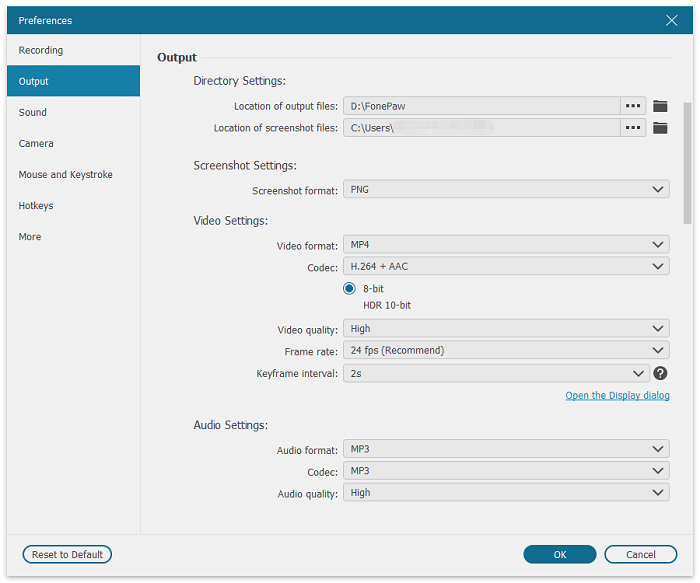
- If you want to change more settings such as output, effects, and shortcuts, go to Settings > Preferences. It’s better to set up before recording.
Step 4. Record the lecture. During the lecture, you can open the floating drawing panel to add annotations and marks or set up the recording length as you need. When you want to manually end the recording and finish the lecture, choose the square button in red.

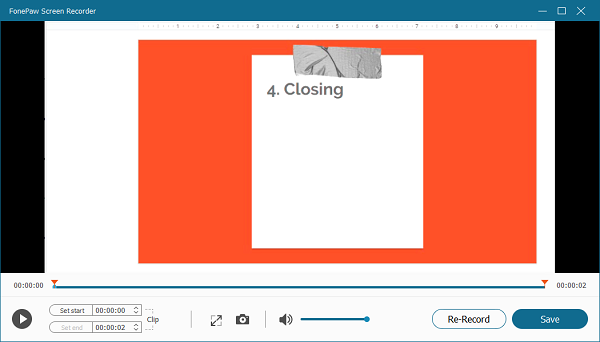
Step 5. Preview and edit the video. You can clip the video and cut the unwanted part before you save the lecture for student.
Free Download Buy with 20% off Free Download Buy with 20% off
FonePaw Screen Recorder can be the best option for lecture capturing on PC/Mac. As its interface is very intuitive and simple, it does not require complex setups – this is user-friendly.
As for another recommendation, it’s more helpful when you want to store and share the recorded lectures via Cloud.
Panopto Screen Recorder – Support Cross-Platform Lecture Capture and Cloud Sharing
Panopto is also a popular way to record lectures for students. It’s a video recording service that allows teachers to record lectures and embed them directly into learning platforms like Moodle and other open-resource learning management systems.
It can record lectures, presentations, or guest speakers from a classroom or computer using webcam and microphone.
Besides, you can also set up Panopto to allow students to record their presentations using Panopto. To download Panopto, go to www.panopto.com and sign in the Panopto video library.
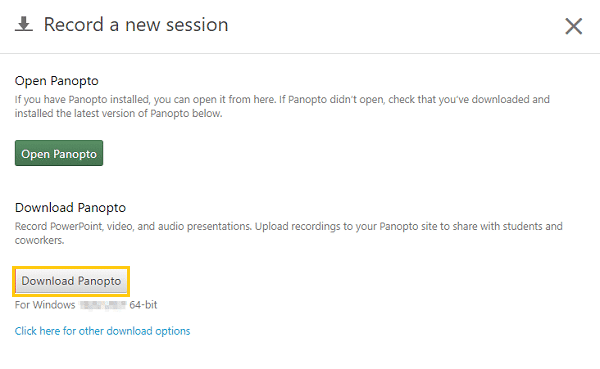
Step 1. Click the Create button and choose Record a new session. Select the Download Panopto link in the top right of the video library to download.
Step 2. In the Secondary Sources, you can choose to capture PowerPoint, Main Screen, video from a webcam, or additional cameras.
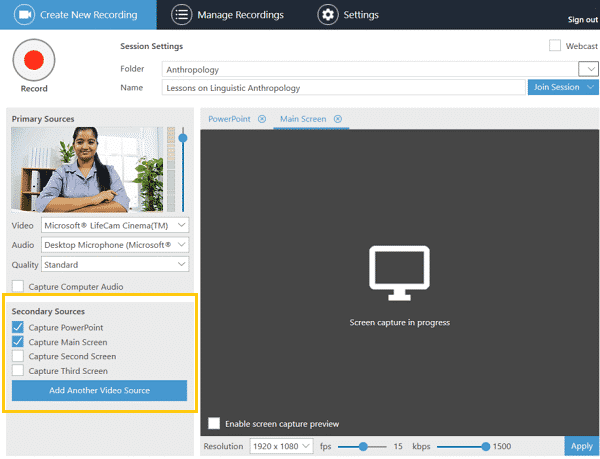
Step 3. When you are ready, click the Record button to start. You can pause the recording at any time. When done, click Stop Recording.

Step 4. Click Upload and the video will be uploaded to your video library.
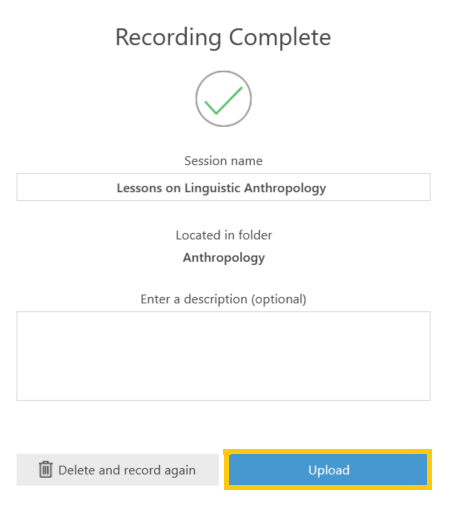
It will take some time to process the recordings. When the processing is complete, the recording will appear as a link in the Panopto block in Moodle.
You can embed the video in Moodle by going to a place in Moodle that you can edit text and click on the Panopto icon on the editor toolbar. Select the video and insert into the page.

Above are the 2 best ways that you can try to record lectures and share to you students. FonePaw is good to use when you want to make local recordings in high quality, and Panopto is suitable when you want to upload the video to learning platforms or share with other in Cloud.
Hope this article can help you find the screen recorder you need and make an engaging lecture.
