When you get a brand new MacBook Pro, what do you need to do to set it up? The following procedure explains how to set up a new MacBook Pro.
Related Reading:
How to Securely Clean Up the Trash on Your Mac (opens new window)
Top 5 Must-Know Data Recovery Software for Mac/PC
1. Charge Your MacBook Pro
Although a new MacBook always comes with enough power in the battery to turn on. You have to connect it to a power source as you have no ideas about when the battery drains. You don't want that the MacBook suddenly shut off during the setup. So you'd better plug the USB-C charger in before you move on to next step.
2. Start the MacBook Pro
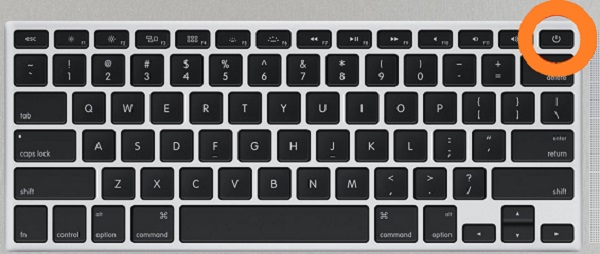
The Power button is on the top right of the keyboard above the Delete Key. Press it to start your Mac.
3. Choose Your Country
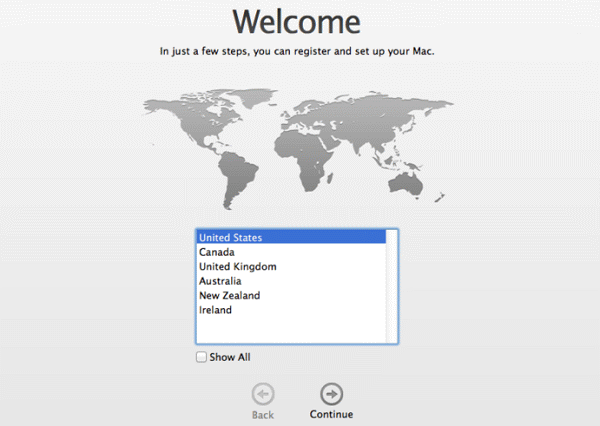
The MacBook Pro would ask you what country you are in to determine the system language as well as the formats of dates, time, etc. If you don't want to mess up language or time on the Macbook, choose the country accordingly.
4. Select A Keyboard
The system would suggest US keyboard as standard, however, you could choose a foreign keyboard if you need. Click Show All to find the desired keyboard.
5. Join Wi-Fi Network
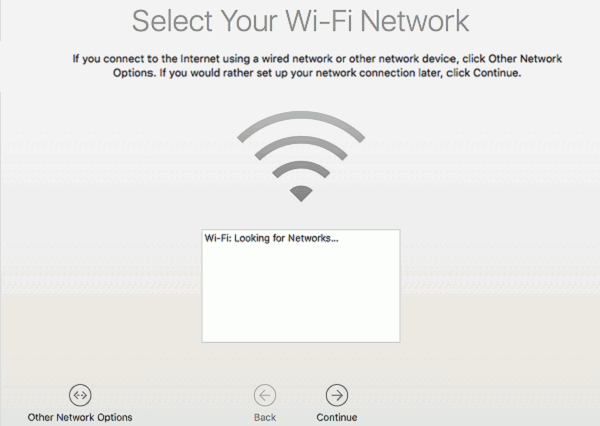
You will then need to join a Wi-Fi network. Choose your Wi-Fi from the list of available network.
- If you would like to connect the MacBook Pro to an Ethernet network, you should choose "Use Another Network".
- If you don't want to connect a network at this time, you could just click Continue to skip this step.
6. Transfer Old Mac to New Mac
If you have an old MacBook or iMac, you can transfer everything (apps, files, accounts, etc.) from old Mac to the new MacBook Pro. There are several ways to do this.
Use Thunderbolt cable to connect the new MacBook Pro to the old Mac. Then launch Migration Assistant on both Mac to transfer files, apps and other information to the new Mac.
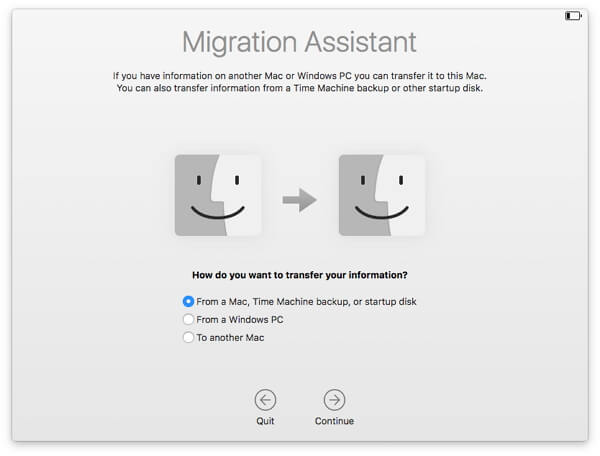
Also, if you used to backup data of your old Mac via Time Machine, you can connect the Time Machine drive to your new MacBook Pro and restore the backup.
7. Set up iCloud
Log in your iCloud account with the correct Apple ID and password. In this way, you could sync data between your Mac and iOS device and make full use of Apple services like iCloud Photo Library, Find My Mac.
Also, it is significant to enable Location Services and "Find my Mac", which will be very useful if the MacBook Pro is lost or stolen.
8. Create A Username and Password
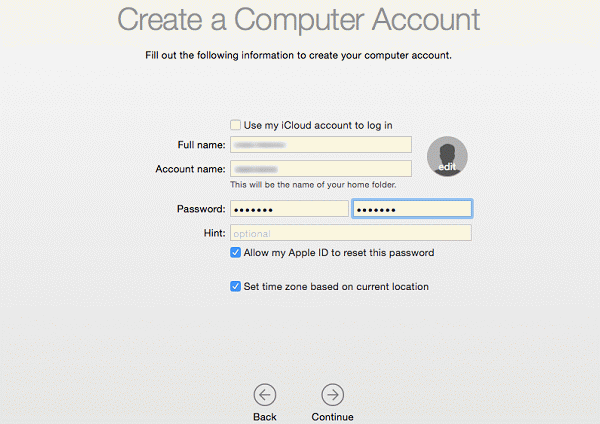
Next, you have to create a computer account. You are required to create a username and you could let macOS make up one for you based on the full name you type. The password is also required. Tick Require password when logging in and type the password hint as well.
If you want to disable your password later, you could go to Security or the Users & Groups control panel to set it.
9. Disable/Enable Diagnostics & Usage
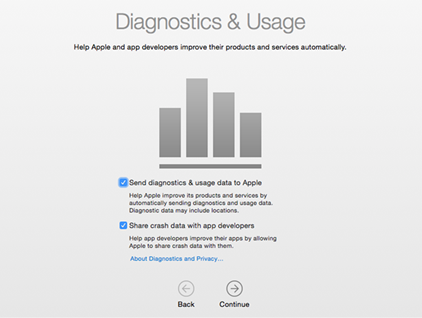
MacBook Pro would request permission for Sending diagnostics and usage data to Apple as well as Share crash data with non-Apple developers. You could uncheck the boxes if you have a concern about privacy. However, allowing bug reports will help developers fix and update problems with applications and macOS.
10. Enable Siri
Siri, as the automated assistants, would help you solve many problems via voice or text input. It can help you send messages, locate files, play music, get weather or other information from Internet and more. Enable Siri if you want to enjoy the convenience.
11. Set up Touch ID
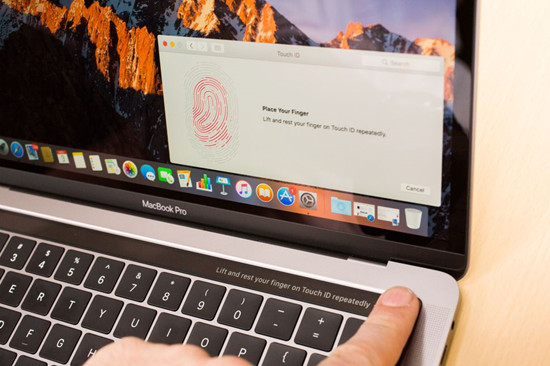
Touch ID is a fingerprint recognition feature which allows you to log in your account without typing the password. The Touch ID locates on the right side of the Touch Bar at the top of the keyboard. It could actually save your times and enable you to unlock MacBook Pro quickly.
Similar to Touch ID on iPhone, you'll have to tap and lift your finger several times to register your fingerprint.
NOTE: If you would like to add more fingerprints, you could go to Apple Menu > System Preference > Touch ID to add your fingerprint. In the selection of usage of Touch ID, checks the Touch ID features that you want to use on your Mac.
That's all for setting up a MacBook Pro. You can now get into the Mac. There are some settings that you would like to customize:
- Adjust Trackpad scrolling gesture: Go to System Preferences > Trackpad > Scroll & Zoom tab to select the scrolling and zooming gestures that are comfortable to you.
- Change the Dock: Navigate to System Preferences > Dock and you can choose to display the Dock on the left, right or bottom. Or you can completely hide the Dock. Also, you can drag the items to desktop to remove the items from the desktop.
- Customize the Touch Bar: New MacBook Pro model comes with the Touch Bar at the top of keyboard, which can give you shortcuts and options to better control apps. You can decide which options to show on the default view of the Touch Bar. Head to System Preferences > Keyboard > Customize Control Strip.
- Allow downloading apps from outside the App Store. Go to System Preferences > Security & Privacy> Allow apps downloaded from App Store and identified developers.


