In many cases, you want to transfer music from your iPhone to your PC. For example, you’ve just curated the perfect playlist on your iPhone, now you need it on your PC for editing or backup. In this blog, we’ll explore 3 effective methods to accomplish it, along with common FAQs to guide you through the transfer. Keep reading to discover the most suitable way to ensure your tunes are safely backed up on your PC.
Way 1. Transfer Music from iPhone to PC with FonePaw DoTrans
The first method goes to a powerful third-party tool: FonePaw DoTrans. It is the most effort-saving tool to help you transfer iPhone files to a PC, not limited to music, but also videos, messages, and contacts are included.
Besides the support of various file types, FonePaw DoTrans also excels in compatibility. It runs smoothly on a Windows computer (Windows 7 to Windows 11) and is also fully compatible with the latest iOS and Android versions. Thus, not surprisingly, you will find this tool also ranked top as an iPhone-to-iPhone transfer app. You can explore more expressive features from below:
- Cross-Device File Transfer: Easily copy files between devices with the same or different OS, including iOS to iOS, Android to Android, iOS to Android, and Android to iOS.
- Flexible Transfer: Supports both wired and wireless transfers. If you don't have a USB cable, use a shared Wi-Fi connection to move data between Android and PC.
- High Speed with Security: Transfer data in seconds while maintaining the original quality of media files without compression.
- Built-in Toolbox: Features tools for contact restoration, ringtone production, and HEIC conversion, all integrated into FonePaw DoTrans, eliminating the need for additional apps.
You can finish the music transfer from your iPhone to the PC in minutes with the following step-by-step instructions.
Step 1. Connect your iPhone to the PC with a USB cable.
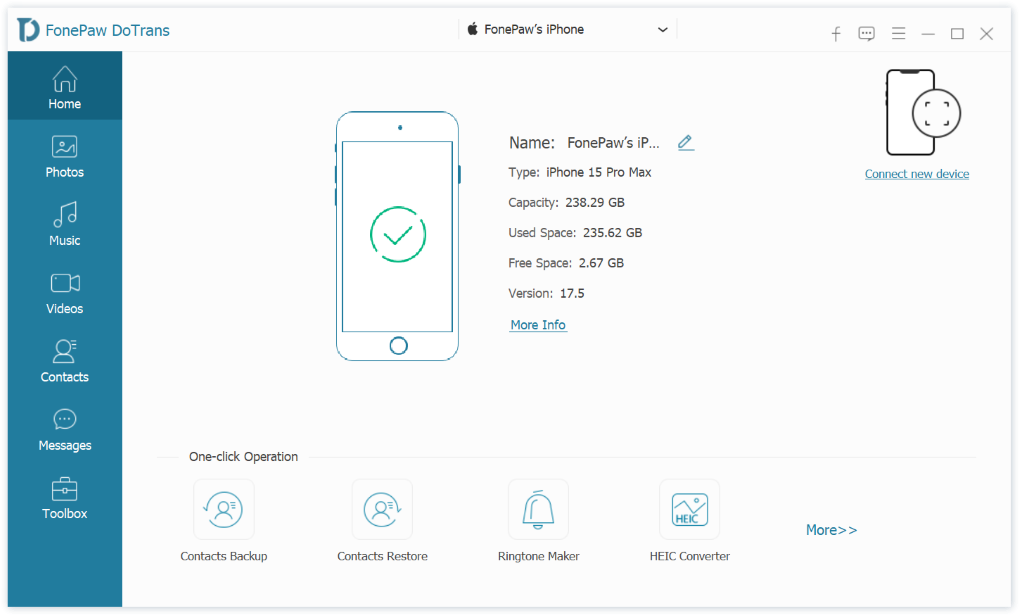
Step 2. From the left column, select "Music" to allow FonePaw DoTrans to scan audio files on your iPhone, and wait for it to finish scanning.
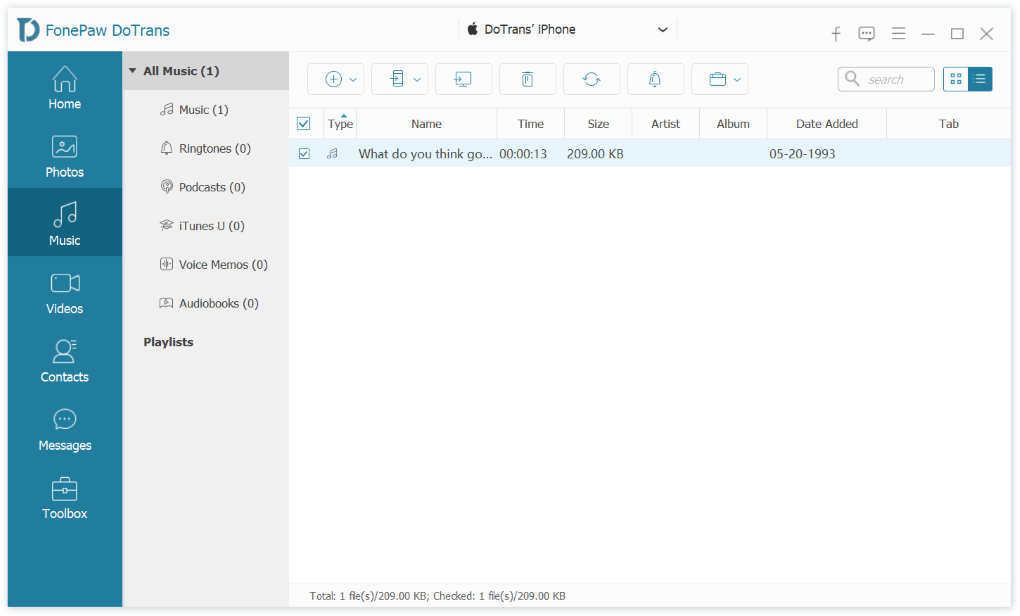
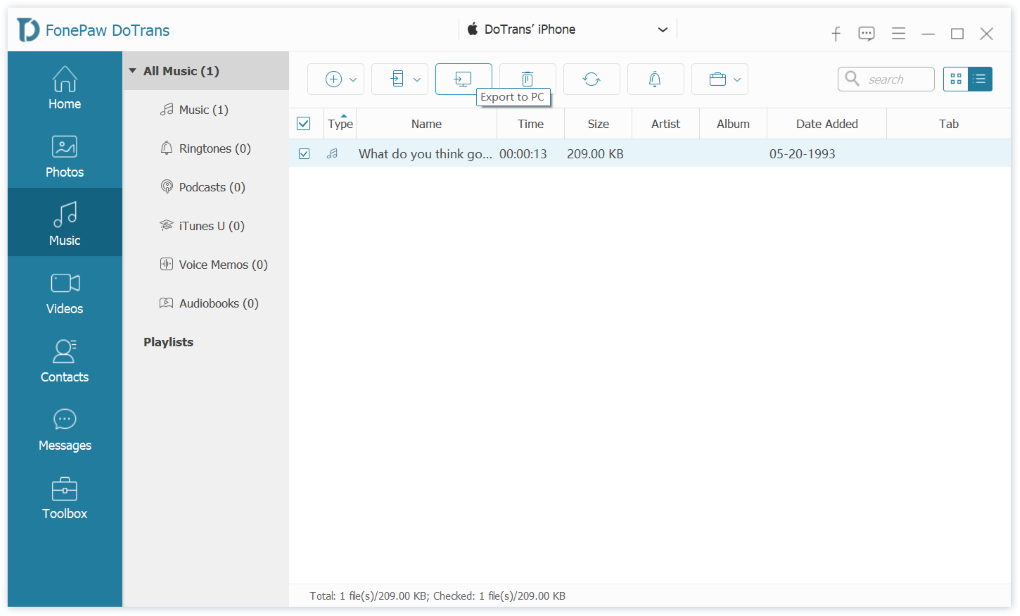
Step 3. Select the music you want to transfer, choose an output folder, select “Export to PC” (the computer icon at the top screen), and then FonePaw will start to import the selected music from your iPhone to the PC.
Way 2. Import Music from iPhone to PC via Apple Devices (iTunes)
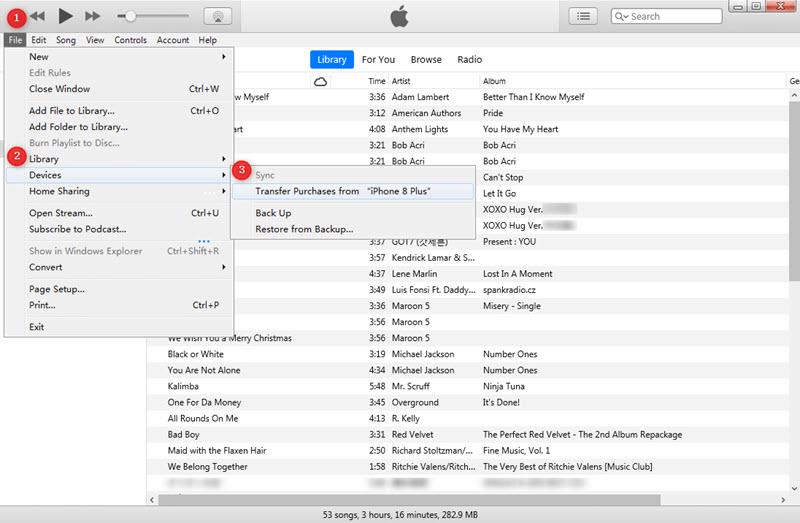
As we all know, we can transfer music from iPhone to iTunes directly. Naturally, the question arises: Can iTunes be the tool to help us import music from iPhone to PC? Definitely yes. You can rely upon this tool, which is seamlessly integrated with Apple devices, to transfer music downloaded from iTunes or Apple Music. Below are detailed steps for your reference.
Step 1. Install iTunes on your computer and connect your iPhone to your computer with a USB cable. Then launch iTunes, click the device icon from its upper-left corner, and select the device under your name.

Step 2. Navigate to "Settings" on the left column, choose "Music", select the checkbox next to each item that you want to sync, and finally click the "Apply" button in the lower-right corner of the window.
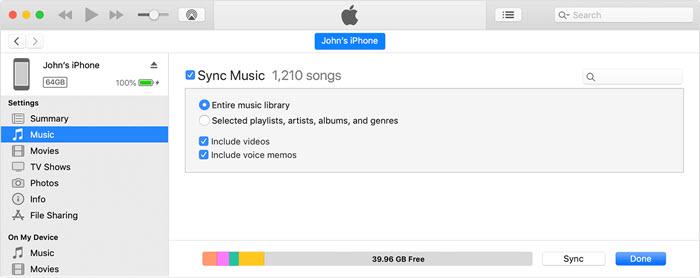
Step 3. After the sync finishes, click "Recently Added" on the left side of the iTunes window, choose the purchased music you want to save to this computer, and click the "Download" button.
Way 3. Sync Music from iPhone to PC Through iCloud
iCloud makes it easy to transfer music from your iPhone to your computer without the hassle of cables and manual transfers. Once you've uploaded it to iCloud, you can access and download the music onto your PC whenever a stable network connection is available. The only drawback is that iCloud does not support the uploading of DRM-encrypted audio files. If you have music from streaming platforms like Spotify, Amazon, or Apple Music, you'll need to convert these files to non-DRM MP3/FLAC before transferring them to your PC. You can follow the steps below for the transfer.
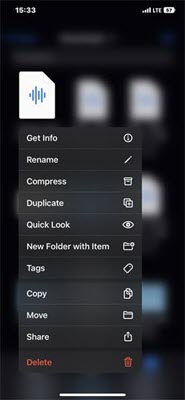
Step 1. On your iPhone, open the Files app, long-press the music file you want to transfer, tab “Move”, and choose “iCloud Drive” as the destination.
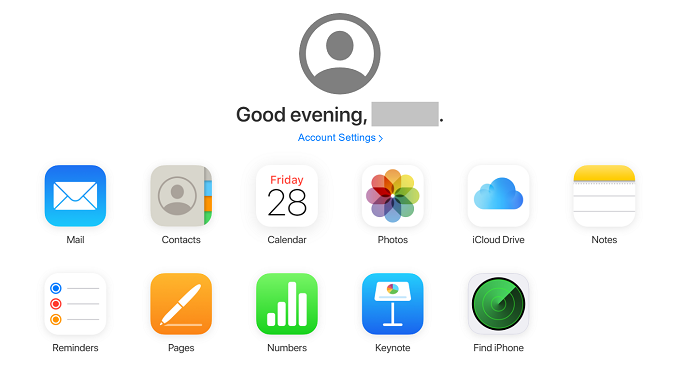
Step 2. On your computer, visit iCloud from a browser, sign in with the Apple ID you’re using on the iPhone, access “iCloud Drive”, navigate to the audio file you’ve recently added, and tap “Download” to save it to the PC.
FAQs about Transferring Music from iPhone to PC
How do I transfer music from iPhone to computer without iTunes?
There are many tools to help you fulfill the task besides iTunes. The most straightforward method is to transfer the music as files from your iPhone to your computer. You can refer to the step-by-step guide we compiled in "Way 3. Sync Music from iPhone to PC Through iCloud". Furthermore, you can finish the transfer via a shared network or Bluetooth or with the help of a USB drive.
How do I transfer non-iTunes music from iPhone to computer?
Unfortunately, there's no built-in way to transfer non-iTunes music directly from your iPhone to a computer. To gain full control over non-iTunes music on your iPhone, you can use powerful third-party apps like FonePaw DoTrans. It allows you to effortlessly transfer music and other files such as videos, contacts, and more among Windows, iOS, and Android devices.
Final Words
In this blog, we've discussed three effective methods to transfer music from an iPhone to a PC. iTunes, developed by Apple, excels in integration but has a cumbersome interface. iCloud Drive is a great wireless choice for non-DRM-encrypted files. FonePaw DoTrans stands out as a comprehensive and versatile solution, supporting various file types and ensuring smooth transfers across different operating systems. You can trust it for speedy and reliable file transfer. Download it now for a seamless music transfer experience!
